
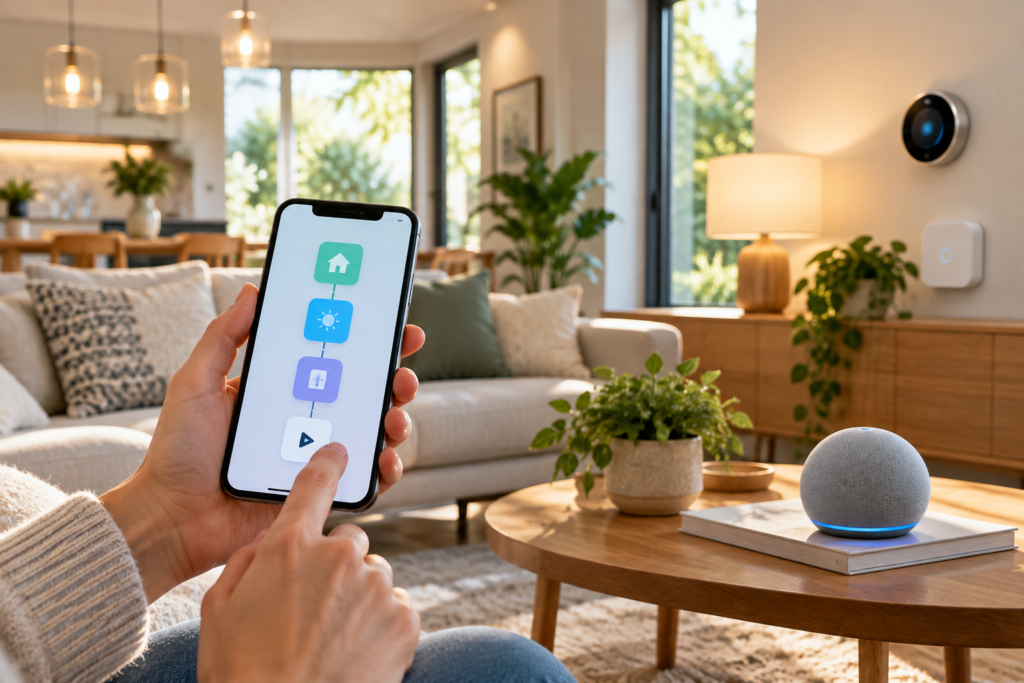
How to Automate Smart Home Devices for Beginners
Smart home automation transforms how you interact with your living space by allowing devices to work together without constant manual control. Learning how to automate smart home devices for beginners starts with understanding that automation means creating rules where one action triggers another, or events happen on schedules you define. Rather than manually adjusting lights, thermostats, or locks throughout the day, automation handles these tasks based on conditions you set once.
The process involves selecting compatible devices, choosing a central control platform, and creating routines that match your daily patterns. Beginners often worry about complexity, but modern automation platforms have simplified setup significantly. Most automations require no coding knowledge and can be configured through straightforward mobile app interfaces that guide you through each step.
Key Takeaways
- Smart home automation uses hubs or platforms to connect and control multiple devices automatically
- Selecting the right hub depends on device compatibility and your preferred voice assistant
- Start with lighting and thermostats before expanding to more complex devices
- Your first automation routines should address repetitive daily tasks
- Time-based and trigger-based automations serve different purposes in your smart home
Understanding Smart Home Automation Basics
Smart home automation relies on communication between devices through a central hub or platform. This hub acts as the translator, allowing products from different manufacturers to work together. When you create an automation, you establish a relationship between a trigger and an action. The trigger might be a specific time, a device state change, or a sensor detection, while the action represents what you want to happen in response.
Most smart devices communicate using wireless protocols like Wi-Fi, Zigbee, or Z-Wave. Wi-Fi devices connect directly to your home network and typically work without additional hardware. Zigbee and Z-Wave devices require a compatible hub but often provide more reliable connections with lower power consumption. Understanding which protocol your devices use helps you plan an automation system that functions smoothly.
Automation differs from remote control in an important way. Remote control lets you operate devices from your phone or voice assistant, but you still initiate each action. Automation removes you from the process entirely once configured. Your lights turn on at sunset without you remembering to trigger them, and your thermostat adjusts when you leave home without manual intervention.
The automation logic follows an “if-then” structure. If a condition occurs, then an action executes. Some platforms support more complex logic with multiple conditions or actions, allowing you to create sophisticated routines. For example, if motion is detected and the time is after sunset and the lights are off, then turn on the hallway lights to 30% brightness.
Choosing the Right Smart Hub or Platform
Your choice of smart hub or platform determines which devices you can automate and how you control them. The three dominant platforms are Amazon Alexa, Google Home, and Apple HomeKit. Each offers voice control, mobile app management, and automation capabilities, but they differ in device compatibility and automation features.
Amazon Alexa supports the widest range of third-party devices and provides robust routine capabilities through the Alexa app. Alexa routines can trigger based on time, voice commands, device states, or when you arrive or leave home. The platform excels at connecting disparate brands and offers extensive integration options for beginners.
Google Home emphasizes simplicity and integrates tightly with Google services. Google routines work similarly to Alexa but with slightly fewer trigger options. The platform handles voice recognition well across multiple users and provides strong contextual awareness when you ask questions about your home’s status.
Apple HomeKit prioritizes privacy and security with end-to-end encryption for device communication. HomeKit automations are called scenes and automations, offering time-based and sensor-based triggers. The platform has fewer compatible devices than Alexa or Google Home, but manufacturers increasingly add HomeKit support. HomeKit requires an Apple device as your hub, typically an iPad, HomePod, or Apple TV that remains at home.
Some users prefer dedicated smart home hubs like Samsung SmartThings or Hubitat. These platforms provide more advanced automation capabilities and support multiple communication protocols simultaneously. They require more technical knowledge but offer greater flexibility for complex automation scenarios. For connecting smart home devices without a hub, Wi-Fi-based devices can often work with manufacturer apps, though this limits cross-brand automation.
Starting with Essential Smart Devices
Begin your automation journey with devices that address frequent daily tasks. Smart lighting provides the most immediate impact and serves as an excellent entry point. Smart bulbs or smart switches let you automate lights based on time, occupancy, or other conditions. Bulbs offer individual control and color options, while switches control existing fixtures without replacing bulbs.
Smart plugs extend automation to non-smart devices by controlling their power supply. These inexpensive devices let you automate lamps, fans, coffee makers, or any device that operates when powered on. Smart plugs typically include energy monitoring, helping you understand device power consumption patterns.
Smart thermostats deliver both convenience and energy savings. They learn your schedule, adjust temperatures based on occupancy, and can be controlled remotely. Automation allows your thermostat to lower heating or cooling when everyone leaves and restore comfort before you return home. Most models provide detailed energy reports showing how automation affects your utility costs.
Smart door locks add security automation options. They can lock automatically at night or when you leave home, and unlock when you arrive. Many integrate with video doorbells and security cameras to create comprehensive entry monitoring systems. Lock automation should always include manual override options for safety.
Motion sensors and door/window sensors enable more sophisticated automation by detecting activity and entry points. These small, battery-powered devices trigger automations based on real-world events. A motion sensor in your hallway can turn on lights when movement is detected, while door sensors can trigger alerts or automation routines when opened.
Setting Up Your First Automation Routines
Your first automation routine should address a specific repetitive task you handle daily. A good starting point is an evening lighting routine that turns on specific lights at sunset. This simple automation demonstrates the basic principle while providing immediate practical value. Most platforms let you create this routine in under two minutes.
To create a basic routine in Amazon Alexa, open the Alexa app and tap “More,” then “Routines.” Select the plus icon to create a new routine. Give it a descriptive name like “Evening Lights.” Under “When this happens,” choose “Schedule” and set the time to sunset. Under “Add action,” select “Smart Home,” then “Control device,” and choose your lights. Set them to turn on and adjust brightness as desired. Tap “Save” to activate the routine.
Google Home follows a similar process. Open the Google Home app, tap “Automations,” then the plus icon. Name your automation and select “Add starter.” Choose “At sunrise or sunset” and configure for sunset. Under “Add action,” select “Adjust scenes, lights, and more,” choose your lights, and configure the desired state. Save the automation to enable it.
A morning routine can automate multiple actions with a single trigger. Set a weekday morning routine to gradually increase bedroom light brightness 15 minutes before your alarm, adjust the thermostat to your preferred waking temperature, and start playing your preferred news briefing. This layered automation replaces multiple manual tasks with one automated sequence.
Good night routines consolidate bedtime tasks. One routine can lock doors, turn off all lights except a night light, lower the thermostat, and ensure security cameras are armed. By addressing multiple devices simultaneously, you create consistency and never forget a step. For more structured approaches to automation, you can explore how to set up smart home routines with detailed planning.
Test each new routine multiple times before relying on it. Manually trigger the routine through your app to verify all actions execute correctly. Check that lights reach the intended brightness, thermostats adjust to the right temperature, and locks engage properly. Most platforms let you edit routines after creation, allowing you to refine timing and actions based on real-world results.
Creating Time-Based and Trigger-Based Automations
Time-based automations execute at specific times or intervals you define. These work well for predictable daily patterns like morning wake-up routines, evening lighting, or nighttime security measures. You can set exact times or use dynamic times like sunrise and sunset that adjust with seasonal changes. Time-based automations provide reliability but lack flexibility for varying schedules.
Trigger-based automations respond to specific events or conditions. A door sensor triggering when opened, a motion sensor detecting movement, or a smart button being pressed all serve as triggers. These automations adapt to your actual behavior rather than following rigid schedules. When you arrive home and open the front door, lights can turn on automatically regardless of the time.
Combining both approaches creates more sophisticated automation. A trigger-based automation can include time conditions, executing only during certain hours. For example, motion in your hallway triggers lights only between sunset and sunrise, preventing unnecessary activation during daylight hours. This conditional logic makes automations context-aware and more efficient.
Geofencing automations use your smartphone’s location as a trigger. When you leave a defined area around your home, the automation can adjust the thermostat, turn off lights, and lock doors. When you return and cross the geofence boundary, your home prepares for your arrival. Geofencing requires location permissions for your smart home app and works best when multiple household members each have the app installed.
Device state triggers respond to changes in other smart devices. When your smart thermostat detects you’re home, it can turn on lights. When your security system arms to “away” mode, all lights turn off automatically. These inter-device automations create cohesive smart home behavior where devices work together intelligently.
Avoid over-automation initially. Start with automations that genuinely improve convenience and gradually expand. Too many automations can create unpredictable behavior and make troubleshooting difficult. Each automation should have a clear purpose and address a real need rather than existing just because the capability exists.
Connecting Devices Across Different Brands
Most smart home devices advertise compatibility with major platforms, but actual integration quality varies. Before purchasing devices, verify they work with your chosen hub or platform. Look for official compatibility badges like “Works with Alexa,” “Works with Google Home,” or “Works with Apple HomeKit” on packaging and product listings.
Native integration provides the best automation experience. Devices with native support appear directly in your platform’s app without requiring separate manufacturer apps. You can include them in routines and automations without additional configuration. Native devices typically receive voice command support and benefit from platform-specific features.
Some devices require manufacturer apps for setup but integrate with your platform afterward. You’ll initially configure the device in its native app, then link that account to Alexa, Google Home, or HomeKit. Once linked, the device becomes available for automation in your platform, though some advanced features may only work through the manufacturer app.
IFTTT (If This Then That) bridges compatibility gaps between devices and platforms. This third-party service creates connections called applets that trigger actions across different smart home ecosystems. IFTTT supports thousands of devices and services, enabling automation between products that don’t natively communicate. The free tier supports basic automation needs, while advanced features require a subscription.
Hub devices like SmartThings support multiple communication protocols, letting Zigbee, Z-Wave, and Wi-Fi devices work together. This becomes valuable when you own devices using different protocols. The hub translates between protocols and exposes all devices to your automation platform. For homes with diverse device ecosystems, a multi-protocol hub simplifies integration.
Pay attention to cloud dependence when connecting devices. Some devices rely entirely on manufacturer cloud servers for automation, creating potential failure points if the service experiences downtime or discontinuation. Devices with local execution capabilities continue functioning even if internet connectivity drops, though remote access and voice control may be affected.
Testing and Troubleshooting Your Automations
Systematic testing prevents automation failures from disrupting your daily routine. After creating an automation, manually trigger it through your platform’s app to verify correct execution. Watch each action occur and confirm devices respond as expected. For time-based automations, temporarily change the trigger time to a few minutes ahead so you can observe the automation without waiting.
Common automation failures often stem from connectivity issues. Ensure all devices maintain stable connections to your network. Devices located far from your router or in areas with interference may drop offline intermittently, causing automations to fail. If automations work inconsistently, check device connection status in your platform app. Relocating devices closer to your router or adding a mesh network node can resolve connectivity problems. For comprehensive network improvements, consider learning how to set up a mesh Wi-Fi network.
Timing conflicts occur when multiple automations affect the same device simultaneously. If one routine turns lights off while another tries to turn them on, the result depends on execution order. Review your automations to identify potential conflicts and adjust trigger times or add conditions that prevent simultaneous execution. Most platforms execute automations in the order they were created, but this isn’t guaranteed.
Voice command conflicts arise when device names are similar or when multiple devices respond to the same command. Rename devices with unique, descriptive names that avoid confusion. Instead of “bedroom light,” use “master bedroom ceiling light” to distinguish it from bedside lamps. Clear naming also makes voice control more reliable and helps you identify devices quickly when creating automations.
Automation delays can indicate hub processing limitations or network congestion. If actions execute several seconds after triggers, your hub may be handling too many devices. Reducing the number of simultaneous automations or upgrading to a more capable hub can improve responsiveness. For wireless devices, ensure your network isn’t experiencing heavy traffic when automations execute.
Keep automation logs for troubleshooting. Most platforms maintain execution history showing when automations ran and which actions completed. When an automation fails, check these logs to identify which step failed. This information directs you to the specific device or action causing problems, making diagnosis faster than testing the entire automation sequence.
Addressing common smart home setup mistakes early prevents frustration as your system grows. Document your automations in a simple spreadsheet or note file, listing triggers, actions, and purposes. This reference becomes valuable when troubleshooting complex systems with many automations, and it helps you avoid creating duplicate or conflicting rules.
Expanding Your Automation Setup Over Time
Start small and expand gradually as you identify additional automation opportunities. After your initial routines function reliably, observe your daily patterns for repetitive tasks that automation could handle. Perhaps you frequently adjust blinds at certain times, or you always turn on specific lights when watching television. These observations reveal valuable automation candidates.
Seasonal automations adapt your home to changing conditions throughout the year. Create separate heating and cooling routines that activate based on calendar dates or outside temperature readings. Adjust evening lighting routines as sunset times change, or create holiday lighting schedules that run only during specific months. Seasonal automations keep your home responsive to actual conditions rather than following static rules.
Integrate entertainment systems once basic automations work consistently. Smart home platforms can control compatible TVs, streaming devices, and audio systems. Create a “movie night” routine that dims lights, closes smart blinds, turns on your TV and sound system, and sets the thermostat for comfortable viewing temperatures. Single-command entertainment automations simplify what previously required multiple remotes and manual adjustments.
Security automations add peace of mind through automated monitoring. Create presence simulation routines that vary lighting patterns when you’re away, making your home appear occupied. Set up notification automations that alert you when doors open while you’re gone, or when motion is detected in unusual locations. Security automations should complement physical security measures rather than replacing them.
Energy monitoring automations help reduce utility costs. Many smart plugs and switches track power consumption and can turn off devices that draw standby power. Create automations that disable entertainment systems and phantom loads during specific hours, or that respond to high energy usage by adjusting thermostats or turning off non-essential devices. Understanding smart home security tips ensures your expanding automation system remains protected as it grows more complex.
Consider advanced platforms like Home Assistant for extensive automation needs. Home Assistant provides deeper customization, supports nearly every smart home device, and runs locally without cloud dependence. It requires technical knowledge and dedicated hardware but offers automation capabilities beyond consumer platforms. Many users begin with Alexa or Google Home and transition to Home Assistant as their needs become more sophisticated.
Regular maintenance keeps automations functioning correctly. Review your automation list quarterly to remove outdated routines, update seasonal triggers, and refine actions based on changing needs. Firmware updates for hubs and devices can introduce new features or occasionally break existing automations, making periodic testing important. Stay informed about your platform’s updates and adjust automations when necessary.
Frequently Asked Questions
Do I need a hub to automate smart home devices?
Not always. Many Wi-Fi devices work directly with phone apps and voice assistants without requiring a hub. However, a hub becomes necessary for Zigbee or Z-Wave devices, and it simplifies automation when you own devices from multiple manufacturers. Hubs also enable more reliable local automation that functions even if your internet connection drops.
Can I create automations that work when my internet is down?
Some platforms support local execution where automations run on the hub itself rather than relying on cloud servers. Devices and automations must specifically support local execution for this to work. Check your platform’s documentation to determine which devices and automation types execute locally versus requiring internet connectivity.
How many automations should I create as a beginner?
Start with three to five automations addressing your most repetitive daily tasks. This limited number lets you understand how automations work without creating a confusing system. Once these function reliably for several weeks, gradually add new automations based on observed needs rather than building an extensive system immediately.
Conclusion
Learning how to automate smart home devices for beginners involves selecting compatible devices, choosing a central platform, and creating simple routines that address repetitive daily tasks. Start with basic time-based automations for lighting and climate control, then expand to trigger-based automations as you gain confidence. Test each automation thoroughly and document what you create to simplify future troubleshooting.
Successful automation balances convenience with simplicity. Focus on automations that genuinely improve your daily routine rather than automating everything possible. As your system grows, maintain organized documentation and periodically review automations to ensure they remain useful and conflict-free. Smart home automation should reduce effort and enhance comfort, transforming your house into a responsive environment that adapts to your lifestyle.
Pingback: How to Secure Your Home Wi-Fi Network: 6 Key Steps