How to Sign a PDF on Your Phone Without Printing It
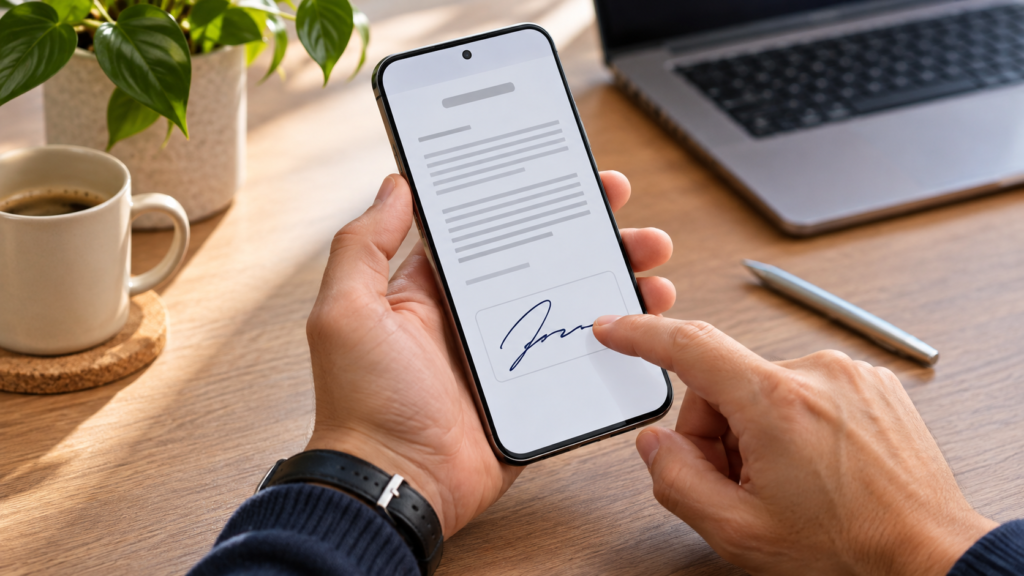
Being asked to sign a lease, permission slip, or contract when you have no printer or scanner nearby is common. You can sign a PDF on your phone without printing it in a few minutes, using tools that are already on most phones or free to download. This guide shows how to sign a PDF on your phone without printing it on iPhone and Android, explains when a formal e-signature service is needed, and covers what to do when the signature will not save.
The methods below work for everyday documents such as rental applications, school forms, invoices, and work agreements. Some documents carry stricter legal requirements, and the first section explains how to tell the difference before you sign anything.
Key Takeaways
- A drawn electronic signature is accepted for most everyday documents, but some legal papers need a certificate-based digital signature or a wet signature
- iPhone users can sign PDFs for free with the built-in Markup tool in the Files and Mail apps
- Android users can sign with the free Adobe Acrobat Reader app and its Fill & Sign tool
- If the sender uses DocuSign or Dropbox Sign, sign through their link instead of downloading and marking up the file
- Flatten or export the signed file before sending so the signature cannot shift or disappear
What You Need Before Signing a PDF on Your Phone: Electronic vs. Digital Signatures and When Each Is Accepted
The terms “electronic signature” and “digital signature” are often used as if they mean the same thing, but they describe different things. Knowing which one a document needs saves you from signing twice.
Electronic Signatures
An electronic signature is any electronic mark you use to show you agree to a document. Drawing your name with a finger, typing your name, or placing a saved image of your signature all count. This is what the iPhone Markup tool and Adobe’s Fill & Sign tool create.
In the United States, the federal ESIGN Act gives electronic signatures the same legal standing as handwritten ones for most commercial and consumer transactions. The European Union has a similar framework under the eIDAS regulation. For a typical lease, job offer, or consent form, a drawn signature on your phone is usually enough.
Digital Signatures
A digital signature is a specific type of electronic signature that uses a certificate and encryption to prove who signed and to show whether the document changed afterward. Government agencies, banks, and some regulated industries ask for these. Signing with one usually requires a certificate issued to you, often through an e-signature service or an identity provider your employer or government uses.
When a Phone Signature May Not Be Accepted
Wills, some property deeds, court filings, and documents that must be notarized often have extra rules that vary by country and state. If you are unsure, ask the person or organization requesting the signature what format they accept. That one question prevents the most common problem, which is a document rejected after you have already sent it.
Before you start, you need three things: the PDF saved on your phone or open from an email, an app that can add a signature, and a way to send the file back. You do not need a stylus. A fingertip works, and the tips in a later section help it look natural.
Signing a PDF on iPhone With Markup in the Files App and Mail
iPhones include a tool called Markup that lets you draw, add text, and insert a saved signature on PDFs and images. It is free and needs no extra app. The exact icons can look slightly different between iOS versions, but the steps below follow the same pattern.
Sign a PDF in the Files App
- Save the PDF to Files if it is not already there. From an email or a messaging app, tap the attachment, tap the Share button, and choose Save to Files.
- Open the Files app, find the PDF, and tap it to open it.
- Tap the Markup button, which looks like a pen tip inside a circle.
- Tap the plus (+) button in the Markup toolbar and choose Add Signature (on some versions it is labeled Signature).
- If you have not created a signature before, draw it with your finger and tap Done. If you have, tap your saved signature.
- Drag the signature onto the signature line. Pinch or drag the corner handles to resize it.
- Tap Done to save the changes to the file.
Files saves the signature into the same PDF rather than making a copy. If you want to keep an unsigned original, duplicate the file first by pressing and holding it and choosing Duplicate.
Sign a PDF Attachment in Mail
If the PDF arrived in Apple’s Mail app, you can sign it without saving it anywhere first.
- Open the email and tap the PDF attachment.
- Tap the Markup button.
- Tap the plus (+) button, choose Add Signature, and place your signature.
- Tap Done. Mail creates a reply with the signed PDF attached.
- Check the recipient, add a short note, and send.
This route is the fastest when someone emails you a form and expects it back. A common mistake is tapping Done and then closing the draft without sending, which leaves the sender with nothing. If that happens, the signed copy is usually still in your Drafts folder.
Signing a PDF on Android With Adobe Acrobat Reader’s Fill & Sign Tool
Android phones do not share a single built-in signing tool the way iPhones do. Some manufacturers include PDF editing in their own apps, but the options differ by brand and software version. Adobe Acrobat Reader is free on the Google Play Store, works the same on almost any Android phone, and includes a Fill & Sign tool for adding signatures.
Install the app only from the Play Store. Signing apps handle contracts and personal details, so avoid downloading them from unknown websites. If you ever need to install an app outside the store, read up on how to sideload apps on Android safely first.
Steps to Sign With Fill & Sign
- Install Adobe Acrobat Reader from the Play Store and open it. You can skip or sign in to an Adobe account. Signing in lets you sync your saved signature across devices.
- Open the PDF. You can tap a PDF attachment in Gmail and choose Acrobat Reader, or open the file from inside the app.
- Tap the edit button or the Fill & Sign option. Adobe updates its interface regularly, so the button may appear as a pencil icon or inside a menu.
- Tap the signature icon (a pen nib) and choose Create signature.
- Draw your signature with your finger, or use the options to type it or use an image, then tap Done.
- Tap the spot on the page where the signature belongs, then drag and resize it to fit the line.
- Save the file and share it using the app’s share option.
Acrobat Reader also works on iPhone, so it is a good choice if you switch between devices or want the same tool on both. If the app closes unexpectedly while you sign, the guide on why apps keep crashing on Android covers fixes such as clearing the app cache and updating the app.
Using E-Signature Apps Like DocuSign and Dropbox Sign When the Sender Requests a Formal Signature
Many businesses, landlords, and employers send documents through e-signature services such as DocuSign or Dropbox Sign (formerly HelloSign). In that case you receive an email with a link rather than a plain PDF attachment. Sign through that link instead of downloading the document and marking it up yourself.
The reason matters. These services record who signed, when, and from which email address, and they produce a certificate of completion that the sender relies on. A PDF you sign in Markup and email back does not carry that record, so the sender may ask you to sign again.
How Signing a Request Works on Your Phone
- Open the email from the service and tap the button to review the document.
- Agree to use electronic records and signatures when prompted. This consent step is standard.
- Tap each highlighted field. The service guides you from one required field to the next.
- When you reach a signature field, choose a typed style or draw your signature, then adopt it.
- Tap Finish or the equivalent button to complete signing.
You normally do not need an account or the app to sign a document someone sends you. The process runs in your phone’s browser. The DocuSign mobile app and the Dropbox Sign app are useful when you need to send documents for others to sign, or when you sign often and want everything in one place.
Check that the email genuinely comes from the person you expect. Scammers send fake signature requests that lead to password-stealing pages. If you were not expecting a document, confirm with the sender through a separate channel before tapping the link.
Creating, Saving, and Reusing Your Signature So It Looks Natural and Stays Consistent
A finger-drawn signature often looks shaky or oversized on the first attempt. A few habits make it look closer to the one you write on paper.
- Turn the phone sideways. Most signature pads give you a wider drawing area in landscape mode, which leaves room for your full name.
- Sign at a normal speed. Slow, careful strokes look wobbly. Sign the way you would with a pen, in one smooth motion.
- Use the full width of the pad. A small signature becomes blurry when you enlarge it. Draw it large, then shrink it on the page.
- Try a cheap capacitive stylus if you sign documents often. It gives you more control than a fingertip.
- Clear and redo any attempt you are unhappy with before saving it.
Reusing Saved Signatures
Both iPhone Markup and Adobe Acrobat Reader save your signature so you can place it again with one tap. On iPhone, saved signatures appear in the Add Signature menu, and you can manage or delete them from the same menu. In Acrobat Reader, the saved signature appears when you tap the signature icon, and you can also save a separate set of initials.
Using the same saved signature across documents keeps your signature consistent, which helps if anyone compares documents later. Anyone who unlocks your phone can also place your saved signature, so keep a passcode or biometric lock on the device.
Filling In Dates, Initials, and Form Fields Before You Add Your Signature
Most documents ask for more than a signature. Fill in every other field first and add your signature last. A signature placed before the rest of the form is complete can look like you agreed to blank sections, and some apps make the file harder to edit after signing.
Fillable Forms vs. Flat PDFs
Some PDFs contain fillable fields. When you tap a box, a keyboard appears and your text drops neatly into place. Others are flat scans of paper forms, where nothing happens when you tap a box.
- Fillable forms: Tap each field and type. Acrobat Reader detects these fields automatically. On iPhone, recent versions of iOS can also detect form fields when you open a PDF in Markup.
- Flat PDFs: Add a text box and position it over the blank line. In iPhone Markup, tap the plus (+) button and choose Add Text. In Acrobat Reader’s Fill & Sign tool, tap the text option and then tap the spot on the page.
Dates and Initials
Type the date in the format the document uses. If it shows “MM/DD/YYYY,” follow that format exactly. For pages that need initials, Acrobat Reader lets you create a saved set of initials separate from your full signature. On iPhone, you can create a second saved signature containing only your initials.
Before you finish, zoom in and scroll through every page. Initials boxes at the bottom of each page and checkboxes in small print are the fields people miss most often.
Saving, Flattening, and Sending the Signed PDF Without Losing Your Signature
Many apps add your signature as an annotation, a separate layer on top of the page. Most PDF viewers display annotations correctly, but some older viewers, printers, or online upload forms show the document without them. The recipient then sees a blank signature line, or can move or delete your signature in an editing app.
Flattening merges the signature and text into the page itself, so they display everywhere and cannot be moved.
Flattening a PDF on iPhone
The Print screen on iPhone can create a flattened copy of a document.
- Open the signed PDF in Files, tap the Share button, and choose Print.
- On the print preview, spread two fingers apart on the page thumbnail to open a full-size preview.
- Tap the Share button on that preview and choose Save to Files, or send it directly.
You do not need a printer for this, because nothing is actually printed.
Flattening a PDF on Android
Most Android phones include a Save as PDF option in the system print menu. Open the signed PDF, choose Print from the app’s menu, select Save as PDF as the printer, and save the new file. The menu location varies between apps and phone brands.
Sending the Signed PDF
When you send a signed PDF by email, attach the final flattened file rather than the original. Give the file a clear name, such as “Lease-Agreement-Signed.pdf,” so the recipient can tell it apart from the unsigned version they sent you.
Signed documents often contain your address, date of birth, or financial details. Send them only to the expected recipient, and protect the email account they live in. Turning on two-step verification for your Google account helps if you use Gmail.
Fixing Common Problems: Locked or Protected PDFs, Missing Signature Options, and Files That Will Not Save
Locked or Protected PDFs
Some PDFs are password-protected or have permissions that block editing. You may see a prompt for a password, or the Markup and Fill & Sign tools may be grayed out. Only the person who created the file can remove those restrictions, so ask the sender for an unlocked version or a signing link from an e-signature service. Avoid online tools that promise to strip protection from PDFs. Uploading a contract to an unknown website exposes your personal details.
Missing Signature Options
- The Markup button does not appear on iPhone. You may be viewing the file in a preview that does not support editing, such as an in-app viewer inside a messaging app. Save the PDF to Files and open it from there.
- The file is not actually a PDF. Documents sent as Word files or images may open with different tools. Check the file extension, and ask the sender for a PDF if needed.
- Acrobat Reader shows no Fill & Sign option. Update the app from the Play Store. Older versions place the tools in a different menu.
- The PDF opened in a different app. On Android, a viewer such as a browser or a basic file viewer may have opened it. Use the Open with option and choose Acrobat Reader.
Files That Will Not Save
If your changes disappear after you close the document, check these causes in order:
- The file is a read-only copy. Attachments opened directly from email or chat are sometimes temporary copies. Save the PDF to your phone first, then sign the saved version.
- You closed without saving. Tap Done or Save before leaving the document. On iPhone, Markup changes in Files are saved only after you tap Done.
- Your phone is out of storage. A nearly full phone may fail to save files without a clear warning. The guide to freeing up storage space on your smartphone covers quick ways to make room.
- The file lives in a cloud folder that has not synced. If the PDF is stored in iCloud Drive, Google Drive, or Dropbox, make sure you are online and the file has finished downloading before you sign it.
If the recipient says your signature is missing even though you can see it, the signature was most likely saved as an annotation that their viewer does not display. Flatten the file using the steps in the previous section and send it again.
Frequently Asked Questions
Is a signature drawn on my phone legally binding?
For most everyday agreements, yes. Laws such as the ESIGN Act in the United States and eIDAS in the European Union recognize electronic signatures. Wills, notarized documents, and some government forms have stricter rules, so check with the requester if the document falls into one of those categories.
Do I need to pay to sign a PDF on my phone?
No. iPhone Markup is built in, Adobe Acrobat Reader’s Fill & Sign tool is free, and signing a document someone sends you through DocuSign or Dropbox Sign does not require a paid account. Paid plans mainly matter if you need to send documents for other people to sign.
Can I sign a PDF on my phone without creating an account?
Yes. iPhone Markup needs no account, and Acrobat Reader lets you skip signing in, although an Adobe account lets you sync saved signatures across devices. E-signature requests open in your browser from the email link.
Conclusion
Signing a PDF on your phone takes a few minutes once you know which tool fits the situation. On iPhone, use Markup in Files or Mail. On Android, use Adobe Acrobat Reader’s Fill & Sign tool. When a sender uses DocuSign or Dropbox Sign, sign through their link so they receive a proper record of your signature.
Fill in every field before you sign, flatten the file before sending it, and check that the recipient can see your signature. If the document is a will, deed, or something that needs a notary, confirm the accepted format first. For everything else, you no longer need a printer to get a document signed and returned.