
How to Take Screenshots on Windows 11: 5 Easy Methods
Introduction: Screenshot Tools Built Into Windows 11
Knowing how to take screenshots on Windows 11 is one of the most practical skills for any PC user. Whether you need to capture an error message for tech support, save a receipt from an online purchase, document a conversation, or grab a frame from a video, Windows 11 offers multiple built-in methods to capture your screen without installing third-party software.
Microsoft has significantly improved the screenshot experience in Windows 11 compared to previous versions. The modernized Snipping Tool combines the best features of the legacy Snipping Tool and Snip & Sketch apps, while classic keyboard shortcuts like Print Screen continue to work alongside newer methods designed specifically for gaming and productivity workflows.
This guide walks you through every native screenshot method available in Windows 11, from quick keyboard shortcuts to annotation features that let you mark up captures before sharing them. By the end, you’ll know exactly which method to use for different situations and where to find your saved screenshots.
Key Takeaways
- Windows 11 includes five native screenshot methods, each designed for different use cases—no third-party apps required
- The Snipping Tool (Win + Shift + S) offers the most flexibility with rectangular, freeform, window, and full-screen capture modes plus built-in annotation
- Screenshots save to different locations depending on which method you use—some go to the clipboard, others save directly to your Pictures folder
- The modernized Snipping Tool can now capture scrolling windows and includes a timer function for capturing menus and tooltips
- Xbox Game Bar (Win + G) provides specialized screenshot and screen recording features optimized for gaming sessions
Method 1: Using the Snipping Tool (Win + Shift + S)
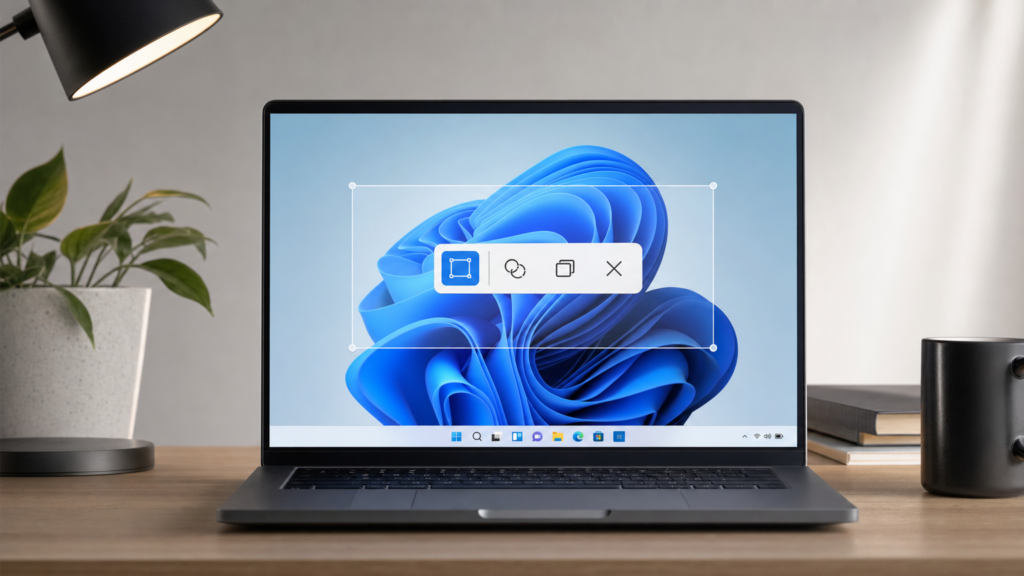
The Snipping Tool is the most versatile screenshot method in Windows 11 and the one Microsoft expects most users to adopt as their primary capture tool. Pressing Win + Shift + S dims your screen and brings up a small toolbar at the top with four capture modes.
Here’s what each mode does:
- Rectangular Snip: Click and drag to capture any rectangular area of your screen. This is the default mode and works well for capturing specific sections of web pages, documents, or applications.
- Freeform Snip: Draw any shape around the area you want to capture. Useful when you need to exclude surrounding content or capture irregular shapes.
- Window Snip: Click on any open window to capture it precisely, including its borders. The tool automatically detects window boundaries.
- Fullscreen Snip: Captures your entire screen instantly with one click—all monitors if you’re using a multi-monitor setup.
After capturing, a notification appears in the lower-right corner. Click it to open the Snipping Tool app where you can annotate, crop, or save your screenshot. If you don’t click the notification, the screenshot remains on your clipboard for 15 minutes, ready to paste into any application with Ctrl + V.
The Snipping Tool in Windows 11 (version 11.2210.42.0 and later) introduced a game-changing feature: the ability to capture scrolling content. Open the Snipping Tool app directly from the Start menu or by searching for it, then click the camera icon and select “Capture scrolling window.” This lets you capture entire web pages, long documents, or chat threads that extend beyond your visible screen area—something that previously required browser extensions or third-party tools.
Another helpful feature is the timer function. Click the stopwatch icon in the Snipping Tool app and set a delay of 3, 5, or 10 seconds. This gives you time to open menus, hover over elements, or position your cursor before the capture occurs—perfect for documenting dropdown menus, tooltips, or context menus that disappear when you press other keys.
Method 2: Print Screen Key for Full Screen Captures
The Print Screen key (labeled PrtScn, PrtSc, or similar on your keyboard) is the oldest screenshot method in Windows, dating back decades. In Windows 11, pressing Print Screen alone captures your entire screen and copies it to the clipboard.
This method is straightforward but has limitations. The screenshot doesn’t save automatically—you must paste it into an application like Paint, Word, or an email client. Press Print Screen, open your destination app, and press Ctrl + V to paste the image. From there, you can edit, crop, or save it as needed.
If you’re using multiple monitors, Print Screen captures all screens as a single wide image. This can be useful for documentation purposes but may require cropping if you only needed content from one display.
The Print Screen key location varies by keyboard manufacturer. On full-size keyboards, it’s typically in the top row above the arrow keys, near Scroll Lock and Pause/Break. On laptops, you might need to press Fn + Print Screen due to space constraints and key combinations. Some ultraportable laptops integrate Print Screen with other function keys (like F10 or F12), requiring the Fn key to activate it.
One quirk worth noting: on some OEM systems from manufacturers like Dell, HP, or Lenovo, the Print Screen key may be preconfigured to launch their proprietary screenshot software instead of using Windows’ native functionality. You can usually disable this behavior in the manufacturer’s utility software if you prefer Windows 11’s native capture methods.
Method 3: Windows Key + Print Screen for Auto-Save Screenshots
While Print Screen copies to the clipboard, Win + Print Screen captures your entire screen and automatically saves it as a PNG file. This is the fastest way to take a full-screen screenshot that you want to keep permanently without any additional steps.
When you press this combination, your screen briefly dims to confirm the capture. Windows 11 saves the screenshot to C:\Users\[YourUsername]\Pictures\Screenshots with the filename format “Screenshot (number).png”—for example, “Screenshot (1).png,” “Screenshot (2).png,” and so on. The numbering increments automatically, so you’ll never overwrite previous captures.
This method shines when you need to quickly capture multiple screens in succession for documentation, tutorials, or reporting. There’s no need to open an app, paste, and save each time. Just press Win + Print Screen repeatedly and find all your captures waiting in the Screenshots folder.
Like the standard Print Screen key, Win + Print Screen captures all monitors as one image in multi-display setups. If you need individual monitor captures, you’ll want to use the Snipping Tool’s window or rectangular modes instead.
The auto-save feature makes this method ideal for situations where you’re capturing many screens rapidly—like documenting installation steps, comparing before/after states while troubleshooting, or capturing sequential frames from a video tutorial. Since everything saves automatically, you can focus on the task at hand rather than managing files.
Method 4: Alt + Print Screen to Capture Active Window
When you only need to capture one specific window rather than your entire screen, Alt + Print Screen is the most efficient choice. This combination captures only the currently active window (the one with focus) and copies it to your clipboard.
The “active window” is whichever application you clicked on most recently—indicated by a highlighted title bar and appearing in front of other windows. If you want to capture a specific window, click anywhere inside it first to bring it into focus, then press Alt + Print Screen.
This method captures the window precisely as it appears, including its title bar, borders, and all content within the window frame. Unlike the Snipping Tool’s window mode, it doesn’t require you to click on the window after pressing the shortcut—it immediately captures whatever window already has focus.
Like the standard Print Screen method, screenshots taken with Alt + Print Screen live on your clipboard until you paste them into another application. Open Paint, Word, PowerPoint, or any image-capable app and press Ctrl + V to paste. From there, you can save, edit, or share the screenshot.
This technique is particularly useful when you’re writing documentation or tutorials and need clean captures of individual application windows without desktop clutter. It’s also helpful when sharing software issues with technical support—you can capture the problematic window with its error message, menu state, or settings dialog without exposing unrelated content from your desktop.
One limitation: Alt + Print Screen only works with traditional windowed applications. It doesn’t capture full-screen apps like games running in exclusive fullscreen mode, Windows 11’s Start menu, or the lock screen. For those scenarios, you’ll need different methods—the Xbox Game Bar for games, or the Snipping Tool for system UI elements.
Method 5: Using Xbox Game Bar (Win + G) for Gaming Screenshots
Windows 11 includes the Xbox Game Bar, a gaming-focused overlay that provides screenshot and screen recording capabilities optimized for capturing gameplay. Press Win + G to open the Game Bar interface over any running application.
The Game Bar appears as a set of translucent widgets across your screen. Look for the Capture widget, which shows recording and screenshot buttons. Click the camera icon or press Win + Alt + PrtScn to take a screenshot of your current game or application. A notification appears confirming the capture, and you’ll hear a camera shutter sound if your volume is on.
Screenshots taken through Xbox Game Bar save automatically to C:\Users\[YourUsername]\Videos\Captures as PNG files with timestamps in the filename—for example, “Desktop 2025-01-15 14-23-45.png.” This folder also stores any video recordings you make through the Game Bar.
The Game Bar’s screenshot function works with most games and applications, including those running in fullscreen mode where other screenshot methods might fail. It’s particularly valuable for capturing moments in games that don’t have built-in screenshot features or when you want consistent file organization across different games.
Beyond screenshots, the Game Bar offers screen recording functionality. Click the record button or press Win + Alt + R to start recording your screen. The same keyboard shortcut stops recording. Videos save to the same Captures folder as screenshots, making it easy to keep gameplay footage and screenshots organized together. You can learn more about the Xbox Game Bar’s full feature set in Microsoft’s official Game Bar documentation.
The Game Bar settings (click the gear icon) let you customize screenshot format (PNG or JPEG), video quality, audio recording sources, and keyboard shortcuts. You can also toggle whether the Game Bar opens automatically when Windows detects you’re playing a game.
One important note: the Game Bar only captures the application itself, not the Game Bar interface. Your screenshots and recordings will show clean gameplay without the overlay widgets visible. This makes it professional-looking for sharing or creating content.
How to Annotate and Edit Screenshots in Windows 11
Windows 11’s Snipping Tool includes built-in annotation features that let you mark up screenshots immediately after capture without switching to another application. This integration streamlines the workflow from capture to sharing.
After taking a screenshot with Win + Shift + S and clicking the notification, the Snipping Tool opens with your capture loaded. The toolbar across the top provides several annotation tools:
- Ballpoint Pen: Draw freehand with a thin line. Choose from multiple colors using the dropdown menu. Useful for circling areas of interest or drawing arrows.
- Pencil: Similar to the pen but with a softer, textured appearance that mimics a real pencil stroke.
- Highlighter: Draw semi-transparent lines to emphasize text or UI elements without completely obscuring them.
- Eraser: Remove annotation marks without affecting the underlying screenshot. Click and drag over any pen, pencil, or highlighter strokes to erase them.
- Ruler: Draw perfectly straight lines at any angle—helpful for pointing to specific elements or creating diagrams.
- Crop: Trim your screenshot to remove unwanted edges or focus on a specific area.
The Touch Writing feature (if you have a touchscreen or stylus) lets you annotate directly with your finger or pen, making it natural to add quick notes or markups on touch-enabled devices like the Surface lineup.
Each tool offers thickness and color options. Click the dropdown arrow next to any tool to select from preset colors or click “More colors” to use the full color picker. Line thickness options range from thin (1-2 pixels) to thick (8-10 pixels), giving you control over how prominently your annotations appear.
After annotating, click the floppy disk icon to save your screenshot. The Snipping Tool defaults to PNG format, which preserves quality without compression artifacts—ideal for screenshots with text or UI elements. You can also copy the annotated image to the clipboard (Ctrl + C) or share it directly through Windows 11’s share menu (arrow icon) to send via email or supported apps.
For more advanced editing needs beyond annotation—like resizing, adjusting brightness, or adding filters—you can open screenshots in the Photos app (right-click any image and choose “Open with” > “Photos”) or Paint (press Win + R, type “mspaint”, and press Enter). Paint offers basic editing tools like resize, rotate, and text insertion, while the Photos app provides more sophisticated adjustments like lighting corrections and filters.
Where Windows 11 Saves Your Screenshots
Understanding where Windows 11 stores screenshots is crucial for finding, organizing, and sharing your captures. Different screenshot methods save to different locations, which can be confusing if you’re looking for a specific capture.
Here’s the complete breakdown:
Clipboard Only (temporary storage):
- Win + Shift + S (Snipping Tool quick capture)
- Print Screen
- Alt + Print Screen
These methods copy screenshots to your clipboard but don’t save them as files. The clipboard holds only one item at a time, so taking another screenshot or copying text overwrites the previous capture. You must paste (Ctrl + V) into an application and manually save before the clipboard content is replaced.
C:\Users\[YourUsername]\Pictures\Screenshots
- Win + Print Screen
This folder stores full-screen captures taken with the Windows Key + Print Screen combination. Files are named sequentially as “Screenshot (1).png,” “Screenshot (2).png,” and so on. If this folder doesn’t exist, Windows 11 creates it automatically the first time you use Win + Print Screen.
C:\Users\[YourUsername]\Videos\Captures
- Xbox Game Bar screenshots (Win + Alt + PrtScn)
- Xbox Game Bar recordings (Win + Alt + R)
The Game Bar saves both screenshots and video recordings here with timestamp-based filenames like “Desktop 2025-01-15 14-23-45.png.” You can change this default location in the Game Bar settings under Capturing > Capture location.
User-Defined Location
- Snipping Tool app (when you click Save)
When you open the Snipping Tool as a full app (not the Win + Shift + S quick capture) and click the save button, you choose where to save each screenshot. The app remembers your last-used folder, making it convenient to save related screenshots to project-specific directories.
If you’re having trouble locating screenshots, open File Explorer and navigate to your Pictures folder, then look for the Screenshots subfolder. You can also search for “*.png” or “Screenshot” in the File Explorer search box while in your user folder to find all PNG files or files with “Screenshot” in the name. Similar to other Windows 11 system configurations covered in guides like how to disable startup apps, understanding default file locations helps you work more efficiently with your operating system.
For better organization, consider creating a dedicated screenshot folder structure. You might set up folders like “Work Screenshots,” “Gaming Captures,” or “Bug Reports” and save or move screenshots there immediately after capture. You can also change the default Screenshots folder location by right-clicking the Screenshots folder, selecting Properties > Location, and choosing a new path. Just as you would organize other system files when learning how to access BIOS on Windows 11 or managing system configurations, keeping your screenshots organized improves your productivity.
Troubleshooting Common Screenshot Issues
Even with built-in tools, users occasionally encounter problems taking or saving screenshots in Windows 11. Here are the most common issues and their solutions:
Problem: Win + Shift + S doesn’t work or does nothing
This usually indicates the Snipping Tool keyboard shortcut is disabled or conflicts with another app. Open Settings (Win + I), navigate to Accessibility > Keyboard, and scroll down to the “Print Screen key” section. Make sure “Use the Print Screen key to open Snipping Tool” is toggled on if you want Print Screen to launch the Snipping Tool instead of the traditional clipboard capture.
Alternatively, open Settings > System > Notifications, then ensure notifications are enabled for the Snipping Tool. If notifications are blocked, you won’t see the popup after captures, though screenshots still copy to your clipboard.
If the issue persists, restart the Snipping Tool process. Open Task Manager (Ctrl + Shift + Esc), look for “Snipping Tool” under the Processes tab, right-click it, and select “End task.” Then try the keyboard shortcut again—Windows will restart the Snipping Tool automatically.
Problem: Screenshots are completely black or show a black screen
Black screenshots typically occur when capturing content protected by Digital Rights Management (DRM) or hardware-accelerated applications. Streaming services like Netflix, Amazon Prime Video, and Disney+ intentionally block screenshots to prevent piracy. Games using certain graphics APIs may also produce black captures with standard Windows screenshot tools.
For games specifically, try using the Xbox Game Bar (Win + G) instead, as it’s designed to work with DirectX and other gaming graphics systems. For DRM-protected content, screenshots are intentionally blocked and there’s no legitimate workaround—this is by design to protect copyrighted material.
If you’re getting black screenshots from regular desktop applications, try disabling hardware acceleration in that specific app. For example, in Google Chrome, go to Settings > System and toggle off “Use hardware acceleration when available,” then restart Chrome.
Problem: Print Screen key isn’t working
First, verify you’re pressing the correct key combination. On laptops, you often need Fn + Print Screen because function keys serve dual purposes. Check your keyboard’s documentation if you’re unsure.
Some manufacturers map Print Screen to launch their own screenshot utilities. Look for pre-installed software from your PC manufacturer (Dell SupportAssist, HP Support Assistant, Lenovo Vantage, etc.) and check their keyboard shortcut settings to disable any Print Screen remapping.
You can also remap Print Screen to open the Snipping Tool in Windows 11 settings. Go to Settings > Accessibility > Keyboard and enable “Use the Print Screen key to open Snipping Tool.” This makes Print Screen launch Win + Shift + S mode instead of the traditional clipboard capture.
Problem: Can’t find saved screenshots
Remember that some methods only copy to the clipboard without saving files. If you used Print Screen, Alt + Print Screen, or Win + Shift + S, check your clipboard by opening Paint or Word and pressing Ctrl + V. If the screenshot appears, it was never saved as a file—you need to paste and manually save it.
For auto-saved screenshots, check the appropriate folder based on the method used: Pictures\Screenshots for Win + Print Screen captures, or Videos\Captures for Xbox Game Bar screenshots. Open File Explorer and type the full path in the address bar to navigate directly.
Problem: Snipping Tool crashes or won’t open
The Snipping Tool is a Microsoft Store app in Windows 11, so you can repair or reset it through Windows settings. Go to Settings > Apps > Installed apps, find “Snipping Tool” in the list, click the three dots menu, and select “Advanced options.” Try “Repair” first, which fixes the app without losing settings. If that doesn’t work, use “Reset,” which reinstalls the app fresh (you’ll lose any custom settings).
You can also update the Snipping Tool through the Microsoft Store. Open the Store app, click Library in the bottom left, and click “Get updates” to install any pending Snipping Tool updates.
Advanced Screenshot Tips and Best Practices
Once you’ve mastered the basic screenshot methods in Windows 11, these advanced tips will help you work more efficiently and capture exactly what you need in any situation.
Using the Delay Timer for Complex Captures
The Snipping Tool’s delay timer isn’t just for capturing menus—it’s useful anytime you need to set up your screen before capturing. Open the Snipping Tool app, click the stopwatch icon, and choose a 3, 5, or 10-second delay. This gives you time to arrange windows, hover your mouse over specific elements, or navigate to a particular screen state before the capture executes. This feature is particularly valuable when documenting multi-step processes or capturing tooltip text that appears on hover.
Capturing Multiple Monitors Separately
If you’re using multiple displays and need to capture just one screen, use the Snipping Tool’s rectangular or fullscreen modes while your cursor is on the target monitor. The tool captures the display where your mouse is located. Alternatively, use Win + Shift + S and drag a rectangle across only the monitor you want. This gives you precise control over multi-monitor captures without needing to crop afterward.
Creating Screenshot Templates
For repetitive screenshot tasks—like documenting software bugs, creating tutorials, or preparing training materials—create a dedicated folder structure before you begin. Set up folders by date, project name, or issue number, then save screenshots directly to the appropriate folder using the Snipping Tool’s save function. This organization saves time later when you need to locate specific captures or compile documentation.
Keyboard Shortcuts Summary
Keep this reference handy until these shortcuts become second nature:
- Win + Shift + S: Open Snipping Tool overlay (most versatile)
- Win + Print Screen: Capture full screen and auto-save to Pictures\Screenshots
- Print Screen: Capture full screen to clipboard
- Alt + Print Screen: Capture active window to clipboard
- Win + G: Open Xbox Game Bar for gaming screenshots
- Win + Alt + PrtScn: Take Game Bar screenshot
Privacy Considerations When Sharing Screenshots
Before sharing screenshots, review them carefully for sensitive information. Screenshots often inadvertently capture browser tabs with personal accounts, notification popups with private messages, file paths that reveal your username or directory structure, or background windows with confidential content. The Snipping Tool’s crop feature lets you remove these elements before saving or sharing. For maximum privacy, use the rectangular snip mode to capture only the specific content you want to share, rather than full-screen captures that include peripheral information.
Frequently Asked Questions
Can I take scrolling screenshots in Windows 11 without third-party apps?
Yes, the updated Snipping Tool in Windows 11 includes a scrolling capture feature. Open the Snipping Tool app from the Start menu, click the camera icon dropdown, and select “Capture scrolling window.” Click on the window you want to capture, and the tool automatically scrolls through and captures the entire content—even parts not visible on screen. This works with web browsers, document viewers, and most scrollable applications.
Why do my screenshots look blurry or pixelated?
Blurry screenshots usually result from display scaling settings. Windows 11 uses scaling to make text and icons larger on high-resolution displays. If you’re viewing a screenshot at 100% zoom but it was captured on a display with 150% or 200% scaling, it may appear blurry when viewed on differently scaled displays. The screenshot is accurate—it’s capturing exactly what appears on your screen at your current scaling level. To get sharper screenshots on high-DPI displays, you can temporarily reduce scaling before capturing (Settings > System > Display > Scale), though this makes on-screen elements smaller while capturing.
Can I change the default save location for screenshots?
Yes, but it depends on the screenshot method. For Win + Print Screen captures, right-click the Screenshots folder in your Pictures directory, select Properties > Location, and choose a new destination. For Xbox Game Bar captures, open the Game Bar (Win + G), click Settings > Capturing, and change the “Captures folder” location. The Snipping Tool remembers your last-used save location when you manually save files, so saving to a specific folder once will make it the default for future saves.
How do I take screenshots of Netflix or other streaming services?
Streaming services like Netflix, Hulu, Disney+, and Amazon Prime Video use Digital Rights Management (DRM) protection that intentionally blocks screenshots. This is a copyright protection measure designed to prevent unauthorized distribution of content. When you attempt