How to Enable and Use Clipboard History in Windows 11
Every time you copy something in Windows, it replaces whatever you copied before. Clipboard history changes that. Learning how to enable and use clipboard history in Windows 11 lets you press Windows + V and pick from up to 25 recently copied items — text, links, and images — instead of just the last one. This guide walks through turning it on, pasting and pinning items, syncing across devices, clearing your data, and fixing the most common problems.
Key Takeaways
- Turn on clipboard history in Settings or by pressing Windows + V
- Paste, pin, and delete items from the clipboard panel
- Sync clipboard items across PCs with a Microsoft account
- Know the limits: 25 items, 4 MB each, and restarts wipe unpinned items
- Fix clipboard history when Windows + V stops working
What Clipboard History Is and How It Works in Windows 11
By default, the Windows clipboard holds only one thing at a time. Copy a paragraph, then copy a link, and the paragraph is gone. If you have ever pasted the wrong content because you copied something else in between, you have run into this limitation.
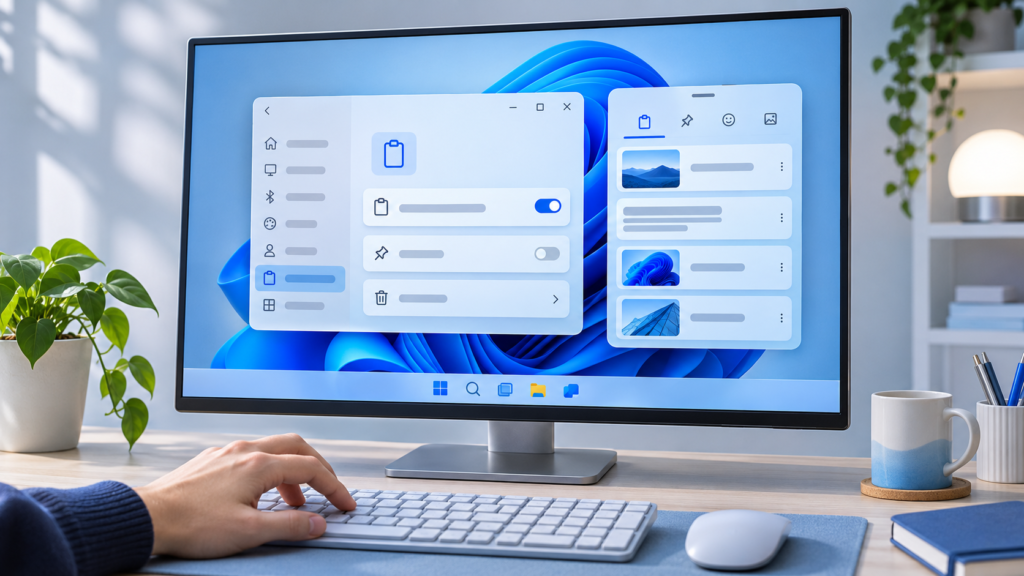
Clipboard history is a built-in Windows 11 feature that stores a rolling list of your recent copies instead of just one. Once enabled, pressing Windows + V opens a small panel showing your saved clips. Clicking any item pastes it at your cursor, which means you can copy several pieces of content in a row and paste them in any order.
The feature saves text, formatted text (HTML), and images such as screenshots. It first appeared in Windows 10 and was carried into Windows 11 with a refreshed design that sits alongside the emoji and GIF picker. Because it is built into the operating system, there is nothing to install — you only need to switch it on, since it is off by default.
A few things are worth knowing up front. Clipboard history is local to your PC unless you turn on syncing. It stores a maximum of 25 items, and a restart wipes everything except items you have pinned. Those limits are covered in detail later in this article.
How to Enable Clipboard History via Settings and the Windows + V Shortcut
There are two ways to turn the feature on, and both take only a few seconds.
Enable Clipboard History in Settings
- Open Settings by pressing Windows + I, or right-click the Start button and choose Settings.
- Select System in the left sidebar.
- Scroll down and click Clipboard.
- Toggle Clipboard history to On.
That is all it takes. From this point on, everything you copy with Ctrl + C, right-click Copy, or a screenshot shortcut is added to your history automatically. The Settings page is also where you manage syncing and clearing, which the later sections cover. For the official documentation, see Microsoft’s Clipboard in Windows support page.
Enable Clipboard History with Windows + V
You can also enable it the moment you need it. Copy something first — the feature needs clipboard content to show the option. Then press Windows + V. If history is off, the panel displays a Turn on button. Click it, and clipboard history activates immediately without opening Settings.
If pressing Windows + V does nothing at all, do not worry — the panel sometimes appears where your cursor is or behind other windows. Check near the bottom of your screen, and see the troubleshooting section below if it still will not open.
How to Use Clipboard History to Paste, Pin, and Delete Items
Once enabled, the Windows + V panel becomes your clipboard manager. Here is how each part of it works.
Paste Any Saved Item
- Copy several items as usual — text from a document, a URL, an image.
- Click where you want to paste, then press Windows + V.
- Scroll through the list and click the item you want. It pastes instantly and also becomes your current clipboard content, so pressing Ctrl + V afterward pastes the same item again.
A practical example: when filling out a form, copy your name, email, and address one after another from a note. Then use Windows + V to paste each into the right field without switching back and forth. For text copied from web pages or formatted documents, click the three-dot menu on an item and choose Paste as plain text to strip out fonts, colors, and links.
Pin Items You Use Often
Pinning protects an item from being removed — both when the 25-item limit pushes old entries out and when you restart your PC.
- Press Windows + V to open the panel.
- Click the three-dot menu on the item, then select Pin.
Pinned items are ideal for things you paste repeatedly, like a standard email reply, a project file path, or a shipping address. To remove a pin, open the same menu and choose Unpin.
Delete Individual Items
To remove one clip without clearing everything, open the three-dot menu on that item and click Delete (the trash icon). This is handy when you have copied something sensitive, like a password, and want it gone from the list immediately.
One useful detail: screenshots taken with Windows + Shift + S are copied to the clipboard, so they appear in your history too. If you capture screenshots regularly, pairing this feature with the methods in our guide to taking screenshots on Windows 11 makes it easy to reuse recent captures without saving files first.
How to Sync Clipboard History Across Devices with a Microsoft Account
Windows 11 can sync your clipboard between PCs that share the same Microsoft account — a feature sometimes called cloud clipboard. Copy text on your desktop, and it is available to paste on your laptop.
- Open Settings > System > Clipboard.
- Under Sync across your devices, sign in with your Microsoft account if you have not already.
- Choose a sync mode:
- Automatically sync text that I copy — every copied item uploads and syncs without extra steps.
- Manually sync text that I copy — nothing uploads unless you open Windows + V, click the item’s three-dot menu, and choose Sync.
- Repeat the setup on your other PCs, signed in with the same Microsoft account.
The manual option is the safer choice if you frequently copy confidential information, since you control exactly what leaves the device. Keep in mind that cloud sync is designed primarily for text — files and larger items do not transfer between machines.
If you use an Android phone, Microsoft’s Phone Link app offers a related feature called cross-device copy and paste, which lets clipboard content move between your phone and PC. It is configured inside the Phone Link settings rather than the clipboard page, but it is worth exploring if you work across both platforms.
How to Clear Clipboard Data and Turn Clipboard History Off
There are three levels of cleanup, depending on how thorough you want to be.
Clear everything from the panel: Press Windows + V and click Clear all at the top of the panel. Pinned items survive this — you must unpin or delete them individually.
Clear from Settings: Go to Settings > System > Clipboard and click the Clear button next to “Clear clipboard data.” This wipes the clipboard and history on the device, again leaving pinned items in place.
Turn the feature off entirely: On the same Settings page, toggle Clipboard history to Off. Windows stops saving new items and clears the existing list. To stop cloud syncing as well, toggle Sync across your devices off first — otherwise your Microsoft account may still hold synced clips on other machines.
A good habit before handing your PC to someone else or presenting your screen: press Windows + V, hit Clear all, and confirm nothing sensitive remains.
Clipboard History Limits: Item Size, Storage Caps, and What Is Not Saved
Understanding the limits prevents surprises when something you copied is not there.
- 25-item maximum. Once the list is full, the oldest unpinned item is removed each time you copy something new. Pinning is the only way to guarantee an item stays.
- 4 MB per item. Any single clip larger than 4 MB is not saved to history. This mainly affects large images — a high-resolution screenshot usually fits, but copying a big image file’s contents may not.
- Files and folders are not saved. Copying a file in File Explorer copies a reference, not the file’s contents, so it does not appear as a usable entry in the Windows + V panel.
- Restarting wipes unpinned items. Clipboard history does not persist across reboots, sign-outs, or shutdowns — only pinned clips survive.
- Some content is excluded. Certain apps block clipboard capture for protected content, and very large copies may silently fail to appear.
If you need long-term storage for clips, a dedicated third-party clipboard manager may suit you better. For most people, though, the built-in tool covers everyday copying and pasting comfortably.
Fix Common Problems When Clipboard History Is Not Working
If clipboard history is not working — Windows + V opens nothing, the panel is empty, or items refuse to save — work through these fixes in order.
1. Confirm it is actually enabled. Open Settings > System > Clipboard and check the toggle. Updates and new user profiles can reset it. If the toggle is already on, turn it off, restart the PC, and turn it back on.
2. Restart Windows Explorer. The clipboard panel is part of the Windows shell. Press Ctrl + Shift + Esc to open Task Manager, find Windows Explorer in the list, right-click it, and choose Restart. Your taskbar will blink briefly, then try Windows + V again.
3. Install pending Windows updates. Go to Settings > Windows Update and apply anything waiting, then reboot. Clipboard bugs have historically been fixed through cumulative updates.
4. Check whether the setting is managed. On work or school PCs, an administrator can disable clipboard history through Group Policy — the toggle will appear greyed out or missing. On your own Windows 11 Pro machine, press Windows + R, type gpedit.msc, and navigate to Computer Configuration > Administrative Templates > System > OS Policies. Set Allow Clipboard History to Not Configured or Enabled.
5. Reset via the Registry (advanced users). If Group Policy is unavailable or ineffective, the policy may exist in the Registry under HKEY_LOCAL_MACHINE\SOFTWARE\Policies\Microsoft\Windows\System as a value named AllowClipboardHistory. Set it to 1 or delete the value. Editing the Registry carries risk, so create a system restore point first so you can roll back if something goes wrong.
6. Fix sync problems separately. If history works locally but does not sync, verify both PCs use the same Microsoft account, check your internet connection, and toggle sync off and back on in Clipboard settings. Sync only transfers new items — clips copied before you enabled it will not appear on other devices.
Privacy and Security Tips for Using Clipboard History
Clipboard history is convenient, but it quietly records everything you copy — including passwords, credit card numbers, private messages, and confidential work documents. Anyone who can reach your unlocked PC can press Windows + V and see the last 25 things you copied.
- Delete sensitive clips immediately. After pasting a password or account number, open the panel and delete that single item rather than waiting for it to age out.
- Choose manual sync or skip sync entirely. Automatic syncing uploads everything you copy to Microsoft’s cloud. If you handle regulated or sensitive data, manual sync — or no sync — keeps clips on the device.
- Clear before sharing your screen. Presenting in a meeting or letting someone borrow your laptop? Clear all first so your copied items do not flash on screen if you hit Windows + V by habit.
- Be careful on shared or managed PCs. On family computers, each user account has its own clipboard — but anyone using your account sees your history. On managed work devices, assume administrators can see that the feature is enabled.
- Let your password manager help. Many password managers clear copied credentials from the clipboard after a short interval, which adds a safety net on top of manual deletion.
Used thoughtfully, the feature is safe for everyday tasks. The risk only grows when sensitive copying becomes routine and the history is never cleaned out.
Frequently Asked Questions
Does clipboard history save after I restart my PC?
No — a restart, shutdown, or sign-out erases everything except pinned items. If there is a clip you need permanently, pin it from the Windows + V panel or save it to a file.
Is clipboard history turned on by default in Windows 11?
No. It ships disabled, which is why pressing Windows + V on a fresh PC shows a “Turn on” button instead of your clips. Enable it once in Settings or through that button, and it stays on.
Does clipboard history work on Windows 10?
Yes. The same Windows + V panel and Settings > System > Clipboard toggle exist in Windows 10 version 1809 and later, including syncing through a Microsoft account.
Conclusion
Enabling clipboard history in Windows 11 takes under a minute, and the payoff is immediate: press Windows + V and your last 25 copies are a click away. Pin the items you reuse, sync text between your PCs with a Microsoft account if it helps your workflow, and clear the list when it holds anything sensitive. When the feature misbehaves, re-enabling the toggle, restarting Windows Explorer, and checking Group Policy solve most cases.
It is one of several built-in features that quietly speed up everyday work. For more ways to get things done faster, browse our Windows tips for productivity.