
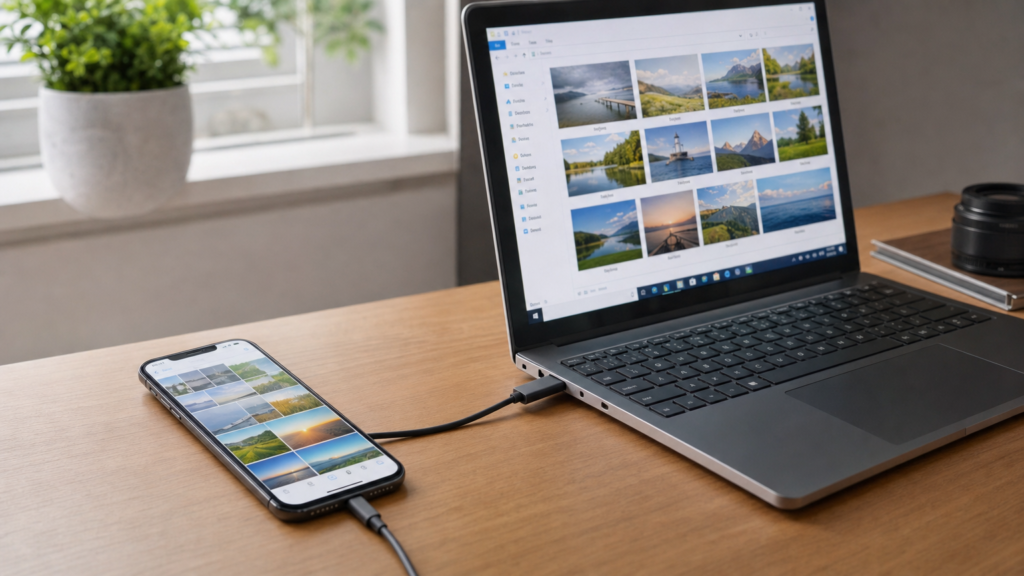
How to Transfer Photos from iPhone to Windows PC: 5 Ways
How to Transfer Photos from iPhone to Windows PC: Complete Guide for 2024
Moving your precious photos from your iPhone to a Windows PC shouldn’t feel like navigating a maze, yet many users struggle with the process. Whether you’re trying to free up storage space on your device, create backups, or edit photos on a larger screen, knowing how to transfer photos from iPhone to Windows PC efficiently can save you hours of frustration. Apple and Windows don’t always play nicely together, but several reliable methods exist to bridge this gap—from traditional USB cable connections to cloud-based wireless solutions.
This comprehensive guide walks you through every viable method for iPhone to Windows photo transfer, including troubleshooting steps for the most common problems users encounter. By the end, you’ll have multiple proven techniques at your disposal and know exactly which approach works best for your specific situation.
Key Takeaways
- USB cable transfer using Windows Photos app or File Explorer offers the fastest direct transfer method without internet dependency
- iCloud Photos provides automatic syncing but requires sufficient iCloud storage and works best for ongoing synchronization rather than one-time bulk transfers
- HEIC format photos from newer iPhones may require conversion or Windows updates for full compatibility on older PC systems
- The “Trust This Computer” prompt must be approved on your iPhone before any wired transfer method will work
- Third-party cloud services like Google Photos and Dropbox offer flexible wireless alternatives with generous free storage tiers
How to Transfer Photos from iPhone to Windows PC with a USB Cable
USB cable transfer remains the most straightforward and fastest method to import iPhone photos to PC, especially when dealing with large photo libraries or slow internet connections. This approach doesn’t consume your mobile data or require cloud storage subscriptions, making it ideal for bulk transfers.
Before starting any wired transfer, you’ll need a working Lightning-to-USB cable (for iPhone 14 and earlier) or USB-C cable (for iPhone 15 and newer models). Apple’s original cables work best, though certified third-party cables labeled as MFi (Made for iPhone) also function reliably. Cheap knockoff cables frequently cause connection problems and transfer failures.
Initial Setup and Connection
Connect your iPhone to your Windows PC using the appropriate USB data cable. When you connect for the first time, or after iOS updates, your iPhone will display a “Trust This Computer?” prompt. This security feature prevents unauthorized access to your device data. Tap “Trust” and enter your iPhone passcode to authorize the connection.
If you don’t see this prompt, unlock your iPhone and check the screen again. Windows cannot access your iPhone’s photos without this authorization, regardless of which transfer method you attempt. After trusting the computer once, your iPhone remembers this decision unless you reset location and privacy settings or restore your device.
For Windows 11 users, you may need to install the Apple Devices app from the Microsoft Store if you haven’t already. This app replaced iTunes for iPhone management on Windows 10 and 11 systems. Windows 10 version 22H2 and later also benefit from this app, though older Windows 10 versions still use iTunes for device recognition.
Import iPhone Photos Using the Windows Photos App
The built-in Windows Photos app provides the most user-friendly interface for importing photos and videos from your iPhone. This method works on Windows 10 and Windows 11 with minimal setup required.
Step-by-Step Import Process
Once your iPhone is connected and trusted, open the Photos app on your Windows PC. You can find it by typing “Photos” in the Windows search bar or clicking the Photos tile in the Start menu. The app should automatically detect your connected iPhone.
Click the “Import” button in the top-right corner of the Photos app window, then select “From a connected device.” The app will scan your iPhone for new photos and videos. This initial scan might take several minutes if you have thousands of photos, particularly on the first import.
After scanning completes, the Photos app displays thumbnails of all available photos and videos. By default, it shows only new items not previously imported. You can change this by clicking “Import settings” and selecting “All items” if you need to re-import specific photos.
Choose your desired photos by clicking individual thumbnails, or click “Select all” in the top toolbar to import everything. You can also select multiple photos by holding Ctrl while clicking. Once you’ve made your selection, click the “Import selected” button at the bottom of the window.
The Photos app automatically organizes imported photos by date in the Pictures folder at C:\Users\[YourUsername]\Pictures. You can change this destination folder before importing by clicking “Import settings” and selecting a custom folder location. This is particularly useful if your C: drive has limited storage space.
Import Settings Customization
The Photos app offers several useful import options worth configuring. Click the three-dot menu icon, then “Settings,” and scroll to the “Importing” section. Here you can choose to delete photos from your iPhone after successful import—a helpful option for freeing up phone storage immediately, though risky if the transfer encounters errors.
You can also enable grouping imported photos by date into separate folders, which creates a more organized structure like “2024-01-15” rather than dumping everything into a single Pictures folder. This organizational approach becomes invaluable when managing years of photo memories.
Copy Photos with File Explorer
For users who prefer more direct control over file management, File Explorer provides manual access to your iPhone’s photo storage. This method works reliably across all Windows versions and doesn’t require any additional apps beyond basic Windows functionality.
Accessing iPhone Storage Through File Explorer
With your iPhone connected and trusted, open File Explorer by pressing Windows key + E or clicking the folder icon in your taskbar. In the left sidebar under “This PC,” you’ll see your iPhone listed with its device name (like “John’s iPhone”).
Double-click your iPhone, then open “Internal Storage,” followed by the “DCIM” folder. The DCIM (Digital Camera Images) folder is the standard directory where iOS stores photos and videos. Inside, you’ll find one or more folders with names like “100APPLE,” “101APPLE,” etc. These numbered folders organize photos chronologically based on when they were taken or imported to your iPhone.
Each folder contains your actual photo and video files with names like “IMG_0001.HEIC” or “IMG_0001.JPG” for photos, and “IMG_0002.MOV” for videos. The seemingly random naming convention reflects iOS’s internal organization system rather than your photo dates or album names.
Manual Copy Process
To transfer photos, simply select the files you want (Ctrl+A selects all files in a folder, Ctrl+Click selects individual files), then right-click and choose “Copy.” Navigate to your desired destination folder on your PC—typically somewhere in your Pictures directory—right-click in the empty space, and select “Paste.”
Large transfers take time, especially if your USB connection uses USB 2.0 rather than USB 3.0 or higher. A progress window shows estimated completion time and transfer speed. Don’t disconnect your iPhone until the copy operation completes entirely, as interrupting the transfer can corrupt files.
This File Explorer method proves especially useful when you need to preserve the original file names and timestamps, or when the Photos app fails to recognize certain photo formats. It also allows selective folder transfers rather than scanning your entire library.
Understanding HEIC Format Compatibility
iPhones running iOS 11 and later capture photos in HEIC (High Efficiency Image Container) format by default. HEIC files are roughly half the size of equivalent JPEGs while maintaining similar quality, which explains why your iPhone can store so many photos. However, older Windows versions (before Windows 10 version 1803) don’t natively support HEIC files.
If you see HEIC files on your Windows PC that won’t open, you need to install HEVC Video Extensions from the Microsoft Store. Microsoft offers a free version through this direct Microsoft Store link. After installation, Windows Photos and most image viewers will handle HEIC files normally.
Alternatively, you can configure your iPhone to capture photos in JPEG format instead. Open Settings on your iPhone, tap “Camera,” select “Formats,” and choose “Most Compatible” rather than “High Efficiency.” This change applies only to future photos, not your existing HEIC library.
Transfer Photos from iPhone to PC Using iCloud
iCloud Photos offers seamless wireless synchronization between your iPhone and Windows PC, making it ideal for users who want automatic ongoing backups rather than manual transfer sessions. This method requires an active internet connection and sufficient iCloud storage space.
Setting Up iCloud Photos on iPhone
First, enable iCloud Photos on your iPhone. Open Settings, tap your name at the top, select “iCloud,” then “Photos.” Toggle on “iCloud Photos” (called “iCloud Photo Library” on older iOS versions). This uploads your entire photo library to iCloud, consuming iCloud storage space. Apple provides 5GB free, but most users need paid plans: 50GB for $0.99/month, 200GB for $2.99/month, or 2TB for $9.99/month.
Below the main toggle, you can choose “Optimize iPhone Storage” to save space on your phone by keeping smaller versions locally while full-resolution originals stay in iCloud. The “Download and Keep Originals” option stores everything on your phone but quickly fills device storage.
Installing iCloud for Windows
Download and install iCloud for Windows from the official Apple support page. After installation, open the iCloud app and sign in with your Apple ID credentials—the same account used on your iPhone.
In the iCloud for Windows app, check the box next to “Photos,” then click “Options” beside it. Here you can configure three important settings: “iCloud Photo Library” syncs all photos bidirectionally, “My Photo Stream” downloads only recent photos (limited to 1,000 most recent and 30 days), and “iCloud Photo Sharing” enables shared albums from family or friends.
Enable “Download new photos and videos to my PC” and choose a download location, typically defaulting to C:\Users\[YourUsername]\Pictures\iCloud Photos. You can also enable “Upload new photos and videos from my PC” to automatically add photos from a specific PC folder to your iCloud library.
How iCloud Photo Sync Works
After setup, iCloud for Windows runs in the background, automatically downloading new photos from your iPhone whenever both devices have internet connectivity. The sync isn’t instantaneous—expect delays from a few minutes to several hours depending on your internet speed, photo library size, and current iCloud server load.
Photos appear in File Explorer under the iCloud Photos folder. Within this folder, you’ll see “Downloads” containing photos from your iPhone, “Uploads” for photos being sent to iCloud from your PC, and “Shared” for any shared albums you participate in.
This method works beautifully for ongoing synchronization but proves less ideal for one-time bulk transfers. Initial sync of a large photo library can take days on slower internet connections, and the continuous syncing consumes bandwidth in the background. Slow Wi-Fi connections can significantly impact iCloud sync performance.
Send Photos Wirelessly with Cloud Storage or Transfer Apps
Beyond iCloud, numerous third-party solutions enable wireless photo transfer between iPhone and Windows PC. These alternatives often provide more free storage, better cross-platform compatibility, and greater flexibility than Apple’s ecosystem-locked approach.
Google Photos
Google Photos offers 15GB of free storage shared across Google services, and high-quality photo backups (slightly compressed) don’t count against this limit. Install the Google Photos app on your iPhone from the App Store, sign in with a Google account, and enable backup in the app settings.
On your Windows PC, simply visit photos.google.com in any web browser and sign in with the same Google account. Your photos appear automatically, viewable and downloadable from any device. For desktop access similar to a local folder, install Google Drive for Desktop and enable Google Photos integration, creating a virtual drive on your PC.
Google Photos excels at automatic organization with facial recognition, location grouping, and AI-powered search. You can search for “beach” or “dog” and find relevant photos without manual tagging. The service also creates automatic animations, collages, and movies from your content.
Microsoft OneDrive
Windows users may prefer OneDrive since it integrates directly into Windows File Explorer. Microsoft provides 5GB free storage, with Office 365 subscriptions including 1TB. Install the OneDrive app on your iPhone, enable camera upload in settings, and your photos automatically sync to the cloud.
On Windows, OneDrive comes pre-installed and appears as a folder in File Explorer. Photos uploaded from your iPhone appear in OneDrive\Pictures\Camera Roll, accessible like any local folder but actually stored in the cloud. This transparent integration makes OneDrive feel like a natural extension of Windows storage.
Dropbox
Dropbox offers 2GB free storage with paid plans starting at 2TB for $11.99/month. The Dropbox app on iPhone includes camera upload functionality that automatically backs up photos when connected to Wi-Fi. On Windows, the Dropbox desktop app creates a special Dropbox folder that syncs bidirectionally with the cloud.
While Dropbox provides less free storage than competitors, it offers superior file versioning and recovery options. Deleted photos remain recoverable for 30 days on free accounts and indefinitely on paid accounts, providing an additional safety net against accidental deletion.
Specialized Transfer Apps
Apps like PhotoSync, SnapDrop, and Send Anywhere specialize in direct device-to-device wireless transfer without cloud intermediaries. These apps create temporary local connections between your iPhone and PC over the same Wi-Fi network, transferring photos directly at high speed without consuming internet bandwidth or cloud storage.
PhotoSync, for example, allows you to select photos on your iPhone and transfer them directly to your Windows PC running the PhotoSync companion app. The transfer happens over your local network, making it faster than cloud methods and maintaining original quality without compression. This approach works excellently for occasional bulk transfers when you don’t want ongoing cloud synchronization.
Troubleshooting Common iPhone Photo Transfer Problems
Even with proper setup, iPhone to Windows photo transfers sometimes fail. These solutions address the most frequent problems users encounter.
iPhone Not Appearing in Windows
If your iPhone doesn’t show up in File Explorer or the Photos app after connecting, try these steps in order:
First, verify your cable connection by unplugging and reconnecting both ends. Try different USB ports on your PC, preferably ones directly on the motherboard rather than front panel or hub connections. USB 3.0 ports (usually blue inside) provide more reliable connections than USB 2.0.
Unlock your iPhone and check for the “Trust This Computer” prompt. If it doesn’t appear, go to Settings > General > Transfer or Reset iPhone > Reset Location & Privacy. This clears all trusted computers, forcing the prompt to reappear on next connection.
Restart both devices. This simple step resolves a surprising number of connection issues caused by temporary software glitches. Restart your iPhone by holding the power button (and volume button on newer models) until the slider appears, then restart Windows normally.
Update or reinstall Apple device drivers. Open Device Manager on Windows (right-click Start menu and select Device Manager), expand “Portable Devices,” find your iPhone, right-click it, and select “Update driver.” Choose “Search automatically for drivers” and let Windows find updated software.
If your iPhone appears with a yellow exclamation mark in Device Manager, the driver installation failed. Right-click the device, select “Uninstall device,” disconnect your iPhone, restart Windows, then reconnect your iPhone to trigger fresh driver installation.
“Device Is Unreachable” Error
This frustrating error appears when copying photos through File Explorer, often midway through transfers. Several factors cause this issue:
Your iPhone’s screen locked during transfer. iOS restricts file access when locked for security. Keep your iPhone unlocked and set “Auto-Lock” to “Never” temporarily by going to Settings > Display & Brightness > Auto-Lock during large transfers. Remember to re-enable auto-lock afterward for security.
The Photos app is open on your iPhone. Close the Photos app completely by swiping up from the bottom of the screen (or double-clicking the home button on older iPhones) and swiping the Photos app away. iOS sometimes locks photo database access when the Photos app is actively running.
Transfer smaller batches of photos rather than thousands at once. Copy 500-1000 photos at a time instead of attempting to move an entire 10,000-photo library in one operation. This approach prevents timeout errors and makes it easier to identify and retry failed segments.
Photos Won’t Open on Windows
If transferred photos display as unopenable files, format compatibility is usually the culprit. As mentioned earlier, HEIC files require Windows 10 version 1803 or later with HEVC Video Extensions installed. Videos in HEVC format (recorded as .MOV files) need the same codec support.
Alternatively, convert HEIC files to JPEG using free online converters or desktop software like iMazing HEIC Converter. While this adds an extra step, it ensures maximum compatibility across all Windows software and older PC systems.
Slow Transfer Speeds
USB transfer speeds vary dramatically based on cable quality, USB port version, and device health. USB 2.0 maxes out around 35MB/s in practice, while USB 3.0 reaches 100MB/s or higher. Using a USB 2.0 cable or port creates a bottleneck even if your devices support faster speeds.
Background processes on either device can also slow transfers. Close unnecessary apps on your iPhone and Windows PC before starting large transfers. Disable antivirus software temporarily during transfers, as real-time scanning of each transferred photo significantly impacts speed. Remember to re-enable antivirus protection afterward.
For cloud-based transfers, internet speed is the limiting factor. Uploading 50GB of photos on a 10Mbps upload connection takes over 11 hours. Consider USB transfer for initial bulk imports, then use cloud sync for ongoing smaller additions. If you’re experiencing general connectivity issues, you might want to restart your Wi-Fi router to improve upload speeds.
Frequently Asked Questions About Transferring iPhone Photos
Why can’t I see all my iPhone photos in File Explorer?
File Explorer only shows photos physically stored on your iPhone. If you use iCloud Photos with “Optimize iPhone Storage” enabled, many full-resolution photos exist only in iCloud, not on your device. Your iPhone stores smaller preview versions to save space. To transfer these photos, either download them to your iPhone first by opening them in the Photos app and waiting for download completion, or use iCloud for Windows to access the full-resolution versions directly from cloud storage.
Do transferred photos keep their original quality?
Yes, when using USB cable transfer methods (Windows Photos app or File Explorer), photos maintain their original quality and resolution exactly as captured by your iPhone. Cloud services vary: iCloud Photos transfers full-resolution originals by default, Google Photos offers a choice between “Original quality” and “Storage saver” (compressed), OneDrive transfers originals, and Dropbox transfers originals. Always verify your cloud service settings if quality preservation is critical for professional work.
Can I transfer Live Photos to Windows?
Live Photos transfer as two separate files: a HEIC or JPEG still image and a MOV video file containing the motion component. Windows doesn’t have native Live Photo support, so you’ll see these as separate files rather than the integrated experience on Apple devices. Both files share similar names (like IMG_0001.HEIC and IMG_0001.MOV) to indicate they belong together. Some third-party apps can combine these into playable Live Photos on Windows, but most users simply keep both files or use only the still image.
Conclusion
Transferring photos from iPhone to Windows PC no longer needs to be a technical challenge. Whether you choose the speed and directness of USB cable transfer through the Windows Photos app or File Explorer, the convenience of automatic iCloud synchronization, or the flexibility of third-party cloud services like Google Photos, you now have multiple proven methods at your fingertips. For one-time bulk transfers, USB connection offers the fastest and most reliable approach. For ongoing backup and access across multiple devices, cloud solutions provide superior convenience despite requiring initial setup and internet bandwidth.
The key is matching the method to your specific needs: file organization preferences, internet availability, storage capacity, and whether you need one-time transfer or continuous synchronization. With the troubleshooting techniques covered here, you can overcome the most common obstacles and establish a reliable workflow for preserving your iPhone memories on Windows. Start with the simplest method that fits your situation, and remember that you can always combine approaches—using USB for initial bulk imports and cloud services for daily automatic backups creates a comprehensive photo management system.
Pingback: How to Scan a QR Code From a Screenshot on iPhone: 3 Ways