How to Transfer Everything to a New Phone (Android & iPhone)
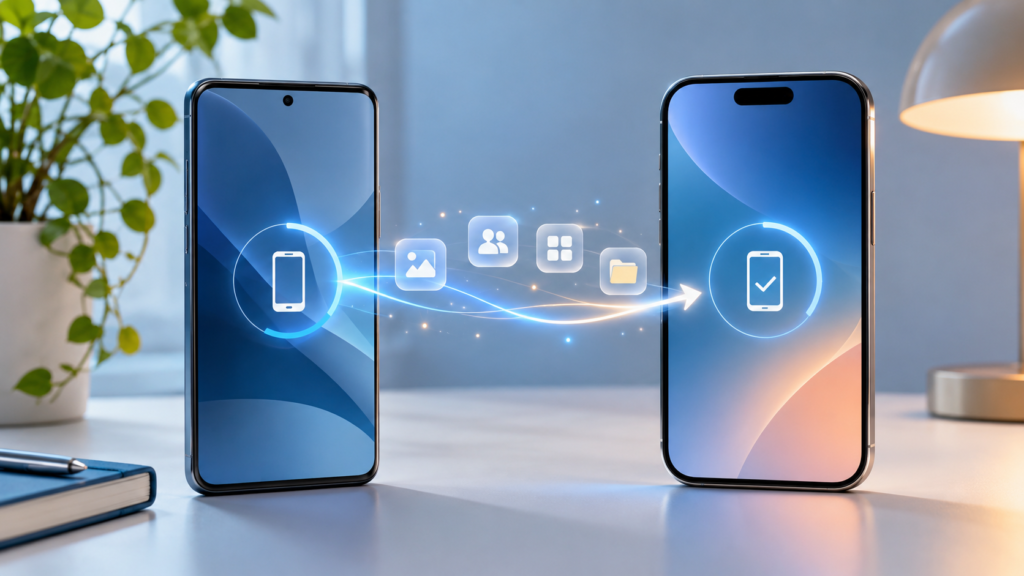
Unboxing a new phone is exciting — right up until you realize everything you care about still lives on the old one. The good news is that learning how to transfer everything to a new phone is far easier than it used to be, whether you’re staying on the same platform or jumping between Android and iPhone.
This guide covers every path: Android to Android, iPhone to iPhone, and cross-platform moves, plus the tricky items that never move automatically, like WhatsApp chats, two-factor authentication apps, and eSIMs.
Key Takeaways
- Back up, charge, and update both phones before you begin
- Android-to-Android transfers work best over a cable or Google backup
- Quick Start moves everything between iPhones wirelessly
- Move to iOS handles switching from Android to iPhone during setup
- 2FA apps, eSIMs, and WhatsApp need manual attention
Before You Start: What Transfers Automatically and What Needs a Backup
A smooth transfer starts before you even power on the new device. Take ten minutes to prepare, and you’ll avoid most of the problems that make people think their data is lost.
- Charge both phones above 50% and connect them to Wi-Fi. Large transfers take a while and drain batteries fast — plugging both devices in is even better.
- Update the software on both devices. Outdated software is one of the most common reasons transfer tools like Quick Start fail.
- Sign in to your account. Android users should confirm a Google account backup exists; iPhone users should check iCloud. Run a fresh backup if the last one is old.
- Check storage on the new phone. If it has less space than your old one, clean up first — our guide to freeing up storage space on your smartphone can help you trim the excess.
- Temporarily disable VPN apps on both phones if you use them — VPNs can interfere with the direct local connections these transfer tools create.
Most content moves automatically once you pick a transfer method:
- Contacts, call logs, and text messages
- Photos and videos stored on the device
- Your app list (apps are re-downloaded, not copied)
- Device settings, home screen layout, and Wi-Fi passwords
Some things need manual attention no matter which method you use:
- Two-factor authentication codes (they’re stored on the device, not in backups)
- Logins for banking and other security-sensitive apps
- WhatsApp chats when switching platforms
- Payment cards in Apple Pay or Google Wallet — these must be re-added for security
- Downloaded files like PDFs, music, and offline documents
How to Transfer Everything from Android to Android
Moving between Android phones is the most flexible scenario because you have two solid options: a direct cable transfer or a restore from your Google backup.
Option 1: Copy directly with a cable (recommended)
- Turn on your new Android phone and follow the setup screens until you see the option to copy apps and data.
- Choose to copy from an old device and connect the two phones with a USB cable when prompted — a USB-C to USB-C cable or a USB OTG adapter both work.
- Unlock your old phone, confirm the connection, and select what you want to move: apps, messages, call history, photos, videos, and settings.
- Keep the cable connected until the transfer finishes, then complete setup.
The cable method is faster than wireless and does a better job with large photo libraries and locally stored files. If you don’t have a suitable cable, most phones offer a wireless option on the same setup screen — it’s slower, but it works fine for smaller libraries.
Option 2: Restore from a Google backup
- On your old phone, open Settings → Google → Backup (paths vary slightly by manufacturer) and tap Back up now.
- On the new phone, sign in with the same Google account during setup.
- Select the backup from your old device and let the restore run.
Samsung owners: Samsung Smart Switch is an excellent alternative that works over a cable or wirelessly, and it can move more Samsung-specific settings than the standard tools. It comes preinstalled on most Galaxy phones.
How to Transfer Everything from iPhone to iPhone Using Quick Start
Quick Start is Apple’s built-in migration tool, and it works on any iPhone released in the last several years. All you need is both phones nearby with Bluetooth and Wi-Fi enabled.
- Turn on your new iPhone and place it next to your old one.
- A Quick Start prompt appears on the old iPhone — tap Continue.
- An animation appears on the new phone. Hold your old iPhone over it to scan, then enter your old phone’s passcode on the new one.
- Set up Face ID or Touch ID when prompted.
- Choose Transfer from iPhone to copy directly device-to-device, or Download from iCloud to restore from your latest iCloud backup.
The direct “Transfer from iPhone” option is the most complete method — it moves your apps, settings, photos, messages, and even some app data over a wireless connection between the two devices. You can also connect the two iPhones with a compatible cable for a faster wired transfer. Keep both phones plugged in and close together; a large library can take an hour or more.
If Quick Start never appears: make sure Bluetooth is on for both phones, restart both devices, and update iOS on the old phone. If it still fails, back up to iCloud on the old device and choose Restore from iCloud Backup during setup instead. Apple’s official Quick Start documentation covers additional requirements.
How to Switch from Android to iPhone with Move to iOS
Apple’s free Move to iOS app is the official way to switch from Android to iPhone. Download it from the Google Play Store on your Android phone before you start setting up the iPhone.
- Power on your new iPhone and follow the setup steps until you reach the Apps & Data screen.
- Tap Move Data from Android. A code appears on the iPhone.
- Open Move to iOS on your Android phone, agree to the terms, and enter the code.
- The iPhone creates a private Wi-Fi connection to your Android device. Select what to move and wait for the loading bar on the iPhone to finish — even if Android says it’s done earlier.
Move to iOS transfers contacts, text messages, photos and videos, calendars, mail accounts, web bookmarks, WhatsApp chats, and some free apps that exist on both stores. Apple’s Move to iOS guide lists the full details.
Important: Move to iOS only works during the iPhone’s initial setup. If you’ve already set up your iPhone, you either need to erase it and start over (Settings → General → Transfer or Reset iPhone → Erase All Content and Settings) or move data manually.
Troubleshooting tips: Keep the Android screen on and stay in the app until the transfer completes — notifications, calls, and other apps can interrupt it. Turning off cellular data on the Android phone helps, since smart network switching can silently break the connection. If the transfer stalls repeatedly, restart both phones and try again rather than reconnecting mid-transfer.
Paid apps don’t carry over, and neither do app logins or most app data — expect to sign in to everything again.
How to Switch from iPhone to Android
Going the other direction is now almost as smooth, thanks to cable-based copying built into modern Android setup.
Cable transfer during setup:
- Turn on your new Android phone and choose the option to copy data from another device.
- Select iPhone as the source, then connect the two phones with a Lightning-to-USB-C cable (or the appropriate adapter).
- Trust the device on your iPhone, then pick what to copy: contacts, calendars, photos, videos, messages, and on supported phones like Google Pixel and Samsung Galaxy, WhatsApp data.
Samsung Galaxy phones can also use Smart Switch for this move — it pulls data from an iPhone over a cable or from an iCloud backup if a cable isn’t available.
No cable? Sync through your Google account instead:
- Contacts: On the iPhone, go to Settings → Contacts → Accounts → Add Account → Google, sign in, and enable contact syncing.
- Photos: Install Google Photos on the iPhone, let it back up your library, then sign in on Android.
- Calendar and email: If you used Gmail and Google Calendar, everything appears automatically after signing in.
One critical step before you switch: turn off iMessage. Go to Settings → Messages and toggle iMessage off, then do the same for FaceTime under Settings → FaceTime. If you skip this, texts from iPhone-using friends may keep routing to iMessage and never reach your Android. If you no longer have the iPhone, Apple offers a deregistration page on its support site.
Be ready for small daily differences too — for example, sharing a Wi-Fi password between an iPhone and an Android works differently than the iPhone-to-iPhone tap you’re used to.
How to Transfer WhatsApp Chats and Other App-Specific Data
WhatsApp is the app people ask about most, because its cloud backups don’t cross platforms — a Google Drive backup can’t restore to an iPhone, and an iCloud backup can’t restore to Android.
- Android to iPhone: Use Move to iOS during setup — it’s the only official path and now includes WhatsApp history.
- iPhone to Android: Use the cable method during Android setup on supported phones such as Pixel and Galaxy devices.
- Same platform: Back up to Google Drive (Android) or iCloud (iPhone) inside WhatsApp (Settings → Chats → Chat backup), then restore during setup on the new phone.
Other messengers behave differently. Telegram stores chats in the cloud, so your full history appears as soon as you sign in on any device. Signal keeps history on the device itself, but offers a direct device-to-device transfer between phones on the same platform — run it before you wipe the old phone.
For everything else, the rule of thumb is simple: data tied to an account survives, data tied to the device doesn’t.
- Banking and payment apps require a fresh login, and many force you to re-verify your identity — plan for a few verification texts.
- Streaming apps like Spotify and Netflix keep playlists and watch history in your account; just sign in and re-download offline content.
- Password managers sync through their own cloud, so install the app, sign in, and everything appears.
- Notes and documents stored in iCloud, Google Drive, or OneDrive transfer with your account. Files saved only to local storage need a cable, cloud upload, or computer copy.
Moving Your SIM, eSIM, Phone Number, and Two-Factor Authentication Apps
Your phone number lives on your SIM or eSIM, not the device — so it travels with you automatically once the SIM is moved or re-activated.
Physical SIM: Power off both phones, eject the tray on your old phone, and move the card into the new one. If the new phone is carrier-unlocked or on the same carrier, service usually works within minutes.
eSIM: This is where people get stuck, because eSIMs can’t just be pulled out — and recent US-model iPhones have no physical SIM tray at all, so eSIM is your only option there. Options vary by carrier:
- iPhones support eSIM Quick Transfer during setup, and many carriers allow conversion from a physical SIM in Settings → Cellular.
- Android eSIM transfers depend on the manufacturer and carrier — some complete during setup, others need the carrier’s app, a QR code, or a store visit.
If in doubt, contact your carrier before wiping the old phone — some require the old device to be active to approve the transfer.
Two-factor authentication apps are the most commonly forgotten item. Authenticator codes are generated on your device and rarely sync through normal backups.
- Google Authenticator: Use the app’s Transfer accounts feature to export accounts via QR code to your new phone, or let accounts sync to your signed-in Google account.
- Authy: Enable multi-device mode and sign in on the new phone — everything syncs.
- App-specific codes (banks, work logins): sign in on the new device before wiping the old one. Keep your recovery codes somewhere safe.
If you haven’t secured your accounts yet, this is also a good moment to turn on two-step verification for your Google account while everything is fresh in your mind.
After the Transfer: Verifying Your Data and Safely Wiping Your Old Phone
Before you erase anything, spend fifteen minutes confirming the transfer actually worked:
- Scroll to the oldest photos and messages, not just the newest — partial transfers often lose older items first.
- Check that your contact count looks right and that a few real contacts open correctly.
- Open WhatsApp and confirm your chat history is intact.
- Make a call, send a text, and test mobile data to confirm the SIM or eSIM activated.
- Open your authenticator app and confirm codes are generating.
- Check downloaded files, offline music, and PDFs — locally stored items are the most commonly skipped.
- Re-add payment cards to Apple Pay or Google Wallet — they never transfer for security reasons.
Keep your old phone charged and intact for at least a week or two. It costs nothing, and it’s the easiest fix if you discover something missing. For extra safety, back it up to a computer first — our guide on transferring photos from iPhone to a Windows PC walks through several methods, and Android users can simply plug in and copy folders.
To wipe an Android phone:
- Sign out of your Google account, then open Settings → System → Reset options → Erase all data (factory reset). On Samsung, it’s under General management → Reset.
- Confirm and let it erase. Modern Android phones encrypt data by default, so a factory reset is sufficient protection.
- Remove the SIM card and delete the device from your Google account at myaccount.google.com.
To wipe an iPhone:
- Go to Settings → General → Transfer or Reset iPhone → Erase All Content and Settings.
- Enter your Apple ID password when asked — this turns off Find My and removes Activation Lock, which is essential if you’re selling or trading in the phone.
Never sell or hand over a phone that still has Find My or a Google account attached — the next owner will be locked out, and your data stays linked to it.
Frequently Asked Questions
Can I transfer data to a new phone after setup is complete?
Partially. Signing in to your Google or Apple account syncs contacts, calendars, photos, and purchases anytime, and tools like Smart Switch can run later. But Move to iOS and the cable-based iPhone-to-Android copy only run during initial setup, so you’d need to erase the new phone and start over to use them.
Do I need a SIM card in the new phone to transfer data?
No. Every method in this guide works over Wi-Fi or a cable, so you can move your data before activating service. Insert the SIM or activate the eSIM whenever you’re ready — calls and texts start working once the carrier activates it.
Will transferring delete anything from my old phone?
No. All of these tools copy your data rather than move it, so the old phone stays fully intact until you erase it yourself. That’s exactly why it’s worth verifying everything before you wipe.
How long does a phone-to-phone transfer take?
Anywhere from fifteen minutes to a couple of hours, depending on how much data you have and the method. Cable transfers are significantly faster than wireless, and a 100 GB photo library can easily take an hour or more — keep both phones plugged in.
Will all my apps transfer to the new phone?
Your app list transfers and the apps re-download automatically, but logins and in-app data often don’t survive. Paid apps move between phones on the same platform through your store account; switching platforms means repurchasing them.
Wrapping Up
Transferring everything to a new phone comes down to picking the right tool for your situation — cable or Google backup for Android-to-Android, Quick Start for iPhone-to-iPhone, Move to iOS for Android-to-iPhone, and a cable for the reverse. Handle the manual items (2FA, eSIM, WhatsApp, payment cards) before wiping, verify your oldest data survived, and keep the old phone around until you’re sure. Do that, and the only thing left to set up is which pocket the new phone lives in.