How to Set Up a Smart Doorbell Camera: Ring, Nest & Budget
Learning how to set up a smart doorbell camera is one of the most practical smart home upgrades you can make, and most installations take under an hour with basic tools. Whether you bought a Ring Video Doorbell, a Google Nest Doorbell, or a budget model from brands like Eufy, Tapo, Blink, or Wyze, the overall process is the same: pick the right power option, confirm your wiring and Wi-Fi can support it, mount the unit, pair it with the app, and fine-tune your alerts. This guide walks through each step so you can get a working video doorbell on the first try, without the trial-and-error that frustrates most first-time installers.
Key Takeaways
- Decide between a battery-powered or hardwired doorbell before you buy — it determines how easy installation will be.
- Check your existing chime type, transformer voltage (typically 16–24 VAC), and Wi-Fi strength at the door to avoid the most common failures.
- Mounting takes four to six steps; always shut off the breaker before touching existing doorbell wires.
- Tuning motion zones and alert types is what separates a useful doorbell from one that pings you every time a car passes.
- Most setup problems come down to weak Wi-Fi or insufficient power, and subscriptions are optional if you choose a local-storage model.
Choose Between Battery-Powered and Hardwired Doorbell Models
The first decision in any video doorbell installation is how the device gets power. Battery-powered models mount almost anywhere because they don’t need existing wiring — you charge the battery pack, screw the bracket to the wall, and you’re done. The trade-off is maintenance: you’ll need to recharge or swap the battery every few weeks to few months depending on activity, and cold weather shortens battery life noticeably.
Hardwired models connect to your existing doorbell wiring and draw continuous low-voltage power from a transformer. They never need recharging, they’re often slimmer, and they can ring your existing indoor chime. Many battery doorbells — including the battery versions of the Ring Video Doorbell and the Nest Doorbell — can also be hardwired as a hybrid setup, where the wires trickle-charge the battery so you rarely have to think about it.
| Battery-Powered | Hardwired | |
|---|---|---|
| Installation | Easiest — no wiring required | Needs existing doorbell wires or a new transformer |
| Maintenance | Recharge or swap battery periodically | Essentially none |
| Existing chime | Usually no (uses plug-in chimes or smart speakers) | Yes, in most cases |
| Best for | Renters, homes without doorbell wiring | Homes replacing a working wired doorbell |
For brands, Ring’s lineup spans battery and wired models at several price points, Google’s Nest Doorbell comes in battery and wired versions, and budget options like the Eufy video doorbells, TP-Link Tapo, Blink Video Doorbell, and Wyze models cover the same ground for less money — often with the bonus of local video storage so you can skip subscription fees entirely.
Check Compatibility: Chime, Transformer Voltage, and Wi-Fi Signal
Skipping this step is the number one reason doorbell setups fail. Ten minutes of checking before you mount anything will save you from a doorbell that won’t power on, a chime that buzzes, or a camera that constantly drops offline.
Existing Chime Compatibility
If you’re hardwiring, open your indoor chime cover and identify whether it’s mechanical or digital. A mechanical chime has metal bars or tubes struck by physical plungers — it produces a classic “ding-dong.” A digital chime plays an electronic tone or melody through a speaker. This matters because you’ll select the chime type inside the app during setup, and the wrong setting can cause weak rings, buzzing, or no sound at all.
Some wired doorbells also require a small accessory installed inside the chime box. Ring’s wired models use a power kit, and the wired Nest Doorbell ships with a chime connector puck that regulates power to the chime. Check what’s in the box before you start so you’re not hunting for it mid-install.
Transformer Voltage
Most wired smart doorbells need a transformer supplying roughly 16–24 VAC — Nest’s wired doorbell specifies 16–24 VAC, while many Ring models accept a wider 8–24 VAC range. Your transformer is usually mounted near the electrical panel, in the basement, attic, garage, or next to the chime itself, and its voltage and VA rating are printed on the label. Older homes often have underpowered 10 VAC transformers that worked fine for a simple chime but can’t sustain a camera.
If you own a multimeter, set it to AC voltage and measure across the two doorbell wires at your front door to confirm the actual voltage delivered. If the reading is below your model’s minimum, you’ll need a transformer upgrade — a straightforward job for an electrician, and a manageable DIY task if you’re comfortable working with household wiring and follow safety precautions. If there’s no wiring at all, a plug-in doorbell power adapter is a cheap workaround for many models.
Wi-Fi Signal Strength at Your Door
Front doors are notorious Wi-Fi dead zones — they’re far from the router, blocked by exterior walls, brick, and metal doors. Before mounting, stand at the door with your phone on your home Wi-Fi and check the signal. If it’s weak, your doorbell will struggle too. Ring’s app shows signal strength as an RSSI value, and a reading around -60 dBm or better is what you want; anything in the -70s will cause missed events and laggy live view.
If the signal is marginal, you have options: reposition your router closer to the entry, add a node to a mesh Wi-Fi network near the front of the house, or use a chime device that doubles as an extender, like the Ring Chime Pro. Note that most budget doorbells only support 2.4 GHz Wi-Fi, which actually helps here — 2.4 GHz travels farther through walls than 5 GHz.
Gather the Tools and Prepare the Mounting Area
You don’t need much, and most doorbells include anchors, screws, and a mounting wedge in the box. Have these ready before you start:
- Drill with a small bit, plus a masonry bit if you’re mounting into brick, stucco, or concrete
- Phillips screwdriver (many kits include one)
- Level — even a phone level app works
- Pencil and a stepladder
- Multimeter (hardwired installs only)
- The included wedge or corner kit if your doorbell faces sideways from a narrow door frame
Prep matters more than people expect. Charge the battery fully and complete the in-app pairing before climbing a ladder — it’s much easier to scan the QR code and troubleshoot connectivity while holding the doorbell in your hand. Plan a mounting height of roughly four feet (about 1.2 m) off the ground, which puts the camera at the right angle for faces and packages. Finally, glance at what the camera will see: avoid aiming directly into the rising or setting sun, and check for a nearby wall that could reflect infrared light and wash out night vision.
Install the Doorbell: Mounting and Wiring Steps
Battery-Powered Installation
- Complete the app setup and firmware update with the doorbell indoors (details in the next section).
- Hold the mounting bracket against the wall at your chosen height, level it, and mark the screw holes with a pencil.
- Drill pilot holes. On wood or siding, screws usually go straight in; on brick or stucco, drill holes for the included wall anchors first.
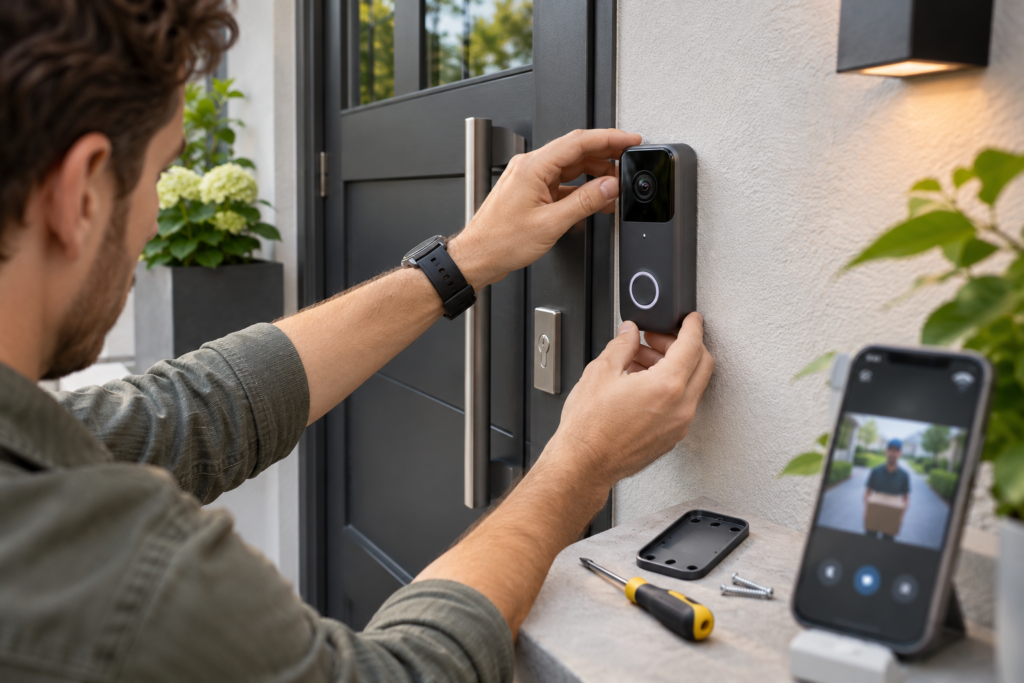
- Attach the bracket — with the wedge behind it if you need an angled view — then snap or slide the doorbell onto the bracket.
- Secure it with the included security screw, which requires the special bit in the box and discourages casual theft.
Hardwired Installation
- Turn off power to the doorbell circuit at the breaker. The voltage is low, but shorting the wires can blow the transformer or damage the new doorbell. Verify power is off by pressing your old doorbell button — the chime should stay silent.
- Unscrew the old doorbell button and gently pull it away so the two wires are exposed. Don’t let them slip back inside the wall; a bit of tape helps.
- If your model requires a power kit or chime connector (Ring’s wired models and the wired Nest Doorbell do), install it inside the indoor chime box now, following the included diagram.
- Mount the bracket as described above, then connect the two wires to the terminals on the back of the doorbell. Doorbell wire is low-voltage AC, so it doesn’t matter which wire goes to which terminal — just make sure the connections are snug and not touching each other.
- Attach the doorbell to the bracket, restore power at the breaker, and give it a minute or two to boot before testing.
If the doorbell powers up but the app later reports insufficient power, the wiring is connected but the transformer can’t keep up — go back to the voltage check above.
Connect the Doorbell to the App and Your Wi-Fi Network
Pairing follows the same pattern across brands, with minor differences in app and terminology. For Ring, open the Ring app, tap the menu and choose Set Up a Device, then scan the QR code printed on the doorbell or its packaging. The app will prompt you to join the doorbell’s temporary Wi-Fi network (it appears as something like “Ring-XXXX”), after which you select your home network and enter the password.
For Nest, everything happens in the Google Home app: tap + → Set up device → New device and scan the QR code. Google Home handles the Wi-Fi handoff automatically using Bluetooth and your phone’s stored network credentials, which makes it one of the smoother pairing experiences. Budget brands follow the same flow in their own apps — the eufy Security app, Tapo app, Wyze app, or Blink app (Blink pairs through its Sync Module).
A few tips that prevent most pairing failures: keep your phone on the same Wi-Fi network you’re assigning to the doorbell, turn off any VPN on your phone during setup, and make sure you’re connecting to a 2.4 GHz network if your model doesn’t support 5 GHz. After pairing, let the firmware update run completely — it can take several minutes, and interrupting it occasionally bricks devices. Once updated, name the doorbell something useful like “Front Door” so it displays correctly in smart home apps later.
Configure Motion Zones, Alerts, and Chime Settings
An out-of-the-box doorbell with default settings will flood your phone with notifications. The fix is motion zones: in the app, draw detection areas that cover your walkway and porch while excluding the street, the neighbor’s driveway, and that flag that waves in the wind. Both Ring and Nest let you create multiple zones and adjust sensitivity sliders; budget apps offer similar controls, sometimes labeled “activity zones.”
Next, enable smart alert filters if your model offers them. Person detection and package alerts dramatically cut noise — instead of “motion detected” thirty times a day, you get a handful of alerts that actually matter. On Ring, rich notifications show a snapshot preview in the alert itself; on Nest, the app can identify people, packages, animals, and vehicles. Also configure privacy zones (areas the camera masks out entirely) if your lens unavoidably covers a neighbor’s window.
Finally, set up your chime options. Hardwired installs need the correct chime type selected in the app — mechanical or digital — or you’ll get buzzing or silence. For battery installs, pair a plug-in chime accessory or use smart speakers for visitor announcements. While you’re in settings, check video quality: enabling HDR on supported models helps when your porch is backlit, and bumping resolution up is worth it if your Wi-Fi can handle it.
Link the Doorbell to Alexa, Google Home, or Other Smart Home Platforms
Doorbells become far more useful when connected to a smart speaker or display, since you can hear announcements and pull up live video hands-free. For Ring with Alexa, open the Alexa app, search the skills section for Ring, enable the skill, sign in, and let Alexa discover the device. Once linked, Echo speakers can announce “Someone is at the front door,” and an Echo Show can display the live feed automatically or on command — our guide on connecting Alexa to smart home devices covers the skill-linking process in more detail.
Nest doorbells integrate natively with Google Home — no skill needed. Visitor announcements can play through Nest speakers and displays, and a Nest Hub can show the live feed automatically when someone rings. Cross-platform support is the part that trips people up: Ring works best with Alexa and has essentially no official Google Home integration, while the Nest Doorbell can work with Alexa through the Google Nest skill for announcements and live view. Neither Ring nor Nest offers native Apple HomeKit support, so check a budget model’s spec sheet carefully if HomeKit matters to you — Eufy, Tapo, and others vary by model.
Troubleshoot Common Setup Problems and Understand Subscription Options
Common Setup Problems and Fixes
- Doorbell won’t connect to Wi-Fi: Re-check the password, confirm you’re using 2.4 GHz if required, and move the router or add a mesh node if the RSSI is weaker than about -65 dBm. Router security set to WPA3-only can also block older devices — try WPA2/WPA3 mixed mode.
- “Insufficient power” or random offline events on a wired install: Your transformer is likely under the model’s voltage or VA requirement. Measure the wires with a multimeter and upgrade the transformer if it’s below spec.
- Indoor chime doesn’t ring or buzzes: The chime type is set wrong in the app, the power kit/chime connector wasn’t installed, or a digital chime isn’t compatible — some setups need the chime bypassed entirely.
- Battery drains in days instead of months: The camera is waking constantly. Tighten motion zones, lower sensitivity, reduce snapshot frequency, and remember that freezing temperatures slow or stop trickle charging and sap lithium batteries.
- Laggy live view or choppy video: Usually upload bandwidth, not download. Run a speed test near the door; a few Mbps of stable upload is typically enough for one doorbell.
Many of these are the same smart home setup mistakes that affect cameras, plugs, and sensors alike — weak Wi-Fi and skipped compatibility checks top the list. If you’re stuck on a brand-specific step, the official support hubs for Ring and Google Nest have model-by-model install videos and diagnostic tools.
Subscription Plans and Local-Storage Alternatives
Every major doorbell works without a subscription for live view and real-time motion or ring alerts — what you typically lose is recorded video history. Ring Protect unlocks video recording and richer alert features, while Nest Aware extends Nest’s event history (newer Nest doorbells include a short free event window) and adds features like familiar-face detection; an upper Nest Aware tier enables 24/7 recording on wired models. Pricing changes periodically, so check current plans before committing.
If monthly fees are a dealbreaker, buy for local storage up front. Eufy doorbells store clips on an in-home HomeBase or microSD, TP-Link Tapo models accept microSD cards, and Blink stores footage on a USB drive through the Sync Module. You give up some cloud convenience, but your footage stays in your house and your total cost stays fixed. Whichever route you choose, enable two-factor authentication on the doorbell account and use a strong unique password — a camera on your front door is exactly the kind of device covered in our smart home security tips.
Frequently Asked Questions
Can I install a smart doorbell without existing doorbell wiring?
Yes. Choose a battery-powered model, or use a plug-in power adapter designed for your doorbell — both let you skip wiring entirely. You’ll rely on a plug-in indoor chime or smart speaker announcements instead of a traditional chime.
What transformer voltage does a smart doorbell need?
Most wired models require 16–24 VAC, though some (like certain Ring doorbells) accept 8–24 VAC. Check your model’s spec sheet, then verify your transformer’s printed rating or measure the wires with a multimeter.
Do smart doorbell cameras work without a subscription?
Yes for live view, two-way talk, and real-time alerts. Recorded video history usually requires a plan like Ring Protect or Nest Aware — unless you buy a local-storage model from Eufy, Tapo, or Blink, which saves clips without monthly fees.
Conclusion
Setting up a smart doorbell camera comes down to three things: choosing the right power option, verifying compatibility before you drill, and spending ten minutes tuning motion zones after pairing. Do those in order and a Ring, Nest, or budget doorbell will reward you with reliable alerts instead of constant false alarms. Once it’s running, consider folding it into routines — like turning on porch lights when motion is detected — to get even more value out of your front door.