How to Set Up and Activate an eSIM on iPhone or Android
Learning how to set up and activate an eSIM on iPhone or Android is much easier than it sounds, and in most cases the whole process takes under ten minutes. An eSIM replaces the plastic SIM card with a digital profile your carrier sends to your phone, so there is nothing to insert, lose, or wait for in the mail. This guide walks you through compatibility checks, every activation method on both platforms, dual SIM setup, transferring an eSIM to a new device, and fixes for the most common activation errors.
Key Takeaways
- An eSIM is a built-in digital SIM that stores carrier profiles without a physical card
- Confirm your phone and carrier support eSIM before buying a plan
- iPhones support carrier activation, Quick Transfer, QR codes, and manual setup
- Android eSIM setup varies by manufacturer but usually starts in SIM settings
- Most activation failures come down to Wi-Fi, used QR codes, or carrier locks
What an eSIM Is and Why You Might Use One
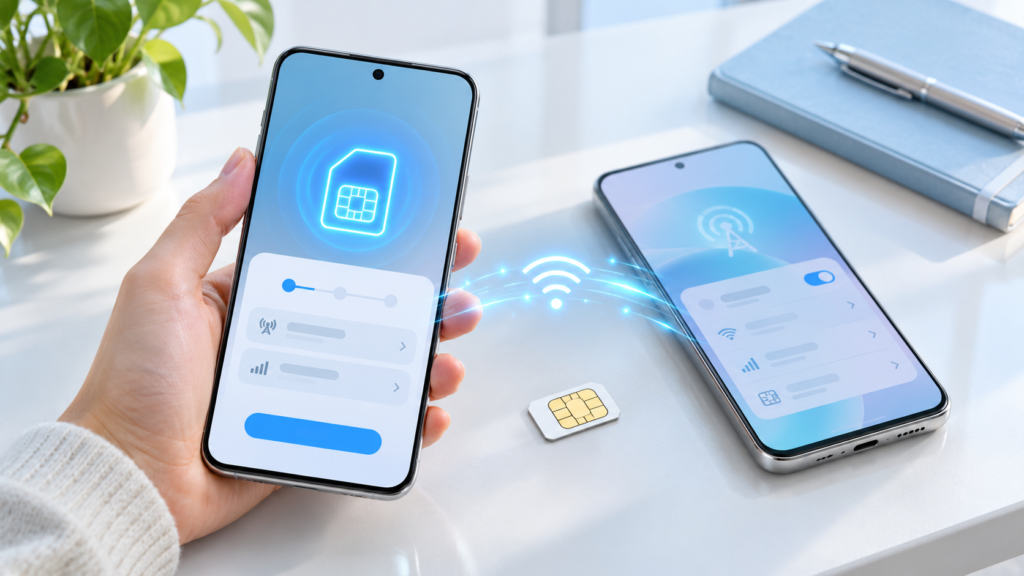
An eSIM (embedded SIM) is a small chip soldered directly onto your phone’s motherboard that does the same job as a removable SIM card. Instead of swapping plastic cards, you download a carrier profile — sometimes called a digital SIM card — onto that chip. The profile holds the credentials that identify you to the mobile network, just like a physical SIM does.
The practical benefits are significant. You can activate service in minutes without visiting a store, store multiple carrier profiles on one device, and keep two lines active at the same time — for example, a personal number and a work number. Recent iPhones can store eight or more eSIM profiles, though only two can be active simultaneously. Many Android phones store several profiles as well, and some newer flagships from Google and Samsung can run two eSIMs at once.
Travelers get perhaps the biggest advantage. Travel eSIM plans from online providers let you buy local or regional data before a trip and install it over Wi-Fi, so you land with working data and skip expensive roaming charges. There is also a small security benefit: because an eSIM cannot be physically popped out of a stolen phone, a thief cannot quickly pull your SIM and hijack your number by inserting it elsewhere.
That said, eSIM is not perfect. Moving service between phones can be slightly more involved than swapping a card, and not every carrier or prepaid brand supports it yet. That is exactly what the rest of this guide helps you handle.
Check Device and Carrier Compatibility Before You Start
Before you buy a plan or request a QR code, confirm two things: your phone has eSIM hardware, and your carrier supports eSIM activation on your plan type.
Check your phone
On iPhone, every model from the iPhone XS, XS Max, and XR onward supports eSIM. US models of the iPhone 14 and later are eSIM-only — they have no physical SIM tray at all — while the same models sold in many other countries still include a tray. The quickest check is to open Settings > Cellular (called Mobile Data in some regions) and look for an Add eSIM or Add Cellular Plan option. If it is there, your iPhone supports eSIM.
On Android, support is broader but patchier. Most eSIM-compatible phones include Google Pixel models from the Pixel 3 onward (with some regional exceptions), Samsung Galaxy S and Z series flagships released since roughly 2020, and select models from Motorola, OnePlus, and others. Because support varies by region and carrier variant, open your Settings app and search for “eSIM,” or open your SIM manager and look for an Add eSIM or Download a SIM option.
One universal check works on both platforms: dial *#06# on the phone app. If an EID number appears alongside the IMEI, your device has eSIM hardware. On iPhone you can also find the EID under Settings > General > About. If you are shopping for a new device and want eSIM support, it is worth verifying before purchase — our guide on choosing a budget smartphone covers what specs to look for.
Check your carrier and lock status
Hardware is only half the equation. Most major carriers support eSIM, and many smaller prepaid and MVNO brands do too, but support can differ between postpaid and prepaid plans on the same network. Check your carrier’s website or app for an eSIM option before you start.
Equally important: if your phone is carrier-locked, it will only accept eSIM profiles from that carrier. A locked phone will refuse activation from any other provider. If you are unsure, iPhone users can check Settings > General > About for a “Carrier Lock” field — “No SIM restrictions” means you are unlocked. Android users may need to contact their carrier to confirm.
Ways to Get an eSIM Plan from Your Carrier
Carriers deliver eSIM profiles in several ways, and the method you receive determines which activation steps you will follow.
- eSIM activation QR code. The most common method. Your carrier emails you a QR code, shows it in your online account, or prints it in-store. You scan it with your phone to download the profile.
- Carrier app activation. Many carriers let you sign into their app and tap an option like “Set up eSIM” or “Activate this device,” which pushes the profile directly.
- Carrier activation during setup. If you bought your phone from your carrier or upgraded an existing line, the eSIM may be assigned automatically and installed during initial setup.
- Convert physical SIM to eSIM. Some carriers let you convert an existing physical SIM to an eSIM right from your phone’s settings — no QR code needed. On iPhone, look for a “Convert to eSIM” option under Settings > Cellular.
- Manual details. Some carriers, especially travel eSIM providers, give you an SM-DP+ address and activation code to type in yourself instead of a QR code.
Travel eSIM providers deserve a special mention. Companies selling prepaid international data plans typically deliver the eSIM instantly by email or inside their own app. These plans are usually data-only, meaning no phone number for calls or texts, so keep your home SIM active alongside it.
How to Activate an eSIM on iPhone
Before starting, connect to Wi-Fi — eSIM activation requires an internet connection — and make sure your iPhone is running a reasonably current version of iOS. Then choose the method that matches what your carrier gave you.
Carrier activation and eSIM Quick Transfer
If your carrier assigned an eSIM to your line automatically, you may see a notification that says “Carrier Cellular Plan Ready to Be Installed.” Tap it, or go to Settings > Cellular and tap the plan waiting to be installed, then follow the prompts.
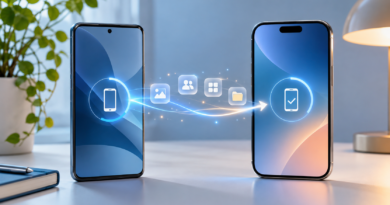
If you are moving from an older iPhone, eSIM Quick Transfer is often the smoothest path. Keep both phones nearby with Bluetooth and Wi-Fi on. During new iPhone setup, choose the option to transfer your number, or afterward go to Settings > Cellular > Add eSIM > Transfer From Nearby iPhone. Your old iPhone will show a confirmation prompt — approve it and the line moves over. Your carrier must support Quick Transfer for this option to appear.
Scan a QR code
- Open Settings > Cellular and tap Add eSIM.
- Choose Use QR Code.
- Point the camera at the QR code your carrier provided.
- Tap Continue when the cellular plan is detected, then confirm the installation.
A common beginner problem: the QR code was emailed to the very phone you are activating, so there is no second screen to scan. On recent iOS versions, you can touch and hold the QR code image inside an email, webpage, or photo, then tap the “Add eSIM” option that appears. If that does not work on your version, our guide on scanning a QR code from a screenshot on iPhone shows workarounds — or simply open the QR code on a computer, tablet, or printed page and scan it with the camera.
Enter details manually
If your carrier gave you an SM-DP+ address instead of a QR code, go to Settings > Cellular > Add eSIM, choose Use QR Code, then tap Enter Details Manually at the bottom of the screen. Type in the SM-DP+ address, the activation code, and a confirmation code if one was provided. Travel eSIM providers frequently use this method.
Carrier app or converting a physical SIM
If your carrier supports in-app activation, download their app, sign in, and look for an option like “Activate eSIM” or “Set up my device.” To convert an existing physical SIM, go to Settings > Cellular and tap Convert to eSIM under your current plan — if you do not see it, your carrier does not support conversion and you will need a QR code instead. Apple’s official documentation on setting up eSIM on iPhone covers these methods in detail.
How to Activate an eSIM on Android
Android menu names differ between manufacturers, but the flow is the same everywhere: open SIM settings, choose to add an eSIM, and scan a QR code or enter activation details. Connect to Wi-Fi first.
Google Pixel and similar devices
- Open Settings > Network & internet > SIMs.
- Tap Add SIM (or the + icon).
- Choose Download a new eSIM and scan your carrier’s QR code.
- Follow the prompts to download and enable the profile.
During initial phone setup, Pixel devices also offer a “Download a SIM instead” option when asked to insert a SIM card. If the QR scanner has trouble, look for a manual entry option — many builds let you type in an activation code instead.
Samsung Galaxy phones
- Open Settings > Connections > SIM manager.
- Tap Add eSIM.
- Choose Scan QR code or Enter activation code for manual setup.
- Confirm the download and turn the new eSIM on in SIM manager.
On Galaxy phones, the SIM manager is also where you toggle eSIMs on and off, rename them, and set preferences — handy if you keep a travel eSIM installed and only enable it on trips.
Other Android phones
On Motorola, OnePlus, Xiaomi, and other devices, the fastest approach is to open Settings and search for “eSIM.” Look for terms like “Add eSIM,” “Download a SIM,” or “Mobile plan.” Carrier apps also work on Android: many providers activate the eSIM entirely inside their app once you sign in, with no QR code required.
Set Up Dual SIM and Choose Default Lines
Once your eSIM is active, you can run it alongside a physical SIM or a second eSIM. Taking a few minutes to configure dual SIM settings prevents surprises like texting work contacts from your personal number.
On iPhone, go to Settings > Cellular. Tap each plan to rename its label — “Personal” and “Business” or “Home” and “Travel” are far clearer than “Primary” and “Secondary.” Then set three things:
- Default Line: which number is used for outgoing calls, texts, iMessage, and FaceTime.
- Cellular Data: which line provides mobile data.
- Allow Cellular Data Switching: optional, but useful if you want data to stay active on whichever line you are calling from.
iPhone also remembers which line you used for each contact, so calls to a specific person automatically use the right number. On Android, open your SIM manager and assign a preferred SIM for calls, text messages, and mobile data independently. Some Samsung and Pixel devices also let you pick a SIM per contact or per call.
One thing to understand: most dual SIM phones are dual standby, meaning both lines receive calls and texts, but typically only one line handles mobile data at a time. Running two active lines can also add a small amount of battery drain. If you notice your battery slipping after adding a second line, our guide on why phone batteries drain fast and how to fix it has targeted tips.
Transfer or Remove an eSIM When Switching Phones
Moving an eSIM to a new phone is where the process differs most from a physical SIM, because you cannot simply pop a card into the new device.
iPhone to iPhone is the easiest case: use eSIM Quick Transfer during or after setup, as described above. Android to Android varies — some newer phones can transfer an eSIM during initial device setup, but many carriers still require you to request a fresh QR code or reactivate through their app. iPhone to Android or Android to iPhone almost always requires contacting your carrier for a new eSIM profile, so plan ahead before wiping the old device.
Keep two warnings in mind. First, most activation QR codes are single-use — once consumed or expired, you must request a new one. Second, deleting an eSIM is usually permanent. On iPhone, go to Settings > Cellular, tap the plan, and choose Delete eSIM. On Android, open SIM manager, select the eSIM, and choose Remove or Erase. In both cases you will likely need your carrier to reissue the profile before you can install it again, so do not delete an eSIM just to “reset” a connection problem.
If you are selling or trading in a phone, erasing all content will prompt you on iPhone to either keep or remove your eSIMs — choose to erase them unless you have already transferred service. For everything else that should move to your new device, follow our full walkthrough on transferring everything to a new phone.
Troubleshoot Common eSIM Activation Problems
Most eSIM issues trace back to a short list of causes. Work through these in order.
- Activation fails immediately. Make sure you are on Wi-Fi — the profile must download from the internet — and temporarily disable any VPN, which can block the activation request.
- “Unable to Activate eSIM” or stuck on “Activating.” Wait a few minutes, toggle Airplane Mode on and off, then restart the phone. If it persists for more than a couple of hours, contact your carrier to confirm the profile is provisioned correctly.
- QR code rejected or “already in use.” eSIM QR codes are typically single-use. If you scanned it on another device, deleted the eSIM, or the code expired, request a fresh one from your carrier.
- “Cellular Plan Not Available” or the eSIM will not add. This often means the phone is carrier-locked to a different provider, or the carrier typed the wrong EID/IMEI when issuing the profile. Verify your lock status and reconfirm the EID with support.
- eSIM installed but no signal. Confirm the line is toggled on in Cellular settings or SIM manager and selected for data. On iPhone, go to Settings > General > About and wait — if a carrier settings update is available, a prompt appears.
- Travel eSIM shows no data abroad. This catches many people: travel eSIMs require Data Roaming turned on for that specific line, because they connect through foreign partner networks. Also confirm the travel eSIM is selected as your Cellular Data line and check the provider’s APN instructions.
- Nothing else works. A network settings reset clears saved Wi-Fi passwords and Bluetooth pairings but does not delete your eSIM. On iPhone: Settings > General > Transfer or Reset iPhone > Reset > Reset Network Settings. On Android, look for the equivalent under System or General management.
If activation consistently fails after these steps, the problem is almost always on the carrier side — an incorrectly provisioned profile or mismatched EID. Ask support to reissue the eSIM and verify the EID they have on file matches your device exactly.
FAQ
Can I use an eSIM and a physical SIM at the same time?
Yes, on any phone that still has a SIM tray alongside eSIM hardware — that combination gives you dual SIM dual standby, so both lines can receive calls and texts. US iPhone 14 and later models have no tray at all, so dual SIM there means two active eSIMs instead.
Does activating an eSIM cost extra?
Most major carriers do not charge a separate fee for eSIM activation — you pay the same plan price either way. Travel eSIMs are sold as prepaid data packages priced by data amount and duration. If a carrier wants a fee, it will appear during checkout or activation.
What happens if I accidentally delete my eSIM?
Deleting an eSIM removes the profile from your phone permanently. The original QR code usually will not work a second time, so you will need to contact your carrier to issue a new profile — many can push a replacement through their app or email a fresh code within minutes.
Conclusion
Setting up and activating an eSIM on iPhone or Android comes down to three things: confirming your device and carrier support it, choosing the right activation method — QR code, carrier app, Quick Transfer, or manual entry — and configuring your default lines afterward. Once the profile is installed, dual SIM opens up genuinely useful setups like separating work and personal numbers or adding a local data plan when you travel. And if something goes wrong, the fix is almost always Wi-Fi, a fresh QR code, or a quick call to your carrier rather than anything complicated.