How to Use Virtual Desktops in Windows 11: Full Guide
If your screen is buried under overlapping windows, learning how to use virtual desktops in Windows 11 can genuinely change the way you work. Virtual desktops let you create several separate workspaces on a single PC, so you can keep work apps, personal browsing, and side projects apart instead of cramming everything onto one screen. This guide covers the full process, from creating your first desktop to customizing settings and using the shortcuts that make switching effortless.
Key Takeaways
- Press Win + Ctrl + D or open Task View to create a new virtual desktop in seconds
- Switch between desktops instantly with Win + Ctrl + arrow keys or a four-finger trackpad swipe
- Rename and rearrange desktops inside Task View to match how you actually work
- Give each desktop its own wallpaper and control what the taskbar and Alt + Tab show
- Closing a desktop never closes your apps — open windows simply move to a neighboring desktop
What Virtual Desktops Are and When to Use Them
A virtual desktop is a separate workspace on your PC. Each desktop has its own set of open windows, but everything else — your files, installed apps, Start menu, and taskbar — stays the same across all of them. Think of desktops as different tables in the same room: the stuff on each table is separate, but the room is shared.
Microsoft first added virtual desktops to Windows 10 and refined them considerably in Windows 11, adding features like per-desktop wallpapers and easier renaming. If you have multiple monitors, a single virtual desktop spans all of your displays, so switching desktops changes what’s shown on every screen at once.
Virtual desktops are most useful when you want separation without extra hardware or accounts. Common scenarios include:
- Work and personal separation. Keep Slack, Outlook, and spreadsheets on one desktop, and personal browsing, music, and shopping on another.
- Cleaner screen sharing. Before a video call, move to a desktop that only contains the windows you plan to present, so nothing private pops up.
- Project-based organization. Dedicate a desktop to each project — research on one, writing or coding on another, communication tools on a third.
- Gaming versus productivity. Park your game launchers and chat apps on a separate desktop so they never clutter your working space.
One important misconception to clear up: virtual desktops are not separate user accounts or isolated environments. Apps running on one desktop can still access the same files and system resources as apps on any other. They’re an organizational tool, not a security boundary — and they also aren’t permanent. Windows doesn’t save your desktop layout between sessions, so after a restart you’ll be back to a single desktop.
How to Create a New Virtual Desktop Using Task View and Keyboard Shortcuts
There are two main ways to create a new desktop, and both take only a moment. The method you choose mostly depends on whether you prefer the mouse or the keyboard.
Using Task View:
- Click the Task View button on the taskbar — it’s the icon that looks like two overlapping rectangles. You can also press Win + Tab to open the same view.
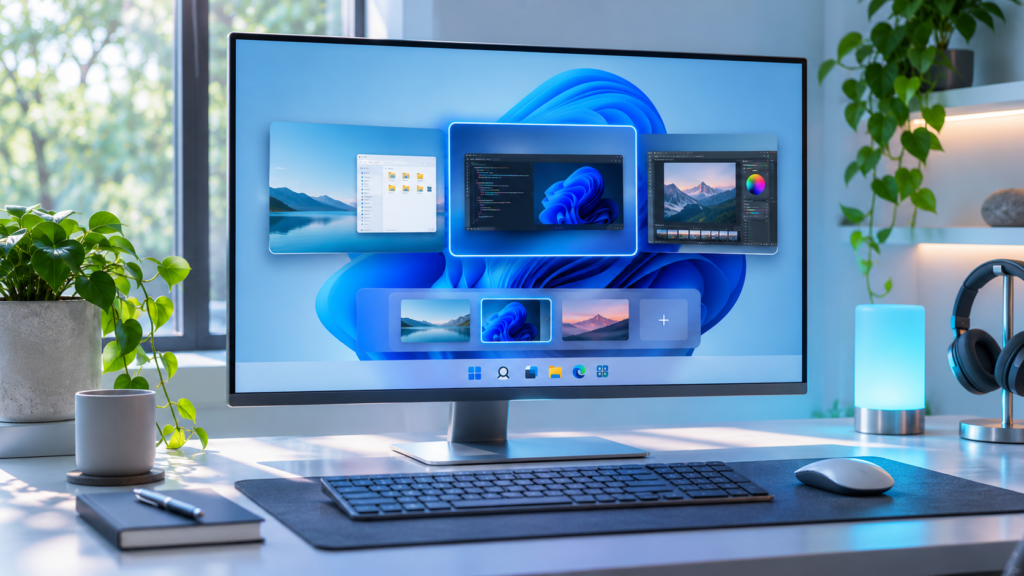
- Look at the strip along the bottom of the screen. You’ll see thumbnails of your existing desktops plus a tile labeled New desktop with a plus sign.
- Click New desktop. A desktop labeled “Desktop 2” (or the next number) appears, and Task View stays open so you can keep organizing.
If you don’t see the Task View button on your taskbar, it may simply be turned off. Right-click an empty area of the taskbar, choose Taskbar settings, and under Taskbar items toggle Task view on. For more ways to tailor this area of Windows, our guide on customizing the Windows 11 taskbar covers nine useful tweaks.
Using the keyboard:
Press Win + Ctrl + D. This creates a new virtual desktop and immediately switches you to it — no menus involved. It’s the fastest method and the one worth memorizing first. Once you’re on the new desktop, you’ll notice all your previous windows are still running; they’re just parked on Desktop 1 where you left them.
There’s no strict practical limit on how many desktops you can create, though in real-world use most people find two to four is the sweet spot. Every additional desktop is another place to lose track of a window.
How to Switch Between Virtual Desktops
Once you have multiple desktops running, moving between them is quick — and there are three ways to do it depending on your setup.
Keyboard: Press Win + Ctrl + Left arrow or Win + Ctrl + Right arrow. These shortcuts step through your desktops in order. Because the movement is linear, you’ll want to arrange desktops so the ones you switch between most often sit next to each other — something covered in the next section.
Task View: Press Win + Tab or click the Task View button, then click the desktop thumbnail you want. The strip at the bottom shows all your desktops; the one you’re currently on is highlighted. Task View is also helpful when you’ve lost track of a window, because the top portion shows everything open on the active desktop. If you used Task View in Windows 10, note that Windows 11’s version no longer includes the activity Timeline — it’s purely a window-and-desktop manager now.
Touchpad gesture: On a laptop with a Precision touchpad, a four-finger swipe left or right switches between desktops by default. This feels especially natural once you get used to it and is covered in more detail in the shortcuts section below.
Unlike app switching, there’s no built-in shortcut to jump directly to a specific numbered desktop — you move through them one at a time. That limitation is worth knowing upfront so you keep your desktop count manageable.
Renaming, Rearranging, and Organizing Your Desktops
Generic names like “Desktop 1” and “Desktop 2” get confusing fast once you have three or four workspaces running. Giving each desktop a meaningful name takes seconds and pays off every time you switch.
To rename a desktop:
- Open Task View with Win + Tab or the taskbar button.
- Right-click the desktop thumbnail you want to rename and select Rename. Alternatively, click directly on the name beneath the thumbnail to edit it in place.
- Type a name — “Work,” “Personal,” “Meetings,” or a project name — and press Enter.
To rearrange desktops: In Task View, drag a desktop thumbnail left or right along the strip, or right-click it and choose Move left or Move right. The order matters more than you might expect, since the Win + Ctrl + arrow shortcuts step through desktops in this exact sequence. A sensible arrangement might put your main work desktop in the middle with supporting desktops on either side.
A few habits make organization stick. Keep a consistent purpose for each desktop rather than letting windows drift; pair desktops with Snap layouts (drag a window to the top edge or press Win + Z to pick a layout) so each workspace stays tidy; and use a distinct wallpaper per desktop — covered next — so you can tell where you are at a glance.
Moving Apps and Open Windows Between Virtual Desktops
Opening a new desktop doesn’t require reopening your apps. Anything already running can be moved to whichever desktop makes sense, and the whole process happens inside Task View.
To move a window to another desktop:
- Open Task View (Win + Tab or the taskbar button). The windows on your current desktop appear at the top; your desktop thumbnails sit at the bottom.
- Drag the window you want to move down onto a desktop thumbnail — or onto the New desktop tile to send it to a fresh workspace.
- Alternatively, right-click the window, hover over Move to, and pick a destination desktop or New desktop from the submenu.
The right-click menu offers two especially useful options: Show this window on all desktops and Show windows from this app on all desktops. These are ideal for tools you want everywhere — a music player, a notes app, or a chat window you need to monitor regardless of which workspace you’re in.
One thing trips up beginners: you can’t move a window to another desktop by dragging it to the edge of the screen, the way you might on some other operating systems. Every move goes through Task View, either by dragging the window preview or using the right-click Move to menu. There’s also no native keyboard-only shortcut for moving windows between desktops, so keep Task View in mind as the hub for this task.
Customizing Virtual Desktop Settings: Wallpapers, Taskbar, and Alt+Tab Behavior
Windows 11 gives you a few meaningful ways to tailor how virtual desktops look and behave, and two of them live in places you might not think to check.
Different Wallpaper for Each Desktop
Setting a unique background per desktop is the single best visual cue for knowing where you are. Open Task View, right-click a desktop thumbnail, and choose Choose background. This opens Settings > Personalization > Background; pick an image, and it applies only to that desktop. Repeat for each workspace — a calm landscape for focus work, something neutral for your meeting desktop, and so on.
Taskbar and Alt + Tab Behavior
By default, Windows 11 filters what you see: the taskbar only shows apps open on your current desktop, and Alt + Tab only cycles through the current desktop’s windows. Both behaviors are configurable.
- Open Settings > System > Multitasking.
- Scroll to the Desktops section.
- Under On the taskbar, show all the open windows, choose between Only on the desktop I’m using and On all desktops.
- Under Show all open windows when I press Alt+Tab, make the same choice.
Which is better depends on how you work. Keeping the default (current desktop only) preserves the clean separation virtual desktops are meant to provide. Showing all desktops makes windows easier to find if you lose track of one, but it also reintroduces the clutter you were trying to escape. Most people are better served leaving both set to the current desktop and using Task View when they need the big picture.
Note that these settings affect window visibility, not which apps can run — everything stays running in the background regardless of which desktop you’re viewing.
Essential Keyboard Shortcuts and Trackpad Gestures
Virtual desktops only pay off if switching between them becomes second nature, and that’s where shortcuts earn their keep. Here are the ones that matter:
| Shortcut | Action |
|---|---|
| Win + Tab | Open Task View (window and desktop overview) |
| Win + Ctrl + D | Create a new virtual desktop and switch to it |
| Win + Ctrl + Left / Right arrow | Move to the previous or next desktop |
| Win + Ctrl + F4 | Close the current virtual desktop |
| Alt + Tab | Switch between open windows (scoped by your multitasking setting) |
On a laptop with a Precision touchpad, gestures do the same job without touching the keyboard. By default, a four-finger swipe left or right switches desktops, a four-finger swipe up opens Task View, and a four-finger swipe down shows the desktop. Three-finger gestures handle apps instead — swiping left or right cycles through open windows much like Alt + Tab.
If the defaults don’t suit you, they’re easy to change. Go to Settings > Bluetooth & devices > Touchpad and look under Advanced gestures to reassign what three- and four-finger swipes do. This requires a Precision touchpad, which most modern Windows laptops have — if you don’t see gesture options in Settings, your touchpad likely uses manufacturer drivers instead, and customization will live in that vendor’s own app.
A practical tip: learn just two shortcuts first — Win + Ctrl + D and the Win + Ctrl + arrow combo. Those alone cover creating and navigating desktops, and the rest tend to stick naturally once you’re in the habit.
Closing Virtual Desktops and Troubleshooting Common Issues
To close a desktop, either press Win + Ctrl + F4 while you’re on it, or open Task View and click the small X in the corner of the desktop’s thumbnail. Importantly, closing a desktop never closes your apps — every open window on it moves to the desktop immediately to its left (or the nearest remaining desktop if you closed the first one). Nothing is lost; it just relocates.
Most virtual desktop problems have simple fixes. Here’s what to check when something isn’t working:
- The Task View button is missing. It’s probably toggled off rather than broken. Right-click the taskbar, open Taskbar settings, and enable Task view under Taskbar items.
- Win + Ctrl + D does nothing. First check whether your keyboard has a Windows key lock — many gaming keyboards have a “Win Lock” key or function combo that disables the Windows key entirely. Software that remaps keys, such as keyboard managers or macro tools, can also intercept these shortcuts.
- Four-finger swipes don’t work. Open Settings > Bluetooth & devices > Touchpad and confirm the gestures are enabled and assigned. If the Touchpad page is missing or sparse, install or update your touchpad driver — non-Precision touchpads don’t support Windows’ built-in gestures.
- Your desktops disappeared after a restart. This is normal behavior. Windows 11 doesn’t preserve virtual desktops between sessions, so you start fresh with one desktop after every sign-out or reboot. Recreate and rename them as part of your morning setup if you use them daily.
- Alt + Tab shows windows from every desktop. Head to Settings > System > Multitasking and set the Alt + Tab dropdown under Desktops to Only on the desktop I’m using.
- You keep losing track of which desktop you’re on. Give each desktop a distinct wallpaper and a clear name — the combination makes the current workspace obvious at a glance.
If you run into an issue not covered here, Microsoft’s official Windows support site maintains up-to-date documentation on virtual desktops and Task View.
Frequently Asked Questions
Is there a limit to how many virtual desktops I can create?
There’s no practical limit you’ll realistically hit — Windows lets you create far more desktops than anyone could usefully manage. The real constraint is your own organization: past four or five desktops, it gets hard to remember what’s where, and the linear Win + Ctrl + arrow navigation makes distant desktops slow to reach.
Do virtual desktops slow down my PC?
The desktops themselves use negligible resources — they’re just organizational containers. What consumes memory and CPU are the apps you leave running across them. Ten browser windows use the same resources whether they’re on one desktop or spread across five, so a cluttered set of desktops can mask how much you actually have open.
Do virtual desktops save between restarts or sync across PCs?
No on both counts. Virtual desktops are temporary workspaces tied to your current session — restarting or signing out removes them, and nothing about your desktop layout syncs to other devices through your Microsoft account. Per-desktop wallpapers and names are also lost when the desktop is gone.
Putting Virtual Desktops to Work
Once you know how to use virtual desktops in Windows 11, the feature tends to become a quiet habit rather than a conscious effort: Win + Ctrl + D for a fresh workspace, the arrow shortcuts to move, and Task View when you need to reorganize or relocate a stray window. Start with just two desktops — one for focused work and one for everything else — and add more only when you feel a genuine need for separation.
Virtual desktops pair well with other Windows 11 productivity features. Enabling clipboard history saves you from re-copying items when moving between tasks, and our roundup of Windows tips for productivity covers more ways to work faster every day. A few minutes of setup now means a noticeably less cluttered screen every time you sit down to work.