How to Snap Windows Side by Side in Windows 11
Learning how to Snap Windows Side by Side in Windows 11 with Snap Layouts can make everyday multitasking much easier. Instead of repeatedly resizing app windows by hand, you can place a browser, document, chat app, spreadsheet, or file folder into an organized portion of the screen in seconds.
Windows 11 includes several ways to arrange windows: the Snap Layouts menu on the maximize button, screen-edge dragging, and Windows key arrow shortcuts. Once two windows are snapped, Windows 11 can also help you fill the remaining space with Snap Assist and keep related apps together in a Snap group.
Key Takeaways
- Snap Layouts provide ready-made arrangements for two or more open windows
- Hovering over a window’s maximize button is a simple way to create a side-by-side layout
- Dragging a window to an edge or corner gives you direct control over its position
- Windows key and arrow shortcuts let you snap windows without using the mouse
- Snap Assist and the divider between panes help you complete and fine-tune a layout
What Snap Layouts Do in Windows 11 and When to Use Them
Snap Layouts are built-in Windows 11 window-management tools that position open apps in predefined areas of the desktop. Depending on your screen size and display resolution, available layouts can include two equal columns, a larger area beside a smaller column, or arrangements with several sections. The exact choices may vary by device and display configuration.
A snapped window is not minimized or closed. It remains open and usable, but its size and position are adjusted so another window can share the screen. This makes Snap Layouts useful whenever you need to compare information, follow instructions while working, or move content between applications.
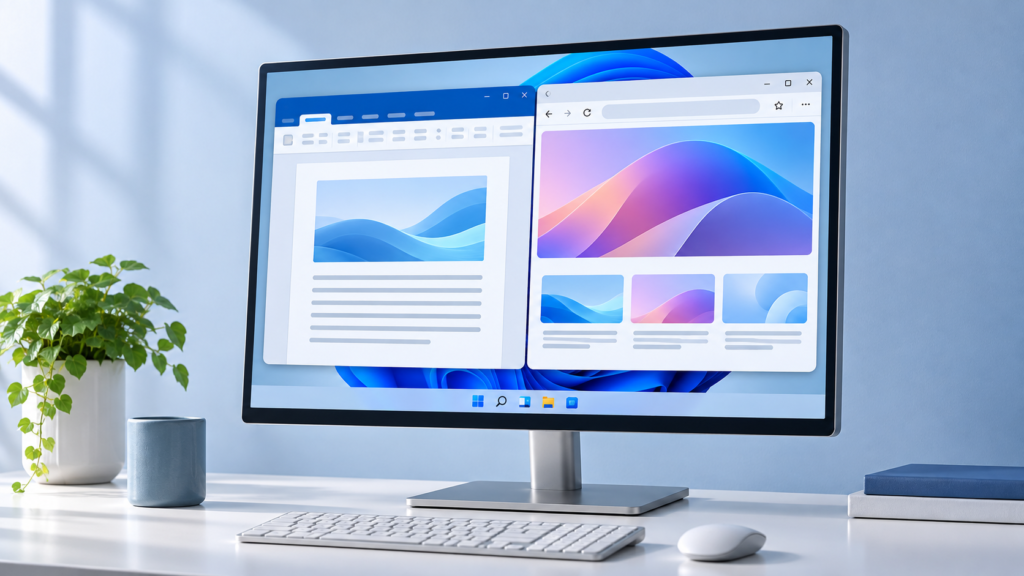
For example, you could place a web browser on the left and a Word document on the right while researching a report. You might also put a video call in a smaller corner while keeping your main work in a larger section. A file folder beside an image editor can make it easier to drag photos into a project without switching back and forth between full-screen windows.
Snap Layouts versus a manually split screen
People often refer to this arrangement as a Windows 11 split screen, but Windows does not create a separate special desktop mode. It simply resizes and positions normal application windows. You can still interact with each app, move the windows later, minimize them, or restore them to their previous size.
Snap Layouts are faster than manually dragging borders because Windows calculates the available space for you. They also make it easier to arrange three or four windows in a consistent pattern when your monitor is large enough to display them comfortably.
What you need before snapping windows
Open at least two windows that you want to use. They can be different apps, such as Microsoft Edge and Notepad, or separate windows from the same app, such as two File Explorer windows. If an app is running in full-screen mode rather than a normal resizable window, its snapping behavior may differ.
It is also worth closing windows you do not need. Snap Assist may show several open apps when you complete a layout, and a crowded desktop can make it harder to identify the correct window.
Snap Two Windows Side by Side with the Maximize Button
The maximize button is the most visible way to use Snap Layouts. It is the square-shaped button near the upper-right corner of a normal window, between the minimize and close buttons.
- Open the first app or window you want to place.
- Move the pointer over the window’s Maximize button. Do not click it immediately.
- Wait for the Snap Layouts menu to appear.
- Move the pointer over the layout you want to use.
- Choose the section where you want the current window to appear.
- When Windows shows other open windows in the remaining areas, select one to fill the next section.
For a basic side-by-side arrangement, select the layout divided into two vertical sections. The current window will occupy one side, and Windows 11 will display available windows for the other side. Select the second app to place it beside the first.
You do not need to click the maximize button first. Hovering over it opens the layout choices, while clicking it normally maximizes the window to fill the desktop. This distinction is a common beginner mistake: if you click too quickly, the window may become full screen instead of opening the Snap Layouts menu.
Choosing the right layout
The equal two-column layout works well when both windows need similar amounts of space. A layout with a wider section and a narrower section is better when one app is your main workspace and the other is only used for reference, messaging, or monitoring.
On a sufficiently wide screen, you may see layouts that support three or four windows. Avoid placing too many apps into a small laptop display if the text becomes difficult to read. A layout is useful only when each pane remains large enough for the task.
Using Snap Layouts from the title bar
Some Windows 11 installations also let you open Snap Layouts by right-clicking a window’s title bar. If the maximize button is difficult to reach, right-click the title bar and look for a snapping option in the menu. The exact menu wording and available choices can vary with Windows updates and the app window you are using.
If neither method works, use the edge-dragging or keyboard methods below. They provide alternative ways to create a side-by-side arrangement without depending on the Snap Layouts menu.
Arrange Windows by Dragging Them to Screen Edges
You can snap a window without opening the layout menu by dragging it to a screen edge. This method is useful when you want a quick two-window arrangement or prefer direct mouse control.
- Click and hold an empty area of the window’s title bar.
- Drag the window toward the left or right edge of the screen.
- Continue moving it until a visual outline or highlighted area appears.
- Release the mouse button to snap the window into that area.
- Choose another open window when Snap Assist displays the available choices.
Dragging a window to the left edge usually places it in the left half of the desktop. Dragging it to the right edge places it in the right half. If you move the window toward a corner instead, Windows may offer a quarter-screen position, allowing you to place additional windows in the other corners.
Drag slowly enough to see the snap preview. Releasing the mouse before the preview appears may simply move the window to a new position without snapping it. If the window ends up floating in the middle of the desktop, try again from the title bar and move farther toward the edge.
Snapping to a corner
Corner snapping is helpful when you want four windows visible at once. Drag the first window to the upper-left corner, then place another in the upper-right, lower-left, or lower-right area as needed. Windows may show a preview indicating the portion that will be used.
Four windows can be practical on a large monitor for tasks such as email, a calendar, a research page, and a notes app. On a small screen, however, the resulting panes may be too narrow. In that situation, two side-by-side windows are usually more comfortable.
Dragging a snapped window away
To remove a window from its snapped position, drag it by the title bar toward the center of the screen. Once it becomes a floating window, you can resize or reposition it normally. You can also minimize it with the taskbar or use the maximize button to change its size.
Use Windows 11 Keyboard Shortcuts for Faster Snapping
The Windows key arrow shortcuts are often the fastest way to snap windows. They are especially useful when you repeat the same arrangement throughout the day or when using a mouse feels inconvenient.
- Windows key + Left Arrow: Snap the active window to the left side.
- Windows key + Right Arrow: Snap the active window to the right side.
- Windows key + Up Arrow: Maximize the active window, or move it toward an upper snapped position depending on its current state.
- Windows key + Down Arrow: Restore, minimize, or move the active window toward a lower snapped position depending on its current state.
To create a two-window arrangement, click the first window or use Alt + Tab to make it active, then press Windows key + Left Arrow or Windows key + Right Arrow. After Windows places the first window, select the second app from the Snap Assist choices or use Alt + Tab to switch to it and snap it to the opposite side.
For more complex layouts, press a Windows key arrow shortcut more than once. For example, moving a window to the left and then pressing the Up Arrow may place it in the upper-left portion of the display. The exact result depends on the window’s current location and the layout Windows is using.
Keyboard shortcuts for switching between snapped apps
Alt + Tab displays open apps and lets you switch between them. This is useful after snapping two windows because it keeps your hands on the keyboard while you move from one pane to the other.
You can also use Windows key + Tab to open Task View. Task View displays open windows and virtual desktops, making it useful when the app you need is not visible in the current arrangement. For a broader productivity workflow, see this guide to Windows tips for productivity.
Complete the Layout with Snap Assist and Resize the Panes
Snap Assist is the part of Windows 11 that helps you finish an arrangement after you snap the first window. It displays thumbnails or choices for other open windows so you can quickly select what should occupy the remaining space.
After choosing a window, Windows may continue offering additional apps if the selected layout includes more than two sections. Select the apps in the order that makes sense for your workflow. If you choose the wrong one, you can usually click another window later and move it into the desired position.
Resize snapped windows
When two windows sit side by side, a vertical divider appears between them. Move the pointer over the divider until it changes into a horizontal resize cursor, then click and drag left or right. This lets you give one window more space while reducing the other.
In a layout with windows stacked vertically, use the horizontal divider between them to adjust their heights. Windows normally keeps the panes connected, so enlarging one reduces the available space for the neighboring pane rather than allowing the windows to overlap.
Resize the panes based on the information each app needs. A document may need more width for readable lines, while a narrow chat window may work well with less space. If text becomes cramped, enlarging the pane or returning to a two-column layout may be more effective than forcing several apps onto one screen.
Snap groups
Windows 11 can remember a set of snapped windows as a Snap group. When you move the pointer over an app icon on the taskbar or use the task switcher, Windows may show the individual window and the grouped arrangement. Selecting the group can bring the related windows back together.
Snap groups are useful when you repeatedly work with the same combination, such as a browser and a spreadsheet. They are not a replacement for saving your work: closing an app, restarting Windows, or changing the desktop can affect which windows remain available.
When Snap Assist does not appear
If Windows snaps the first window but does not show choices for the remaining space, the feature may be disabled or the active app may not support the expected behavior. You can still open another app and snap it manually with a keyboard shortcut, by dragging it to the opposite edge, or through the maximize button.
Some applications use custom title bars or special full-screen modes. These may not respond to every standard Windows snapping action. If one app refuses to snap, test the process with File Explorer or another standard desktop window to determine whether the issue is specific to that app.
Snap Windows Across Multiple Monitors and Virtual Desktops
Snap Layouts can be especially useful with multiple monitors. Each display provides its own working area, so you can snap windows on one monitor while keeping other apps open on another. For example, you might place a browser and document side by side on the main display while keeping email or a video call on a second screen.
To snap a window on a particular monitor, move it to that monitor and use the maximize-button menu, edge dragging, or the Windows key arrow shortcuts. When dragging between displays, move the window past the edge of the current monitor and wait for it to appear on the other one before positioning it.
Monitor size and resolution affect the available layouts. A high-resolution desktop monitor may offer more practical space for three or four panes, while a small secondary display may be better suited to one maximized app. Different scaling settings can also make text and controls appear larger or smaller from one screen to another.
Use snapping with virtual desktops
Virtual desktops let you separate workspaces while still using the same physical monitor. You could keep a writing layout on one desktop and a communication or research layout on another. Snapped windows belong to the desktop where they were arranged, so changing desktops can make the task feel less cluttered.
Press Windows key + Tab to open Task View and create or select a virtual desktop. You can also switch desktops with Windows key + Ctrl + Left Arrow or Windows key + Ctrl + Right Arrow. For detailed instructions, read this guide to using virtual desktops in Windows 11.
Virtual desktops do not replace multiple monitors. A monitor setup shows several work areas simultaneously, while virtual desktops let you switch between separate collections of windows. Choose multiple monitors when you need constant visibility, and virtual desktops when you want to reduce distractions.
Fix Common Snap Layouts Problems and Adjust Multitasking Settings
If Snap Layouts are not working as expected, start by checking the Windows multitasking settings. Open Settings, select System, and then choose Multitasking. Look for the section related to snapping windows and make sure the main snapping option is enabled.
Windows may also show additional choices for controlling how snapping behaves, such as whether a snapped window should be resized together with an adjacent window or whether suggested windows should appear after you snap one. The labels and available options can vary by Windows 11 update, so focus on the descriptions shown on your PC rather than expecting every device to display identical wording.
Common problems and solutions
- The Snap Layouts menu does not appear: Hover over the maximize button for a moment instead of clicking it. If it still does not appear, check Settings > System > Multitasking and confirm that snapping is enabled.
- A window will not snap: Exit the app’s full-screen mode and restore it to a normal window. Some custom or specialized app windows do not support every snapping method.
- Dragging only moves the window: Start from an empty part of the title bar and drag all the way toward an edge or corner until a snap preview appears before releasing the mouse.
- Snap Assist shows the wrong apps: Close unused windows or use Alt + Tab to identify which window is active. Windows bases its suggestions on currently open windows.
- The layout feels too cramped: Use the divider to resize the panes, switch to a two-window layout, or move some apps to another monitor or virtual desktop.
- Shortcuts do not work: Make sure the intended window is active before pressing the Windows key and an arrow. A keyboard utility or accessibility setting may also intercept shortcuts.
- Windows behaves differently after an update: Recheck the Multitasking settings because options can change or become disabled after system changes. Restarting the affected app can also clear temporary window-management problems.
Make snapping easier to use
Keep display scaling and resolution at settings that make app controls readable. Extremely small panes are difficult to use even when the layout technically works. If you frequently compare documents, consider using a larger monitor or a second display rather than shrinking several windows into one small screen.
It also helps to develop a repeatable arrangement. For example, keep your main document on the larger side, reference material on the smaller side, and communication apps on another virtual desktop. Consistent layouts reduce the time spent searching for windows and make Windows 11 window management feel more predictable.
Frequently Asked Questions About Windows 11 Snap Layouts
Can I snap two windows side by side without using Snap Layouts?
Yes. Click a window and press Windows key + Left Arrow or Windows key + Right Arrow. You can also drag the window to the left or right edge of the screen. After the first window is positioned, choose the second app from Snap Assist or snap it manually to the opposite side.
Why can I not see Snap Layouts when I hover over the maximize button?
Check Settings > System > Multitasking and make sure snapping is enabled. Also confirm that the pointer is over the maximize button of a normal desktop window and that the app is not using a special full-screen mode. If the menu remains unavailable, use edge dragging or the Windows key arrow shortcuts.
Can I resize two snapped windows?
Yes. Place the pointer over the divider between the windows and drag it to give one pane more or less space. The result depends on the layout, but Windows generally adjusts the neighboring pane at the same time so the windows continue fitting within the desktop.
Conclusion
Windows 11 gives you several practical ways to snap windows side by side. The maximize-button menu is the easiest starting point, edge dragging offers direct control, and Windows key arrow shortcuts are ideal when you want speed. Snap Assist then helps fill the remaining space, while the divider lets you adjust each pane to match the task.
For simple comparisons, use a two-column layout. For larger monitors, consider three- or four-window arrangements, and use multiple monitors or virtual desktops when one desktop becomes crowded. Once you enable the preferred multitasking options and practice a few shortcuts, Snap Layouts can turn a cluttered desktop into a more organized workspace.