How to Create Gmail Filters and Labels to Sort Email
An overflowing inbox is usually a sorting problem, not a volume problem. Once you know how to create Gmail filters and labels to automatically sort email, Gmail can file newsletters, receipts, work messages, and family updates the moment they arrive—no manual dragging required. This guide walks through labels, filter criteria, filter actions, real-world setups, and how to fix filters that misbehave.
Key Takeaways
- Labels are flexible tags, and filters are the rules that apply them automatically
- Labels—including nested ones—are created from the sidebar or Settings
- You can build a filter from the search bar, an existing email, or the Settings page
- Filters can label, archive, star, delete, forward, or categorize incoming mail
- Filters must be created on the web, and most problems come from criteria or filter order
How Gmail Filters and Labels Work Together
Gmail doesn’t use traditional folders. Instead, every message can carry one or more labels—tags like “Work,” “Receipts,” or “Family.” A single email can sit under several labels at once, which is more flexible than a folder system where a message can only live in one place.
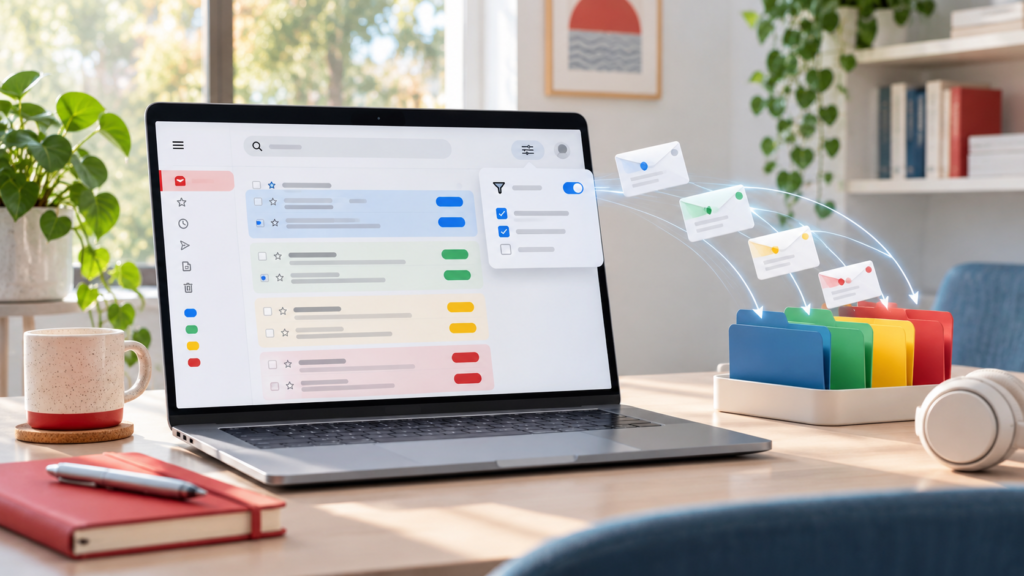
Filters are the automation layer on top of labels. A filter watches incoming mail for conditions you define—such as the sender, words in the subject, or whether an attachment exists—and then performs actions automatically. Those actions include applying a label, skipping the inbox, starring the message, or deleting it outright.
Think of it this way: labels are the filing system, and filters are the assistant doing the filing. You can use labels alone and file messages by hand, or filters alone to archive and delete, but the real payoff comes from combining the two.
How to Create and Customize Labels in Gmail
Create labels before building filters so you can select them when choosing filter actions. There are two easy ways to make one on Gmail’s website:
- In the left sidebar, scroll down and click More, then click Create new label.
- Alternatively, click the gear icon, choose See all settings, open the Labels tab, and click Create new label.
- Enter a name. To create a nested label—like “Invoices” inside “Work”—check Nest label under and pick the parent label.
- Click Create.
Nested labels collapse under their parent in the sidebar, which keeps long label lists tidy. A common beginner mistake is creating dozens of top-level labels when three or four parents with sub-labels would be easier to scan.
To customize an existing label, hover over it in the sidebar, click the three-dot menu, and choose Edit. From there you can rename it, nest it under a different parent, or delete it. Deleting a label removes only the tag—the messages themselves stay in All Mail. The same three-dot menu also lets you assign a label color, which makes important categories stand out at a glance in your inbox.
To apply a label manually, select a message, click the Labels icon in the toolbar, check the labels you want, and click Apply. The Move to button applies a label and archives the message out of the inbox in one step.
How to Create a Filter Using the Search Bar or an Existing Email
Gmail offers three ways to start a filter, and all of them end at the same dialog where you pick actions.
From the Search Bar
- Click the sliders icon at the right end of the search bar to open the advanced search form.
- Fill in one or more fields—From, To, Subject, Has the words, and so on.
- Click Create filter (not Search) at the bottom of the form.
- Check the actions you want, such as Skip the Inbox and Apply the label.
- Optionally check Also apply filter to matching conversations if you want existing messages processed too.
- Click Create filter again to save.
From an Existing Email
This is the fastest route when a specific sender keeps cluttering your inbox:
- Open a message from that sender.
- Click the three-dot menu at the top of the message.
- Select Filter messages like these. Gmail pre-fills the From field for you.
- Click Create filter, choose your actions, and save.
From Settings
Go to Settings → See all settings → Filters and Blocked Addresses and click Create a new filter. This is also where all your existing filters live, which makes it the natural starting point when you want to review or revise your setup. For the official reference, see Google’s documentation on creating rules to filter email.
Filter Criteria You Can Use: Sender, Subject, Keywords, Size, and Attachments
The advanced search form gives you these fields, and combining them makes filters precise:
- From: A full address (boss@company.com), an entire domain using a wildcard (*@company.com), or several senders joined with OR: (anna@example.com OR ben@example.com).
- To: Useful for plus-address aliases like yourname+shopping@gmail.com, which Gmail delivers to your normal inbox while preserving the alias.
- Subject: Words in the subject line. Use quotes for exact phrases like “invoice due”.
- Has the words: Searches the whole message. Supports OR, minus signs for exclusions, and quoted phrases.
- Doesn’t have: Excludes messages containing specific text—handy for filtering a mailing list except messages mentioning your name.
- Size: Greater than or less than a set size, ideal for catching emails with large attachments.
- Date within: Limits matching to a time window relative to a date.
- Has attachment: A checkbox that matches any message with files attached.
You can also type Gmail search operators directly into the regular search box, run the search to confirm it matches what you expect, then open the sliders icon and create the filter from that query. Operators like from:, subject:, has:attachment, and larger:10M all work. Google’s full list of Gmail search operators is worth bookmarking if you want to build more advanced rules.
A tip that prevents most bad filters: run the criteria as a plain search before clicking Create filter. If the results look wrong, the filter will behave wrong too.
Filter Actions Explained: Apply Labels, Skip the Inbox, Star, Forward, and More
After defining criteria, Gmail presents a checklist of actions. You can select several at once:
- Skip the Inbox: Archives the message. It disappears from the inbox but remains in All Mail and under any applied label. This is the backbone of most automatic email sorting.
- Mark as read: Useful for low-value mail you want filed without an unread badge.
- Star it: Flags the message for visibility.
- Apply the label: Attaches a label you choose. Pairing this with Skip the Inbox files mail without cluttering the inbox.
- Forward it: Sends a copy to an address you’ve already verified under Settings → Forwarding and POP/IMAP. Gmail only lets verified addresses appear here, and limits how many filters can forward mail.
- Delete it: Sends matching mail to Trash, where it’s erased permanently after 30 days. Use carefully—an overly broad filter here can quietly destroy mail you wanted.
- Never send it to Spam: Rescues legitimate messages Gmail misclassifies, like a recurring report that keeps landing in spam.
- Always / Never mark as important: Trains Gmail’s importance markers in your preferred direction.
- Categorize as: Forces messages into tabs like Promotions, Social, Updates, or Forums.
- Also apply filter to matching conversations: Retroactively processes existing mail, not just new arrivals.
One caution with forwarding filters: they send copies of your mail outside your account, which is exactly what attackers set up after compromising inboxes. Review your filter list periodically, and protect the account itself with two-step verification on your Google account so nobody can silently create forwarding rules behind your back.
Practical Filter Setups for Newsletters, Receipts, Work, and Personal Email
Newsletters and Promotions
Use Filter messages like these on a typical newsletter, then apply Skip the Inbox plus a “Newsletters” label. Optionally add Mark as read if you don’t want an unread count nagging you. Newsletters stay searchable and browsable under the label whenever you have time.
Receipts and Order Confirmations
Create a filter with Has the words: containing receipt OR "order confirmation" OR invoice. Apply a “Receipts” label and skip the inbox—receipts matter at tax time, not at 9 a.m. on a Tuesday.
High-Priority Work Email
Filter From: *@yourcompany.com, then apply a “Work” label, Star it, and Always mark as important. This inverts the usual setup: instead of pushing noise away, it pulls signal forward so colleagues never get buried under promotions.
Family Mail and Shopping Aliases
Put family addresses in From joined by OR, label them “Family,” and star them. For shopping, register accounts as yourname+deals@gmail.com, then filter To: that alias into a “Deals” label that skips the inbox. This also reveals which companies share your address—if spam arrives addressed to your +deals alias, you’ll know where it leaked.
Large Attachments
Set Size to greater than 10 MB and label the results “Large Files.” It won’t save space by itself, but it gives you a one-click list to review when your Google storage fills up.
How to Edit, Delete, Export, and Reorder Existing Filters
Everything lives under Settings → See all settings → Filters and Blocked Addresses. Each filter shows its criteria and actions with edit and delete links beside it.
Clicking edit reopens the original criteria form. Adjust it, click Continue, change the actions if needed, and hit Update filter. Note that editing doesn’t retroactively re-sort old mail unless you check the option to apply to matching conversations during the update.
The checkboxes next to each filter enable the Export button, which downloads a file called mailFilters.xml. Export before making major changes—it doubles as a backup. The Import filters link uploads that XML into another account, which is the easiest way to copy a mature setup to a new Gmail address.
Regarding order: Gmail processes filters in the sequence shown in this list, and there’s no drag-and-drop reordering. When two filters overlap and you need a different precedence, the workaround is exporting the XML, rearranging the entries in a text editor, deleting the originals, and re-importing. For most people this never matters—but if an email seems to get the “wrong” label, conflicting overlapping filters are usually why.
Limitations, Mobile Differences, and Troubleshooting Common Filter Problems
A few boundaries to know up front. Filters only act on incoming mail—they can’t trigger on messages you send or on things already sitting in your inbox unless you check the matching-conversations box. Google allows up to 1,000 filters per account, but forwarding filters face a much smaller cap, and forwarding only works to verified addresses. Filters also can’t combine with each other logically; each one evaluates independently.
On mobile, the Gmail apps for Android and iOS cannot create or edit filters—that requires Gmail in a desktop browser, or a mobile browser in desktop site mode. The good news: filters you build on the web keep working everywhere, and the apps can still apply existing labels and browse labeled mail.
Common problems and fixes:
- “My filter didn’t sort existing mail.” You didn’t check Also apply filter to matching conversations. Edit the filter and check it, or run the same search, select the results, and apply the label manually.
- “New mail isn’t being caught.” Your criteria are probably too strict. Test them as a plain search—typos in the From field and over-specific subject phrases are the usual culprits.
- “Emails vanished.” Check All Mail for skip-the-inbox messages and Trash for anything hit by Delete it. “Missing” mail is almost always archived, not gone.
- “Forwarding doesn’t work.” The destination address must be verified in Forwarding and POP/IMAP settings, and you may have hit the forwarding-filter cap.
- “Messages get the wrong label.” Two filters match the same email. Review the list order and tighten one filter’s criteria with a Doesn’t have condition.
- “The settings page acts strangely.” If the Filters page won’t save or loads oddly, clearing your Chrome cache often resolves stale-session quirks.
Frequently Asked Questions
Do Gmail filters work on emails already in my inbox?
Not automatically—filters only process messages arriving after they’re created. To sort existing mail, check Also apply filter to matching conversations when creating or updating the filter.
Can I create Gmail filters on the mobile app?
No. Filter creation and editing require Gmail on the web. Open gmail.com in a desktop browser, or request the desktop version of the site on your phone’s browser. Filters created there still apply to all your mail, including what you read on mobile.
What’s the difference between “Skip the Inbox” and deleting?
Skip the Inbox archives the message—it leaves the inbox but remains fully searchable under All Mail and any labels. Delete it sends mail to Trash, where it’s permanently erased after 30 days. When in doubt, archive; you can always delete later.
Start Small, Then Let Gmail Do the Sorting
The most reliable approach to automatic email sorting is gradual: create three or four labels, build one filter for whatever clutters your inbox most, and watch it work for a week. Once you trust it, add filters for receipts, newsletters, and priority senders. Within a month, most incoming mail will file itself—and your inbox will finally show only what actually needs you.