How to Turn Off Ads on Android Phone: 7 Easy Methods
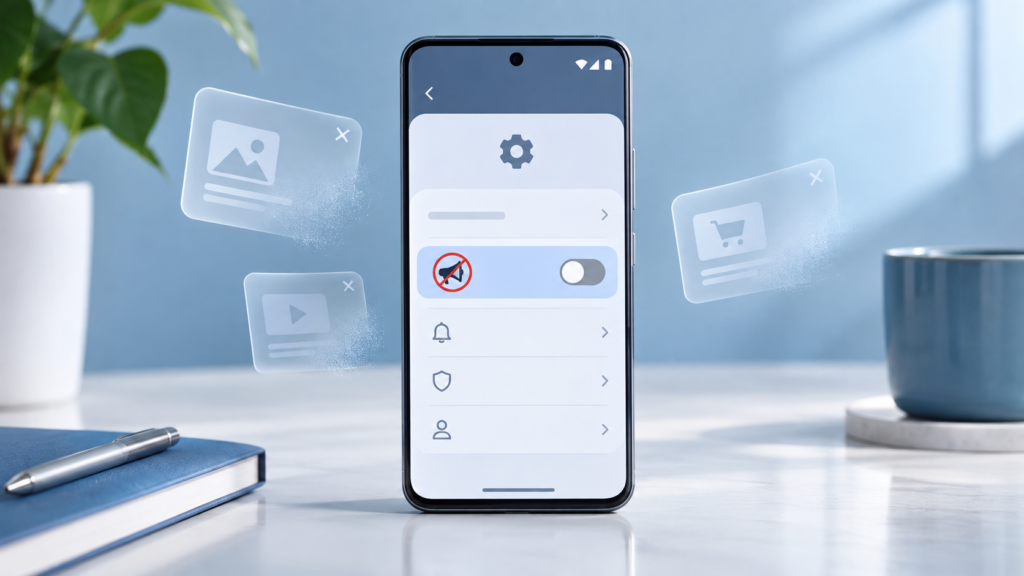
If constant pop-ups, full-screen interruptions, and spammy notifications are ruining your experience, learning how to turn off ads on Android phone settings is easier than you might expect. You don’t need root access or paid software — most of the tools you need are already built into your device.
The catch is that Android spreads its ad controls across several different menus, which is why so many people assume nothing can be done. In reality, combining a few Google account settings, browser tweaks, and system options can eliminate the vast majority of intrusive advertising. Below are seven proven methods, arranged from quick toggles to more aggressive blocking, so you can decide exactly how far you want to go.
Key Takeaways
- Opting out of ad personalization stops Google from targeting you, though it won’t reduce the raw number of ads on its own
- Chrome’s site settings can block pop-ups, redirects, and intrusive ads without installing anything extra
- Private DNS with a filtering hostname blocks ads across most apps and browsers for free
- Notification ads almost always come from a site or app you accidentally allowed — revoke the permission
- Xiaomi, Redmi, Poco, and some budget phones require built-in system ad recommendations to be switched off separately
- A recently installed app abusing the “display over other apps” permission is the usual cause of random full-screen pop-ups
- Firefox with uBlock Origin or Brave delivers the most complete web ad blocking available on Android
Before diving in, it helps to understand that “ads” on Android come from several sources: websites in your browser, ad networks inside free apps, notification permissions you granted, and in some cases the phone manufacturer itself. Use this quick reference to match what you’re seeing to the most effective fix, then work through every relevant method — each one closes a different gap.
| Where the ads appear | Most likely cause | Best fix |
|---|---|---|
| Pop-ups, redirects, and banners in Chrome | Abusive websites or granted site permissions | Method 2 |
| Ads arriving as notifications | A site or app allowed to send notifications | Method 4 |
| Full-screen ads over the home screen or other apps | An app abusing “display over other apps” | Method 6 |
| Ads on the lock screen or inside system apps | Manufacturer ad services (MIUI/HyperOS, Glance) | Method 5 |
| Banner and video ads inside many different apps | Ad networks loading over the network | Method 3 or Method 7 |
| Creepy ads that follow you across apps and sites | Advertising ID tracking and profiling | Method 1 |
Method 1: Disable Ad Personalization in Your Google Account Settings
Every Android phone tied to a Google account has an advertising ID — a unique identifier advertisers use to track your behavior across apps and build a profile about you. Turning off personalization doesn’t reduce the number of ads you see, but it stops that profiling and makes ads less invasive.
Here’s how to do it on most modern Android phones:
- Open Settings and tap Google. On some devices, tap All services first.
- Tap Ads. If you don’t see it, check Settings → Privacy → Ads instead — the location varies by Android version and manufacturer.
- Depending on your version, you’ll see either an Opt out of ad personalization toggle or a Delete advertising ID button. Enable the toggle or delete the ID.
- Tap Ads privacy to review additional controls like ad topics and app-suggested ads, and turn off anything you don’t want.
Deleting your advertising ID is the stronger option because apps can no longer use it to identify you at all. You can also manage this account-wide through Google’s My Ad Center, which applies the setting to Google services on every device where you’re signed in — not just your phone.
My Ad Center is worth a closer look on its own. Beyond the personalization toggle, it lets you limit ads in sensitive categories such as alcohol and gambling, block specific advertisers whose ads you keep seeing, and adjust ad settings for individual Google services like Search and YouTube. None of this reduces ad volume, but it gives you meaningful control over what kinds of ads reach you.
Keep in mind this method targets the tracking behind ads rather than the ads themselves. You’ll still see advertisements, but they won’t follow you based on your browsing history, location patterns, or app usage. Pair it with the methods below to actually shrink the volume of ads.
Method 2: Block Pop-Ups and Intrusive Ads in Chrome
Chrome is the default browser on most Android phones, and it includes built-in protections that many users never check. Taking two minutes to verify these settings stops the most annoying web ads.
- Open Chrome, tap the three-dot menu in the top-right, and select Settings.
- Tap Site settings.
- Tap Pop-ups and redirects and make sure it’s set to Blocked. Chrome blocks these by default, but the setting can be changed, so verify it.
- Go back and tap Intrusive ads (labeled Ads on some versions). Set it to Blocked so Chrome stops ads on sites that use abusive or deceptive advertising.
- Tap Third-party cookies and choose Block third-party cookies. This limits cross-site tracking, which reduces how aggressively retargeted ads follow you around the web.
While you’re in Chrome’s settings, tap Privacy and security → Safe Browsing and consider switching to Enhanced protection. It won’t block ads directly, but it warns you about dangerous sites and downloads in real time — and the sketchy sites that serve the most aggressive ads are often the same ones pushing malware and phishing pages.
If a particular site continues to misbehave after this — redirecting you, spawning tabs, or firing notification prompts — clearing its stored data often helps. Our step-by-step guide on how to clear the Chrome cache shows you how to wipe site data without losing your saved passwords.
One limitation worth knowing: unlike the desktop version, Chrome on Android doesn’t support extensions, so you can’t install uBlock Origin or similar tools inside it. Method 7 covers browsers that do support real ad-blocking extensions.
Method 3: Use Private DNS to Block Ads Across Apps and Browsers
This is the single most effective free method on the list, and most Android users have never heard of it. Android includes a Private DNS feature designed for encrypted DNS — but if you point it at a DNS provider that filters ad and tracking domains, requests to ad servers simply fail, system-wide.
Because it works at the network level, it blocks ads inside apps, games, and browsers simultaneously — no app installation required, no battery-draining background service, and no performance cost you can notice.
- Open Settings → Network & internet → Private DNS. On Samsung phones, it’s under Settings → Connections → More connection settings → Private DNS. On Xiaomi devices, look under Settings → Connection & sharing → Private DNS.
- Select Private DNS provider hostname.
- Type
dns.adguard-dns.comexactly as written, then tap Save. - Open a website or app that normally shows ads and confirm they’re gone.
This uses AdGuard’s free public DNS, which filters known ad and tracker domains. It’s free, requires no account, and works on both Wi-Fi and mobile data. If you also want adult content filtered — useful on a child’s phone — the hostname family.adguard-dns.com adds that layer on top of ad blocking. NextDNS is another option with customizable blocklists, though it requires setting up a free account first.
There are a few honest limitations. It won’t block YouTube or Facebook in-app ads, because those platforms serve ads from the same domains as their content — DNS filtering can’t separate them. Some public Wi-Fi networks with login portals will fail to load until you temporarily switch Private DNS back to Off. Most VPN apps handle their own DNS resolution, so the filtering won’t apply while a VPN is connected. And if your internet stops working entirely, you likely mistyped the hostname — double-check the spelling or revert to Automatic.
If ads don’t disappear right away after saving, toggle Airplane mode on and off to force apps to reconnect, since some apps hold onto previously resolved connections. Despite the caveats above, for most users this single change removes the majority of ads across the entire phone in under a minute.
Method 4: Stop Notification Ads from Websites and Apps
If ads keep arriving disguised as notifications — “hot deals,” fake virus warnings, prize alerts — the cause is almost always a permission you granted without realizing it. Many sites show prompts like “Tap Allow to verify you’re not a robot,” and that Allow click actually grants notification access.
Here’s how to shut them down:
- The next time a spam notification arrives, long-press it. You’ll see options to manage or turn off notifications for that specific app or site — tap the gear icon or Turn off notifications.
- To review everything at once, go to Settings → Notifications → App notifications and toggle off any app you don’t recognize or don’t need alerts from.
- For website notifications specifically, open Chrome → three-dot menu → Settings → Site settings → Notifications. Scroll through the Allowed list and remove or block every site you don’t trust. If the list is full of junk, toggle notifications off entirely.
If you can’t tell which app a notification came from, enable Settings → Notifications → Notification history. Once turned on, it keeps a log of recent alerts — including ones you accidentally swiped away — labeled with the app that sent each one. That makes it easy to trace a spam notification back to its source and revoke that app’s access.
On Android 13 and newer, apps must explicitly ask for notification permission the first time they run. Get in the habit of tapping Don’t allow for anything that isn’t messaging, navigation, or another app where alerts are genuinely useful — denying permission upfront is easier than hunting down spam later.
Legitimate apps should keep notification access — messaging, banking, navigation. But a flashlight app, wallpaper app, or random game has no business sending you alerts. Revoking those permissions won’t break anything important; the apps will still work normally, just silently.
If spam notifications return after this, an app is generating them locally rather than through Chrome — jump to Method 6 to hunt it down.
Method 5: Turn Off Lock Screen and System Ads on Xiaomi, Samsung, and Other Phones
Some manufacturers monetize cheaper hardware by embedding advertising directly into the operating system. This is most aggressive on Xiaomi, Redmi, and Poco phones running MIUI or HyperOS, though several budget brands do the same through lock-screen content services.
On Xiaomi, Redmi, and Poco devices:
- Open Settings → Passwords & security → Authorization & revocation.
- Find msa (MIUI System Ads) in the list and toggle it off. Tap Revoke if prompted.
- Individual system apps also carry their own ad toggles. Open the Security app, tap the gear icon, and disable Recommendations. Repeat inside Cleaner, Downloads, Themes, Mi Browser, and GetApps.
While you’re in Xiaomi’s privacy menus, look under Passwords & security → Privacy → Ad services (or a similarly named path) for a Personalized ad recommendations toggle and switch that off too. Menu names shift between MIUI and HyperOS versions, so the fastest approach is opening Settings and searching for terms like “ads,” “msa,” “recommendations,” or “personalized.”
On Samsung phones: go to Settings → Privacy → Customization Service and turn off personalized ads and marketing. Also check notification settings for Samsung’s own apps (like Galaxy Store and Samsung Push), which occasionally send promotional alerts you can disable without affecting functionality.
On budget phones with lock-screen ads: services like Glance deliver sponsored content directly to the lock screen. Look for a lock-screen content option in your wallpaper or lock screen settings, or find the service in your app list and disable it there.
If none of these menus exist on your device, your manufacturer likely doesn’t inject system ads — and your problem is probably a rogue app instead.
Method 6: Identify and Uninstall Apps That Show Excessive Ads
Full-screen ads appearing over your home screen, the moment you unlock your phone, or while using unrelated apps are the classic signature of an abusive app — usually something free you installed recently. These apps abuse a legitimate permission called “display over other apps.”
To find the culprit:
- Go to Settings → Apps → Special app access → Display over other apps (on Samsung: Settings → Apps → three-dot menu → Special access → Appear on top). Review the list and revoke the permission for anything that doesn’t need it — a game or photo editor has no reason to draw over your screen.
- Open the Play Store → your profile icon → Manage apps & device → Manage, then sort by recently updated. Ad-heavy behavior typically starts right after a new install or update — a formerly clean app can change after an acquisition or a monetization update.
- Run Play Protect (Play Store → profile icon → Play Protect → Scan) to catch anything Google’s scanner flags.
Resource usage can narrow down suspects too. Check Settings → Battery → Battery usage and your mobile data usage list for apps consuming resources heavily in the background even though you barely open them. Ad-serving apps constantly fetch new ad content, so they tend to stand out on both lists.
For stubborn cases, boot into Safe Mode: hold the power button, then touch and hold the on-screen Power off option until the Safe Mode prompt appears. Safe Mode disables all third-party apps — if the ads stop completely, an installed app is definitely responsible. Reboot normally, then uninstall recently added apps one at a time until the ads stop.
If the offending app came preinstalled and Android won’t let you remove it, check our guide on uninstalling versus disabling apps — disabling works for most bloatware. And since ad-heavy apps constantly fetch content in the background, removing them often improves battery life too; if drain persists, see why your phone battery drains so fast.
Method 7: Install an Ad-Blocking Browser or Trusted Ad-Blocker App
For the most thorough blocking available without rooting your phone, switch browsers or install a dedicated filtering app.
Firefox for Android is the standout option because it supports real extensions — including uBlock Origin, the gold standard of ad blockers. Install Firefox, tap the three-dot menu, choose Extensions, and add uBlock Origin. From that point, web ads — including ads on youtube.com viewed through the browser — are filtered properly.
Brave is a simpler alternative with aggressive ad and tracker blocking enabled out of the box, no configuration needed.
Dedicated apps like AdGuard for Android and Blokada filter ads system-wide by creating a local VPN on your device. Because Google Play’s policies restrict ad blockers, these apps aren’t distributed through the Play Store — you’ll need to download them from their official websites instead. If you’ve never installed an app outside the Play Store before, follow our guide on how to sideload apps on Android safely to do it without risking malware.
Two practical notes on VPN-based blockers. First, Android only allows one VPN connection at a time, so a filtering app can’t run alongside a regular VPN — if you rely on a VPN for work or privacy, stick with Private DNS and a blocking browser instead. Second, a local VPN processes traffic on your device rather than sending it anywhere, but you’re still trusting the developer with visibility into your browsing — verify their privacy policy before installing.
One word of caution: the Play Store is full of obscure “ad blocker” apps with few reviews and suspicious permission requests. Stick to well-known names like Firefox, Brave, AdGuard, or Blokada, and be suspicious of any blocker demanding access to your contacts, SMS, or accessibility services.
Which Ads These Methods Still Won’t Block
It’s worth being realistic about the limits, because no combination of free settings removes every ad on Android. Apps that serve ads from the same domain as their content — the YouTube app, Facebook, Instagram, TikTok — are largely immune to DNS and VPN filtering, since blocking the ad servers would break the apps themselves. Streaming services like Spotify’s free tier embed ads into the audio stream the same way.
Your realistic options for these holdouts are:
- Use the web version through a blocking browser. Watching YouTube in Firefox with uBlock Origin filters most ads that the app itself won’t let you skip.
- Pay for the ad-free tier. YouTube Premium, Spotify Premium, and one-time “remove ads” purchases inside apps are the only guaranteed way to eliminate ads from services that control both content and advertising. For a game or utility you use daily, a small one-time upgrade is often the best value fix on this entire list.
- Choose less ad-heavy alternatives. If a free app is mostly an ad delivery vehicle, a paid or open-source alternative frequently costs little and removes the problem permanently.
Occasionally, blocking ads also causes minor side effects elsewhere — an app may fail to load a rewarded video ad you actually wanted, or a site may refuse to show content while a blocker is active. When that happens, temporarily disabling Private DNS or the browser extension for that specific app or site is usually enough.
Frequently Asked Questions
I opted out of personalized ads — why am I still seeing ads?
Opting out only stops advertisers from targeting you based on your profile; it doesn’t reduce the total number of ads apps and sites display. To actually cut the volume, combine it with Private DNS filtering (Method 3), Chrome’s blocking settings (Method 2), or an ad-blocking browser (Method 7).
Will these methods block YouTube ads?
Partially. Private DNS can’t block YouTube app ads because Google serves them from the same domains as the videos themselves. However, watching YouTube through Firefox with uBlock Origin — or through Brave — does block most video ads. The official ad-free route is a YouTube Premium subscription.
Do I need to root my phone to block ads?
No. Everything in this guide works on a completely unmodified phone. Rooting enables deeper system-level modification — editing the hosts file, for example — but it also voids warranties, breaks banking and payment apps, and introduces security risks. The combination of Private DNS, a blocking browser, and revoked permissions covers the vast majority of ads without any of that.
Can ad blocking break apps or slow down my phone?
Rarely, and usually only in specific cases. An app may show an error when a rewarded ad can’t load, and occasionally a website refuses to display content while a blocker is detected — temporarily disabling the filter fixes both. Performance-wise, Private DNS adds essentially no overhead, while VPN-based blockers use a modest amount of battery since they run constantly in the background.
Are ad-blocking apps safe to use?
Reputable ones, yes — Firefox, Brave, AdGuard, and Blokada have long track records and transparent privacy practices. The risk comes from unknown free blockers, which sometimes harvest data themselves. Only sideload from official websites, review permissions carefully, and avoid any app that promises the impossible or asks for unrelated access.
Final Thoughts
Figuring out how to turn off ads on Android phone settings isn’t about finding one magic switch — it’s about layering a few targeted fixes. Start with the two-minute wins: opt out of ad personalization in your Google settings and confirm Chrome’s pop-up blocking. Then enable Private DNS with an ad-filtering hostname for system-wide coverage, revoke notification permissions from spammy sites and apps, and remove any app abusing overlay permissions.
Most people find that these steps alone eliminate the overwhelming majority of ads. If you browse heavily, adding Firefox with uBlock Origin finishes the job, and for the handful of apps where ads are baked into the service itself, a paid upgrade is the one guaranteed fix. The result is a cleaner, faster phone — and far fewer interruptions standing between you and what you actually want to do.