How to Set Up VLANs on a Home Network for Better Security
Your smart TV, robot vacuum, and bargain Wi-Fi camera probably share the same network as your work laptop and personal phone — and that convenience carries real risk. Learning how to set up VLANs on a home network for better security fixes this by splitting one physical network into isolated segments, so a compromised smart gadget can’t reach your computers or files. This guide walks through the whole process: checking your hardware, planning segments, configuring DHCP, tagging switch ports, writing firewall rules, and keeping casting and device discovery working afterward.
Key Takeaways
- VLANs create isolated network segments so a breached smart device can’t reach your computers
- You need a VLAN-capable router, a managed switch, and VLAN-aware access points before starting
- Plan VLAN IDs, subnets, and which devices live on each segment before touching any settings
- Firewall rules are what actually enforce the isolation between your VLANs
- An mDNS reflector keeps AirPlay, Chromecast, and smart home discovery working across segments
What a VLAN Is and How Network Segmentation Improves Home Security
A VLAN (Virtual Local Area Network) lets one physical network behave like several separate networks. It works through 802.1Q VLAN tagging, which adds a small identifier — a VLAN ID between 1 and 4094 — to Ethernet frames so switches and routers know which segment each packet belongs to.
On a typical flat home network, every device can see and talk to every other device. That’s convenient, but it means a single weak link — an unpatched smart camera, a cheap light bulb with outdated firmware, or a visitor’s malware-infected laptop — can probe and attack everything else, including your NAS, your computers, and your router’s admin interface.
Network segmentation changes that. Devices on different VLANs cannot communicate directly; traffic between them must pass through your router or firewall, where your rules decide what’s allowed. A compromised IoT device on an isolated segment can still reach the internet (which it needs for cloud services), but it can’t scan your trusted devices or move laterally through your home network.
Segmentation is one layer of defense, not a complete solution. It works best alongside the fundamentals — strong Wi-Fi passwords, WPA2 or WPA3 encryption, and updated firmware — covered in our guide on how to secure your home Wi-Fi network.
Checking Whether Your Router, Switches, and Access Points Support VLANs
Before planning anything, confirm all three pieces of hardware can handle 802.1Q tagging:
- Router or firewall: It must support creating VLAN interfaces and routing/firewalling between them. Gear like UniFi gateways, Firewalla, MikroTik routers, TP-Link Omada gateways, Netgate appliances running pfSense, and any box running OPNsense or OpenWrt qualifies. Many ISP-provided routers and basic consumer models only offer a simple guest network — check your router’s admin interface or spec sheet for “VLAN” or “802.1Q” support. Some ASUS models now include VLAN functionality through their Guest Network Pro feature.
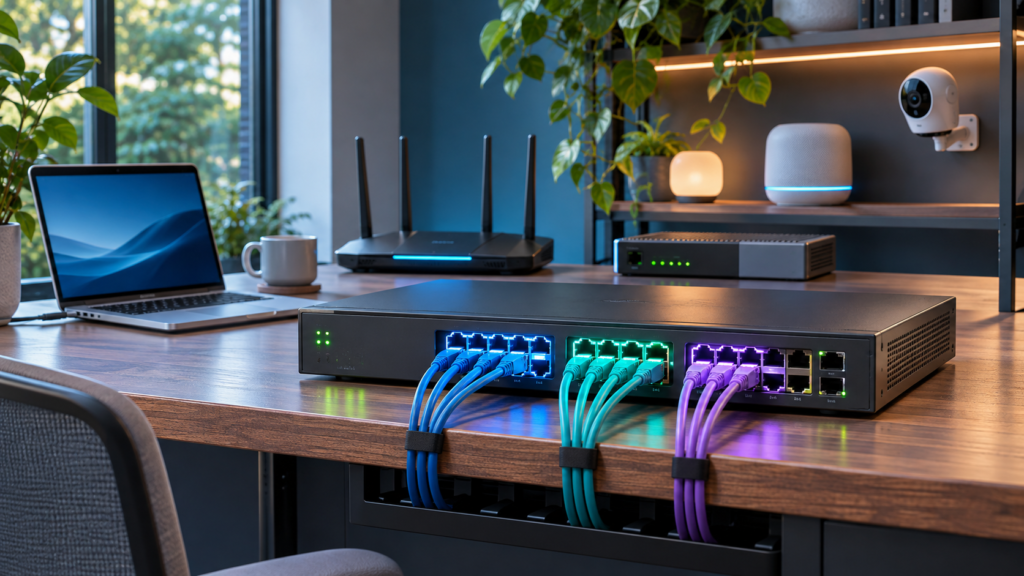
- Switch: You need a managed (or “smart managed”) switch that supports 802.1Q, such as TP-Link’s Easy Smart/JetStream lines or Netgear’s Plus series. An unmanaged switch can’t assign ports to VLANs. Tag-carrying frames often pass through unmanaged switches by accident, but the behavior isn’t guaranteed — some drop or mangle them — so don’t place one between VLAN-aware devices.
- Access points: Each AP must be “VLAN-aware,” meaning it can map different SSIDs to different VLAN IDs. UniFi APs, Omada EAP units, Aruba Instant On, and similar business-grade gear do this. Many consumer mesh kits cannot map SSIDs to VLANs — if you’re running mesh, check our guide on setting up a mesh Wi-Fi network and verify whether your system supports it before continuing.
If your router lacks VLAN support entirely, you still have partial options: a built-in guest network provides basic isolation, and third-party firmware like OpenWrt can unlock VLAN features on compatible hardware. But the cleanest path is gear designed for it.
Planning Your VLAN Layout
Write your plan down before configuring anything. Decide which device categories get their own segment, assign each a VLAN ID, and give each a separate IP subnet. A common convention is matching the third octet of the subnet to the VLAN ID for easy recognition.
| VLAN ID | Segment | Subnet | What Lives Here |
|---|---|---|---|
| 10 | Trusted | 192.168.10.0/24 | Your computers, phones, NAS |
| 20 | IoT | 192.168.20.0/24 | Smart TVs, cameras, plugs, speakers |
| 30 | Guest | 192.168.30.0/24 | Visitors’ phones and laptops |
| 40 | Work | 192.168.40.0/24 | Work laptop, VoIP phone |
| 99 | Management | 192.168.99.0/24 | Switch and AP management interfaces |
A few planning tips worth following:
- Start simple. Two or three segments (trusted, IoT, guest) deliver most of the security benefit. You can always add a work or management VLAN later.
- Avoid VLAN 1 for your segments. It’s the default on most switches and a common attack target; leaving it for background switch traffic is a widely followed best practice.
- Decide your trust policy now. Should the trusted segment reach IoT? Should IoT devices reach each other? Should guests reach anything besides the internet? These answers shape your firewall rules later.
- Inventory your devices. List which devices are wired and which are wireless, and which SSID each wireless one should join. Smart home gadgets that connect directly to Wi-Fi without a hub — covered in our guide to connecting smart home devices without a hub — typically belong on the IoT SSID.
Creating VLANs on Your Router or Firewall and Configuring DHCP
The router or firewall is where each VLAN becomes a real network with its own IP subnet. Exact menu names differ by platform, but the workflow is the same everywhere:
- Create a new network or VLAN interface, and assign your planned VLAN ID.
- Give the router an IP address in that segment — conventionally
192.168.20.1for the 192.168.20.0/24 subnet. This becomes the default gateway for devices on that VLAN. - Enable a DHCP scope for each subnet so devices get addresses automatically. A range like
.100to.250leaves room at the bottom for static assignments such as a NAS or printer. - Set DNS — either let the router hand out its own address as the resolver, or specify your preferred upstream DNS servers.
On UniFi, you create a network under Settings and enter the VLAN ID; the gateway and DHCP options appear in the same form. On pfSense or OPNsense, you first create the VLAN under Interfaces, assign it, then configure the IP and DHCP on the resulting interface. Omada and other controller-based systems follow the same pattern. Don’t worry if the screens look different — every platform is doing these same four steps.
Setting Up Tagged and Untagged Switch Ports and Mapping VLANs to Wi-Fi SSIDs
This is where most beginners get confused, so take it slowly. Two port types do all the work:
- Trunk (tagged) ports carry traffic for multiple VLANs at once, with the tag intact. Use tagged ports for links between infrastructure devices: router-to-switch, switch-to-switch, and switch-to-access-point.
- Access (untagged) ports serve a single device. Frames arrive with no tag, and the port’s PVID (Port VLAN ID) tells the switch which VLAN they belong to. A smart TV plugged into a port set to untagged/PVID 20 lands on your IoT VLAN without knowing anything about VLANs.
A practical port plan looks like this:
- The port linking to your router: tagged member of every VLAN you created.
- Ports linking to each access point: tagged for every VLAN the AP’s SSIDs use, plus untagged/PVID 99 (or your chosen management VLAN) so the AP itself gets a management address.
- Ports for wired IoT devices like TVs and game consoles: untagged/PVID 20.
- Ports for your trusted computers: untagged/PVID 10.
Then map Wi-Fi. On a VLAN-aware AP, create one SSID per segment — for example, “Home” on VLAN 10, “Home-IoT” on VLAN 20, and “Guest” on VLAN 30 — and enter the matching VLAN ID in each SSID’s settings. Give each a unique WPA2 or WPA3 passphrase, and enable client isolation on the guest SSID so visitors can’t even see each other. IoT devices that only support 2.4 GHz can be pinned to an IoT SSID that broadcasts on that band only.
Writing Inter-VLAN Firewall Rules
Creating VLANs separates traffic logically, but by default many routers happily route between all segments — which defeats the purpose. Firewall rules are what enforce real isolation. Most routers apply rules top-down with first-match-wins logic, so order matters.
A sensible starting policy:
- Trusted (VLAN 10): Allow traffic to all other VLANs and the internet. Your phone needs to reach IoT devices to control them.
- IoT (VLAN 20): Block traffic destined for your other private subnets (trusted, work, management), then allow everything else — which is effectively internet-only. Because firewalls are stateful, return traffic from connections your trusted devices initiated is still permitted, while IoT devices can’t start conversations toward your computers.
- Guest (VLAN 30): Block all private/RFC1918 destinations, then allow everything else. Internet access, nothing internal.
- Work (VLAN 40): Same as guest for strict isolation, or allow it limited access — for instance, to a printer on the trusted VLAN.
- Management (VLAN 99): Only reachable from your admin machine; block everything else from reaching it.
Two common rule-writing mistakes to avoid: don’t place a broad “allow all” rule above your block rules, since it will match first and short-circuit the restrictions; and don’t forget that stateful return traffic is already handled — you don’t need allow rules in both directions for responses.
Keeping Casting, Printing, and Smart Home Discovery Working Across VLANs
Segment the network and you’ll quickly hit a side effect: AirPlay, Chromecast, and many printers and smart home gadgets “disappear.” They rely on multicast DNS — described in RFC 6762 — and similar multicast protocols that are deliberately confined to a single subnet.
The standard fix is an mDNS reflector or repeater running on your router. It listens for discovery announcements on one VLAN and rebroadcasts them on others you select. UniFi exposes this as a simple Multicast DNS toggle; OPNsense offers an mdns-repeater plugin; Avahi’s reflector mode does the job on Linux-based systems; Firewalla includes a comparable feature.
Practical guidance:
- Limit the reflector to the VLANs that actually need discovery — typically trusted and IoT. There’s rarely a reason to advertise your devices to the guest network.
- Some discovery needs more than mDNS. Chromecast streaming, for example, also uses specific TCP ports, so you may need firewall rules permitting trusted-to-IoT traffic in addition to the reflector.
- If you run a smart home controller like Home Assistant, placing it on the IoT VLAN — or giving it interfaces on multiple VLANs — solves most discovery problems more cleanly than a reflector. Segmentation pairs well with the broader habits in our smart home security tips.
Testing Your Setup, Troubleshooting, and Avoiding Common Mistakes
Verify each segment before declaring victory:
- Join each SSID and confirm the device receives an IP in the expected subnet (a device on the IoT SSID should show a 192.168.20.x address).
- Ping the gateway, then load a website to confirm internet access works on every VLAN.
- Test the blocks: from the IoT segment, try to reach a computer on the trusted segment — it should fail. From trusted, confirm you can still reach IoT devices.
- Test casting, printing, and smart home control from your phone.
If something breaks, these are the usual culprits:
- No IP address on a new SSID: The VLAN almost certainly isn’t tagged through to the AP. Check that the trunk ports between router, switch, and AP include that VLAN.
- A wired device lands in the wrong subnet: The port’s PVID is set incorrectly, or the port is tagged when it should be untagged.
- Devices can reach things they shouldn’t: Rule order — a permissive rule is matching before your block rules.
- Discovery stopped working: The mDNS reflector isn’t enabled or doesn’t cover the right VLANs.
Finally, protect yourself while working: back up your router and switch configs first, keep at least one wired port on your trusted or management VLAN so a bad change can’t lock you out completely, and change one thing at a time. Resist the urge to create ten VLANs on day one — two or three well-planned segments outperform a sprawling setup you can’t troubleshoot.
Frequently Asked Questions
Is a guest network the same thing as a VLAN?
Not quite. The guest network on a basic consumer router is usually a single isolated SSID — useful, but it can’t extend to wired ports and doesn’t give you multiple named segments with their own rules. A proper 802.1Q VLAN setup lets you create several segments that work across both Wi-Fi and Ethernet with custom firewall policies.
Will VLANs slow down my internet or local network?
No. VLAN tags add a few bytes per frame — a negligible overhead — and modern routers and managed switches handle inter-VLAN routing and firewall rules at or near full speed. If anything, isolating chatty IoT broadcast traffic can slightly reduce noise on your main segment.
Do I need to buy all new equipment to use VLANs at home?
Possibly some of it, but maybe not all. Check whether your router supports VLANs or can run third-party firmware like OpenWrt, whether your switch is managed, and whether your APs map SSIDs to VLANs. A common affordable path is adding a low-cost managed switch and a VLAN-aware access point while keeping a capable router you already own.
Conclusion
Setting up VLANs on a home network for better security comes down to four moves: confirm your router, switch, and access points support 802.1Q; plan a small set of named segments with matching VLAN IDs and subnets; connect everything with correctly tagged trunk ports and SSID mappings; and enforce isolation with firewall rules. Add an mDNS reflector so casting and discovery keep working, test every segment, and you’ll have a network where one vulnerable gadget can no longer put everything else at risk.