Windows Tips for Productivity: Work Faster Every Day
If you spend most of your day on a computer, the right Windows tips for productivity can quietly save you an hour or more every week. Windows 11 is packed with features designed to cut repetitive clicking, reduce distractions, and keep your workspace organized — but most people only ever use a fraction of them. This guide walks through the built-in tools and habits that make the biggest real-world difference, from keyboard shortcuts and Snap layouts to Focus sessions, File Explorer tricks, and Microsoft’s free PowerToys toolkit. You don’t need third-party software or advanced skills for most of these; you just need to know where the features live and how to combine them.
Key Takeaways
- Learn a small set of core Windows 11 shortcuts to eliminate repetitive clicking
- Use Snap layouts and Snap groups to arrange windows in seconds
- Separate projects and contexts with virtual desktops and Task View
- Silence interruptions with Focus sessions and Do Not Disturb rules
- Extend Windows with free Microsoft PowerToys utilities
Master Essential Windows Keyboard Shortcuts
Keyboard shortcuts are the single fastest productivity upgrade available in Windows. Each one saves only a second or two, but across hundreds of daily actions those seconds compound into real time. The mistake most beginners make is trying to memorize dozens at once. Instead, pick three to five shortcuts that match what you actually do all day, stick a note on your monitor, and add more once those become automatic.
Start with the essentials below — these work in Windows 11 and cover navigation, launching, and text input:
| Shortcut | What It Does |
|---|---|
| Win + D | Show or hide the desktop instantly |
| Win + E | Open File Explorer |
| Win + I | Open Settings |
| Win + L | Lock your PC immediately |
| Alt + Tab | Switch between open apps (hold Alt, tap Tab) |
| Win + Tab | Open Task View with desktops and timeline |
| Ctrl + Shift + Esc | Open Task Manager directly |
| Win + V | Open clipboard history (enable it on first use) |
| Win + . (period) | Open the emoji and symbol picker |
| Win + Shift + S | Capture a screen region with Snipping Tool |
| Win + number | Open the app pinned at that taskbar position |
| Win + X | Open the power-user menu for quick system tools |
Clipboard history (Win + V) deserves special attention because it changes how copy-paste works: instead of holding one item, Windows keeps a history of your recent clips so you can paste earlier text and images without recopying them. Pin frequently reused items — like a standard email reply or a tracking-link template — so they survive reboots.
The Win + number combination rewards a small setup step: pin your five most-used apps to the taskbar in order, and each opens with a single keystroke. If you haven’t arranged your taskbar yet, our guide on customizing the Windows 11 taskbar covers the options. For everything Win + Shift + S can do — including delayed captures and window screenshots — see how to take screenshots on Windows 11. Microsoft also maintains a complete official list of keyboard shortcuts worth bookmarking.
Arrange Apps Faster with Snap Layouts and Snap Groups
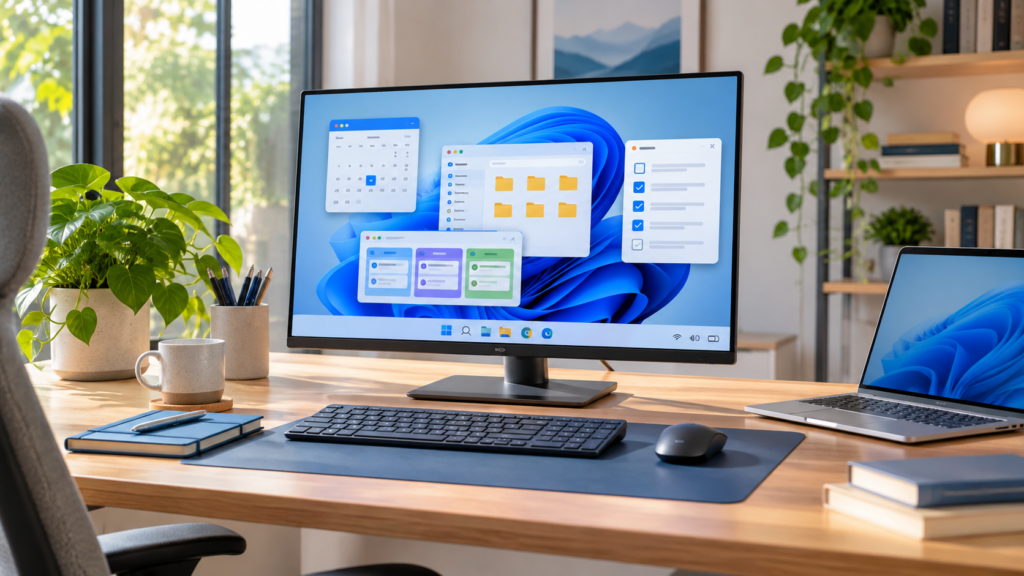
Multitasking falls apart when you spend half your time dragging windows into place. Snap layouts solve that: hover your mouse over a window’s maximize button (or press Win + Z) and Windows shows a grid of layouts — halves, thirds, quadrants, and more. Click a zone and the window snaps into it; Windows then suggests other open apps to fill the remaining zones.
You can also snap the classic way: drag a window to the left or right edge to fill half the screen, or to a corner for a quarter. Dragging a window to the top edge reveals the layout bar on supported configurations. On large or ultrawide monitors, the three- and four-zone layouts are where Snap really earns its keep — a document on the left, a browser upper right, and a chat app lower right is a common productive arrangement.
Once you’ve snapped two or more apps, they form a Snap group. Hover over any of those apps’ taskbar icons and you can minimize or restore the entire arrangement together — perfect when a call or task interrupts your layout. This is one of the most underused Windows productivity features because it’s invisible until you look for it.
If layouts don’t appear when you hover, check Settings > System > Multitasking and make sure “Show snap layouts when I hover over a window’s maximize button” is on. The same page lets you toggle snapping when dragging to the top of the screen and whether snapped apps show suggestions. Note that smaller screens show fewer layout options than large ones — that’s by design, not a bug.
Separate Workspaces Using Virtual Desktops and Task View
Virtual desktops let you keep entirely separate sets of windows for different contexts — one desktop for your current project, another for email and chat, a third for personal browsing. Press Win + Tab (or click the Task View icon on the taskbar) to see all your desktops and open windows at once. If the icon is missing, enable it under Settings > Personalization > Taskbar.
The core controls are simple:
- Win + Ctrl + D — create a new virtual desktop
- Win + Ctrl + Left/Right — switch between desktops
- Win + Ctrl + F4 — close the current desktop (its windows move to the previous one)
In Task View, drag a window’s thumbnail onto another desktop to move it, or right-click the thumbnail and use “Move to.” Right-click a desktop itself to rename it — labels like “Project A,” “Comms,” and “Personal” make Win + Ctrl + arrow navigation feel intentional rather than disorienting. You can even set a different wallpaper per desktop by opening that desktop and changing the background in Settings, which gives you an instant visual cue about where you are.
One setting trips people up: by default, the taskbar and Alt + Tab show windows from all desktops, which partly defeats the purpose. In Settings > System > Multitasking, you can limit both to “Only the desktop I’m using” so each workspace truly stays separate.
Reduce Distractions with Focus Sessions and Do Not Disturb
Organization only helps if you get uninterrupted time to use it. Windows has two overlapping tools for this: Do Not Disturb, which controls notifications, and Focus sessions, which structure blocks of concentrated work.
Do Not Disturb stops notification banners from popping up while still collecting them quietly in the notification center (Win + N). Toggle it from Quick Settings (Win + A) or configure it in Settings > System > Notifications. The automatic rules are the useful part — you can have Do Not Disturb turn itself on:
- During scheduled hours, such as your deep-work mornings
- When you’re duplicating your display (presentations)
- When playing a game or using an app in full-screen mode
The common beginner mistake is silencing everything and then missing a genuinely urgent call. Avoid that with the priority list: under Notifications settings, mark specific apps and allow calls or reminders through even while Do Not Disturb is active. If you also get nagged by promotional pop-ups, our guide on disabling Windows tips and suggestions removes a whole category of noise at the source.
Focus sessions, found in the Clock app, go further by timing your work. Set a session length — Windows suggests breaks on longer blocks — and optionally pull a task in from Microsoft To Do or start a focus playlist via Spotify integration. Starting a Focus session automatically enables Do Not Disturb for the duration. Treating “one Focus session, one task” as a rule is a simple way to turn the feature into an actual habit rather than a novelty.
Speed Up File Management in File Explorer
File management is where small inefficiencies hide — clicking through nested folders, renaming files one by one, hunting for a document you downloaded last Tuesday. A handful of File Explorer tips eliminate most of that friction.
Use tabs instead of extra windows. Press Ctrl + T inside Explorer to open a new tab, Ctrl + W to close it, and Ctrl + Tab to cycle — exactly like a browser. Dragging files between tabs is much easier than juggling separate windows.
Learn five Explorer-specific keys:
- Alt + Up — jump to the parent folder
- F2 — rename the selected file or folder
- Ctrl + Shift + N — create a new folder instantly
- Ctrl + Shift + C — copy the selected item’s full path (huge for documentation and support requests)
- Alt + P — toggle the preview pane so you can inspect files without opening them
Pin your working folders. Right-click any folder and choose “Pin to Quick access” so it sits at the top of Explorer’s sidebar. Combine this with a consistent folder structure and most files become two clicks away.
Rename in batches. Select multiple files, press F2, and type a name — Windows applies it to all of them with sequential numbering, ideal for photo sets or monthly exports. For heavier renaming jobs, the PowerRename tool covered below adds search-and-replace power.
Search smarter. Explorer’s search box accepts filters like kind:document, datemodified:this week, and size:large, which beats scrolling through folders manually. Current versions of Windows 11 also handle compressed archives natively — right-click a group of files and use “Compress to ZIP,” and you can extract formats like 7Z and RAR without installing extra tools. Finally, typing a path or shell command such as shell:startup directly into the address bar is a fast shortcut to system locations.
Extend Windows with Microsoft PowerToys Utilities
Microsoft PowerToys is a free, official collection of advanced utilities that plugs the gaps Windows leaves open. Install it from the Microsoft Store — it’s maintained by Microsoft and safe to use — then enable only the tools you need from its settings panel. The full feature list is documented in the official PowerToys documentation, but these are the standouts for productivity:
- FancyZones — build custom window layouts beyond what Snap offers. Draw your own zone grid (press Win + Shift + ` to open the editor), then hold Shift while dragging a window to drop it into a zone. Essential on ultrawide monitors.
- PowerToys Run — press Alt + Space for a fast launcher that finds apps, files, and settings, and even does quick calculations without opening anything.
- PowerRename — right-click selected files in Explorer for powerful bulk renaming with search-and-replace and live preview.
- Keyboard Manager — remap keys and shortcuts, such as turning Caps Lock into an extra Ctrl or disabling a key you hit accidentally.
- Text Extractor — press Win + Shift + T, drag over any text on screen (even in images or videos), and it copies it via OCR.
- Always on Top — pin a window above everything with Win + Ctrl + T, useful for keeping a calculator, reference doc, or timer visible.
Other utilities worth exploring include Awake (keeps the PC from sleeping during long jobs), Color Picker (Win + Shift + C), and Image Resizer, which adds right-click image resizing to Explorer. PowerToys runs per user and updates through the Store, so there’s little maintenance — just resist enabling every utility at once, since the launcher and zone tools deliver most of the value.
Automate Repetitive Tasks and Keep Windows Running Fast
The last layer of Windows productivity is removing manual work entirely and keeping the system responsive enough that nothing fights back.
Automate with built-in tools. Task Scheduler (search for it in Start) can launch apps or scripts on a trigger — at logon, at a set time, or on a schedule — which is how you handle things like opening your work apps every morning or running a weekly backup script. For click-level automation without code, Microsoft’s Power Automate for desktop is free for Windows 11 users and lets you record sequences of actions — filling forms, moving files, renaming downloads — into replayable flows. Even clipboard history (Win + V) with pinned clips acts as lightweight automation for text you type constantly.
Trim startup load. Every app that launches at sign-in steals seconds and memory. Review the list in Settings > Apps > Startup or Task Manager’s Startup apps tab and disable anything you don’t need running immediately — chat clients, updaters, and game launchers are the usual offenders. Our step-by-step guide on disabling startup apps in Windows 11 walks through it safely.
Let Storage Sense do the cleaning. In Settings > System > Storage, enable Storage Sense and Windows will automatically clear temporary files and empty the Recycle Bin on a schedule. It prevents the slow disk-creep that makes systems feel sluggish over time, without you running cleanup tools manually.
Keep the basics healthy. Restart your PC periodically rather than only sleeping it, keep Windows Update current, and uninstall apps you no longer use — each one is a potential startup entry, context-menu hook, or background process. If File Explorer or context menus feel slow specifically, a third-party shell extension is often the cause; uninstalling recent additions usually reveals it.
Frequently Asked Questions
Do these tips work on Windows 10?
Many do, but not all. Core keyboard shortcuts, virtual desktops (via Task View), and edge-drag snapping exist in Windows 10. Snap layouts with the hover-over-maximize grid, Snap groups, File Explorer tabs, and Focus sessions in the Clock app are Windows 11 features. Windows 10 uses Focus Assist instead of the newer Do Not Disturb system, though the idea is similar.
Is Microsoft PowerToys safe to install?
Yes. PowerToys is an official, open-source project published by Microsoft itself. Install it from the Microsoft Store or Microsoft’s GitHub page — avoid third-party download sites. Utilities run per user and can be toggled off individually, so there’s minimal risk in trying them.
Where should I start if all of this feels overwhelming?
Pick three changes, not thirty: learn three shortcuts you’ll use hourly (Win + D, Win + E, and Win + Shift + S are good candidates), set up one extra virtual desktop for a second context, and run one scheduled Focus session tomorrow. Once those feel automatic — usually within a week — come back for Snap groups or PowerToys Run. Productivity systems built gradually are the ones that actually stick.
Conclusion
None of these Windows productivity features requires new hardware or paid software — they’re already on your machine, waiting to be switched on. The real gains come from layering them: shortcuts speed up every action, Snap layouts and virtual desktops keep work organized, Focus sessions protect your attention, and automation handles what’s left over. Start small, build the habits one at a time, and your PC will start working at the pace you do.